Turning a 2001 Riese und Müller Birdy into a modern folding bicycle

This post was written in January 2020, a smaller update was added in November 2021, and a large update was added in March 2022, with further small changes in April 2022 and January 2023. The original January 2020 blog post remains more or less as written!
In the meantime if you're based in Berlin and reading this and need any assistance with a Birdy bike, contact Fahrradhof Steglitz. They've been able to help me with a bunch of really specialist questions and they're great!
January 2020 post
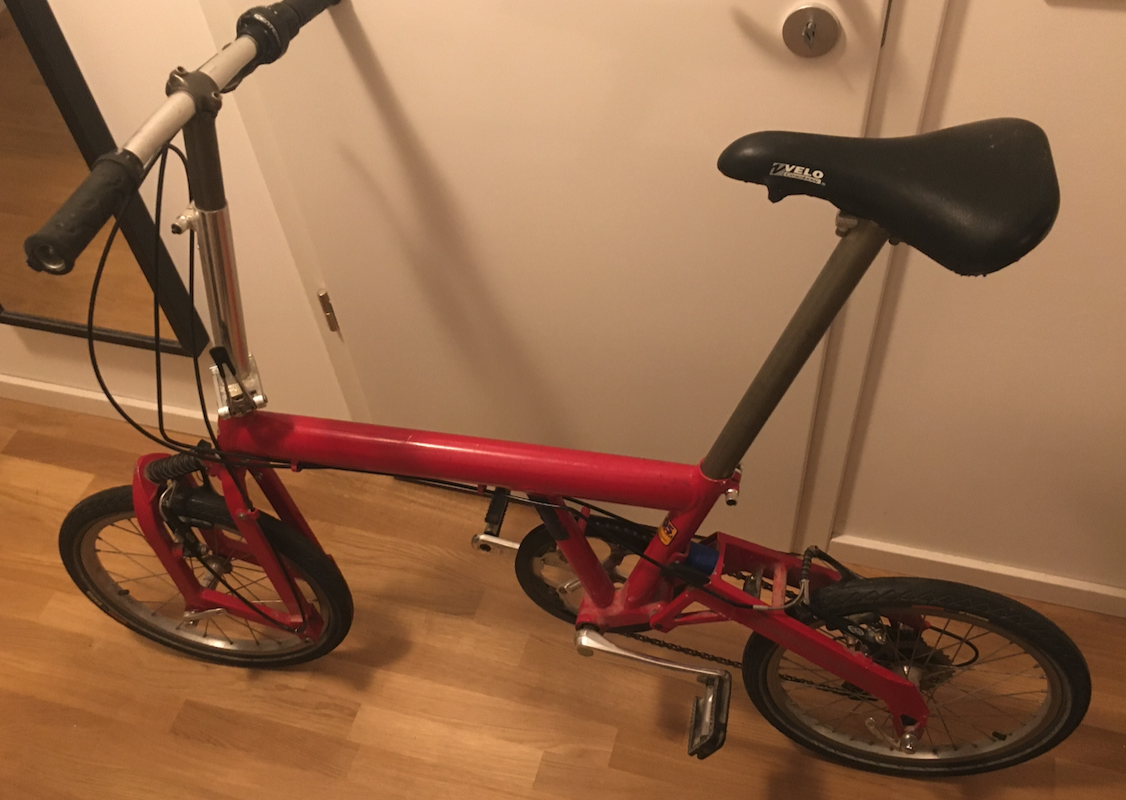
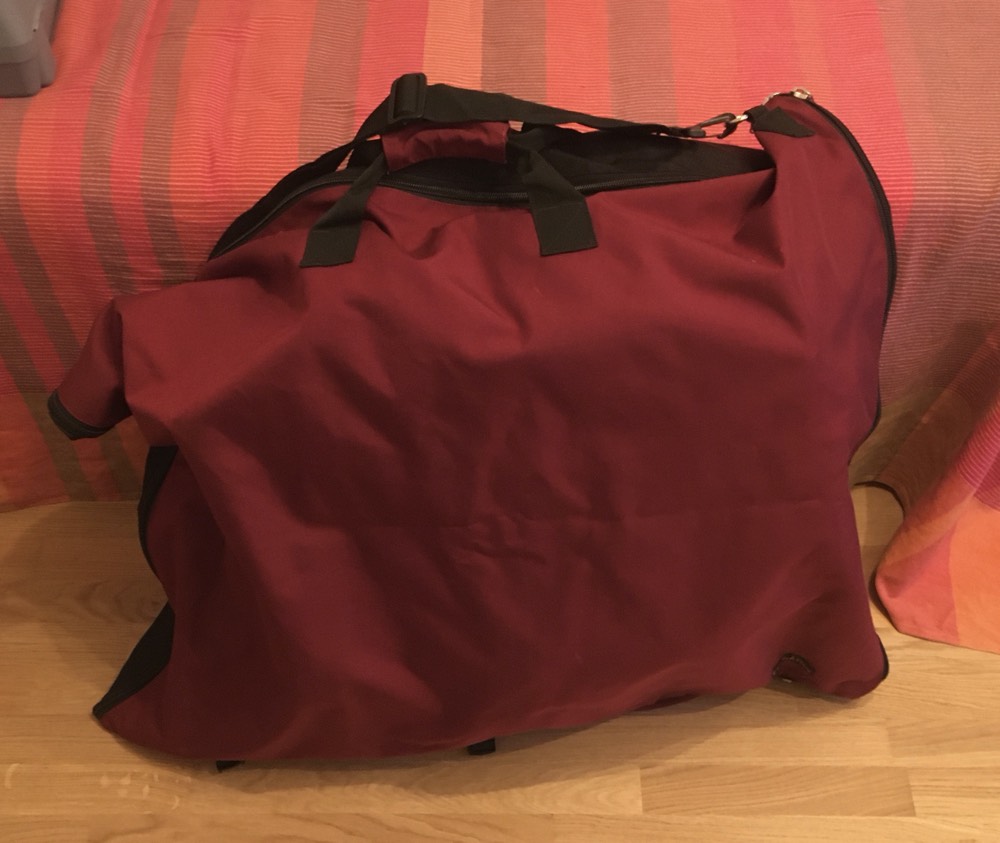
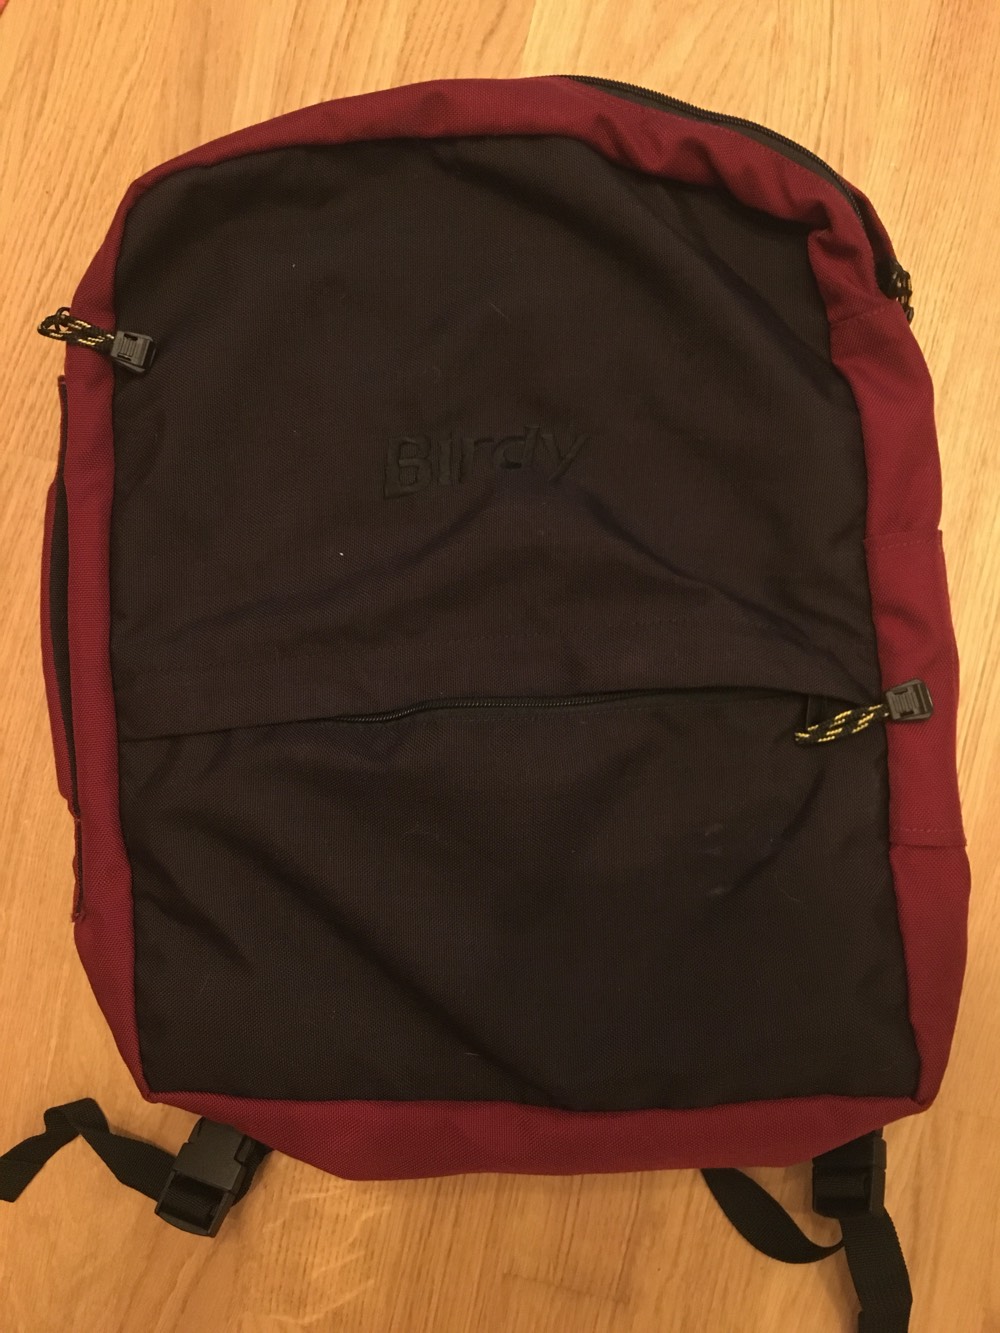
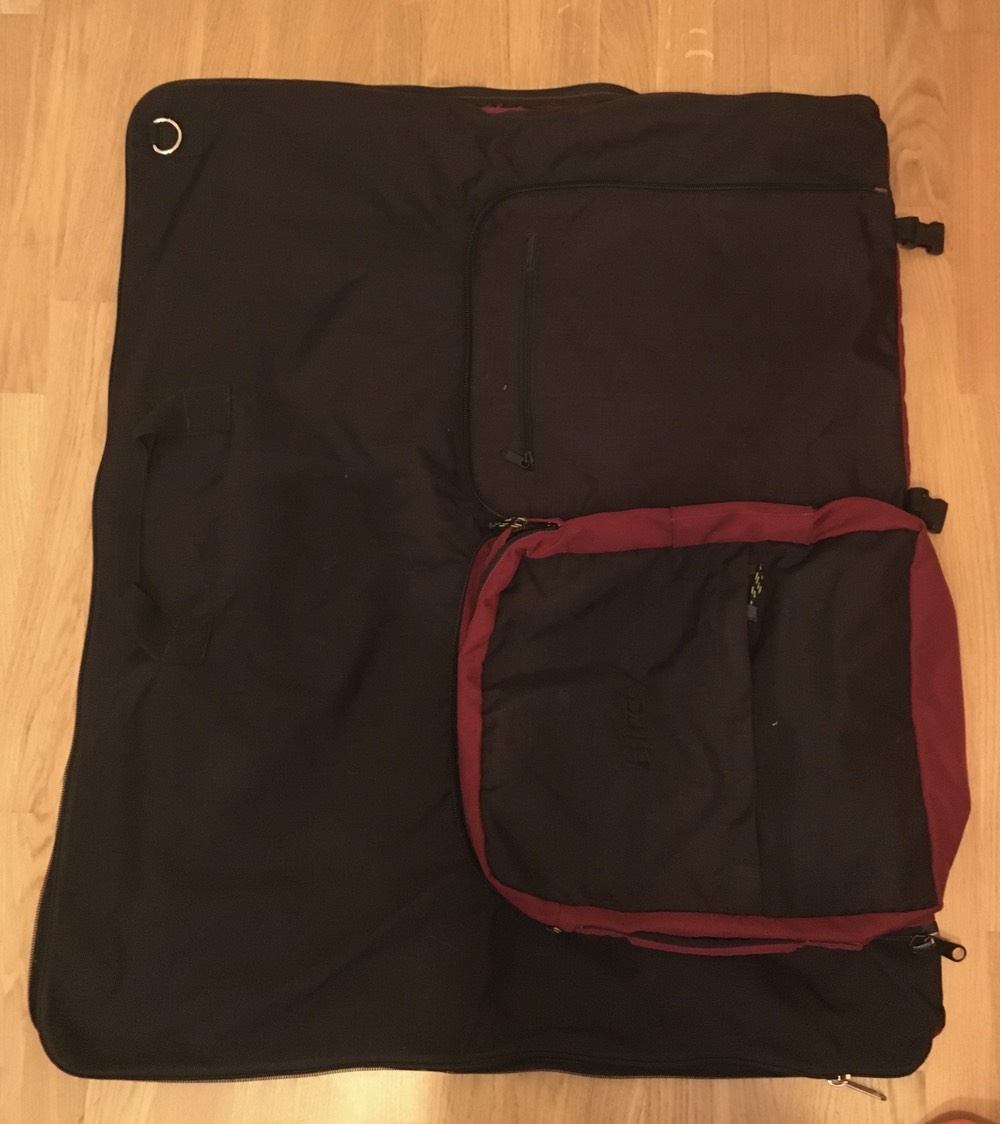
A few weeks back a friend and I were offered a Riese und Müller Birdy that dates from 2001. The hope was that we could make something of it and use it, as the thing had been sitting in a storage room unused for more than 5 years. The bike itself had cost 2199 Deutschmarks (1125 Euro) 18 years ago. It also had a carry bag with it. Having used a Decathlon folding bike before (reasonable, but not very pleasant to ride), and not having enough cash for a Brompton, this project was worth a try.
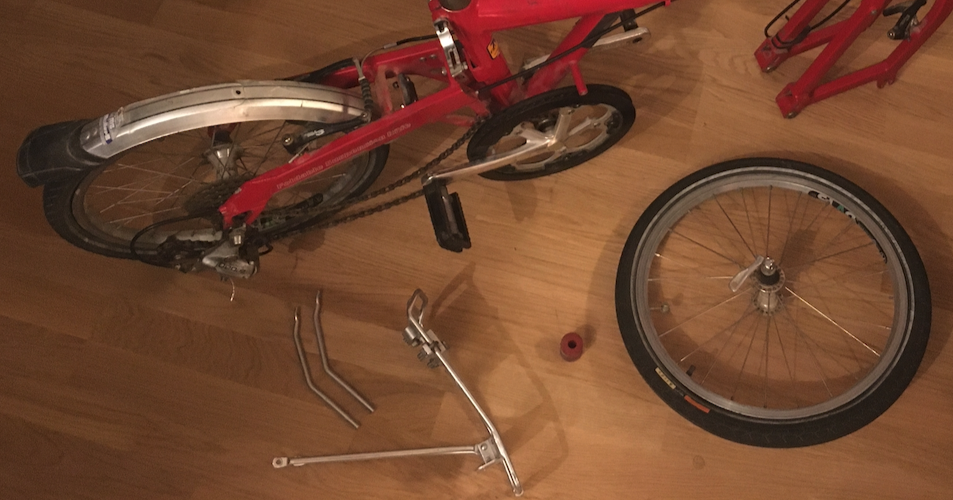
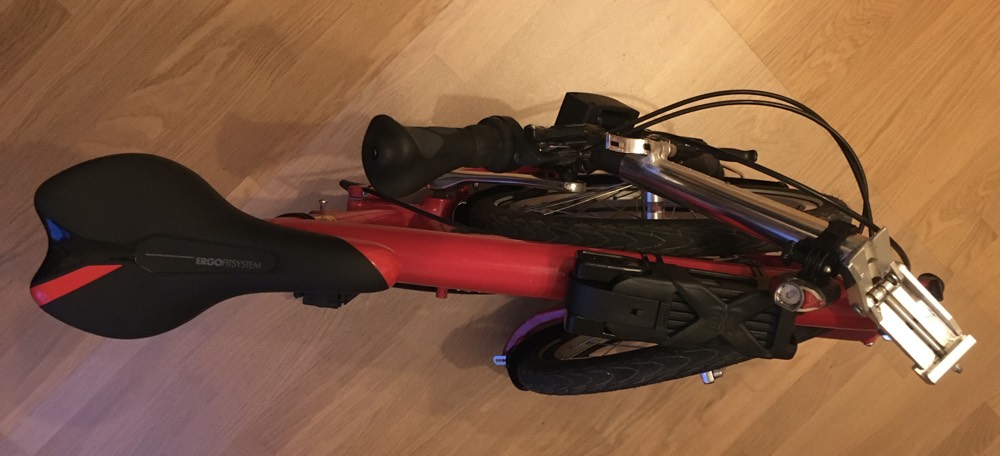
As it looked... and below with the broken mudguard, luggage rack (removed) and old elastomer.
First an assessment: what does a foldable bike for city use need?
Mudguards (this one had an unusable cracked plastic back one, nothing on the front) and some way to mount a bag on it (this one had a bent, very low luggage rack and nothing else). In addition the handlebar grips were all mushy, the pedals stiff and missing reflectors, and the saddle damaged on the edges. The rear elastomer that softens the ride fell apart in my hands. And a new chain is always a good idea. The tires looked OK, but the reviews of early Birdy tires were not good, so those and the inner tubes were replaced too. There were mounts for lights, but no lights. There was also no lock. Brakes and gears all looked OK, so for the moment those stayed.
So the purchases for the repair were as follows:
- Saddle - Decathlon Sport Komfort 500 Red - €9.99 (normally €18.99) (ordered with Decathlon online) - simple semi-sporty saddle
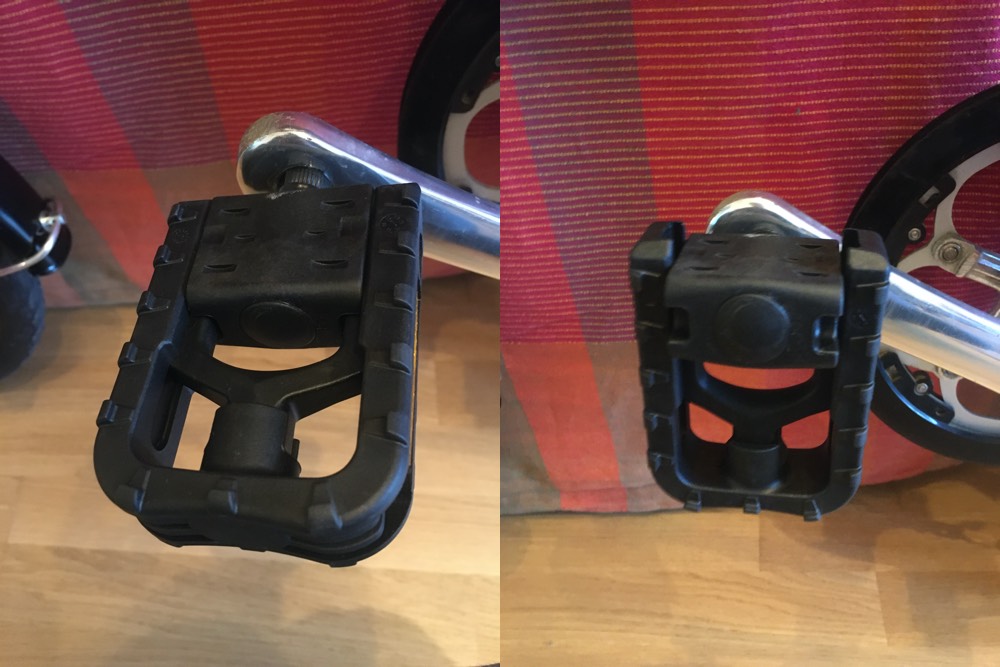
- Pedals - Decathlon Folding Pedals - €12.99 (ordered from Decathlon online) - Birdy normally does not have folding pedals, but these worked well on the Decathlon folding bike I used to use, so were chosen here to save a bit of space. They are heavy but reliable
- Tires x 2 - Schwalbe Marathon RACER 40-355 18 inch RaceGuard - €27.90 (ordered from eBay here) - puncture proof
- Inner tubes x 2 - Schwalbe Nr.5 18 Zoll Presta Valve - €15.00 (ordered from eBay here)
- Chain - KMC X8 Chain Silver Grey 8-Speed 114 Links - €9.95 (ordered from eBay here) - KMC recommended by a bike-mad friend of mine
- Front and Rear Reflectors - unbranded - €3.95 (ordered from eBay here)
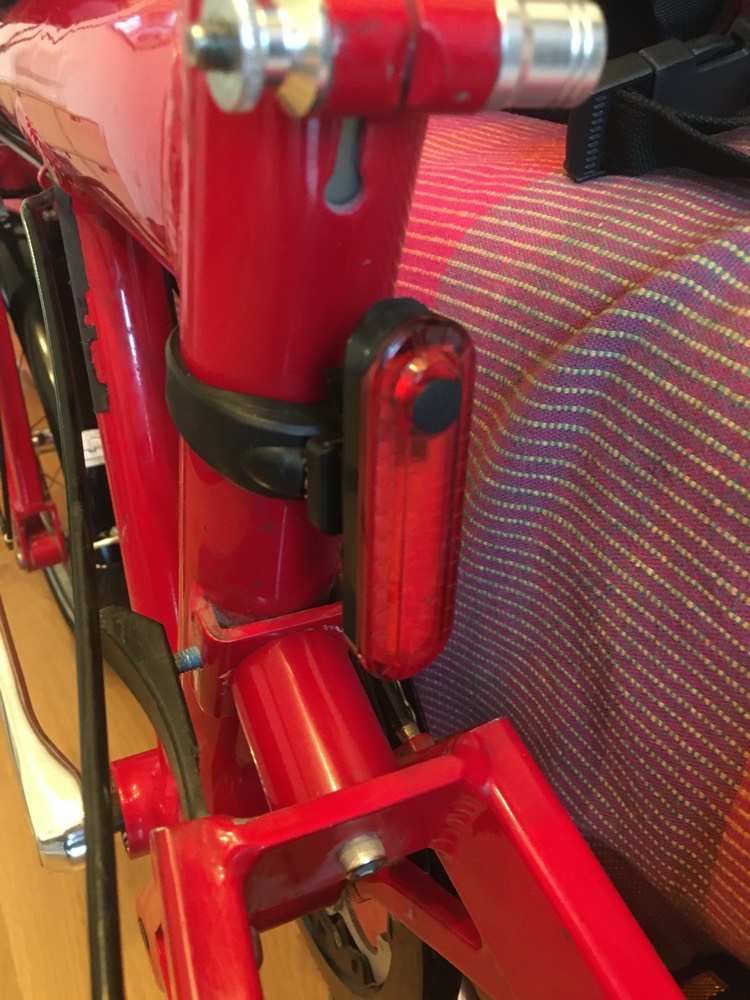
- Front and Rear Lights - unbranded, USB-rechargeable - €11.98 (ordered from eBay here)
- Grips - Velo Attune, asymmetric to fit the grip shift gears - €14.90 (ordered from eBay here) - I like ones that you can rest palms on, so these are perfect
- Rotating Bell - unbranded, goes around the handlebar so very durable but small - €6.00 (ordered from eBay here)
- Aluminium mud guard supports x 2 - unbranded - €13.80 (ordered from eBay here)
- Black metal mudguards - unbranded - €5.00 (one off from eBay Kleinanzeigen, similar on eBay for €19.90 here)
- Birdy Elastomer - Standard medium hardness red - €19.90 (online from dedicated bike shop Per Pedale here)
Two items - neither of crucial importance - have long shipping times and have not arrived yet
- Anti Theft Quick Release QR Skewers - unbranded - €9.75, shipping from Singapore (ordered from eBay here)
- Kickstand - unbranded - €4.29, shipping from China (ordered from eBay here)
Two purchases needed a lot more consideration
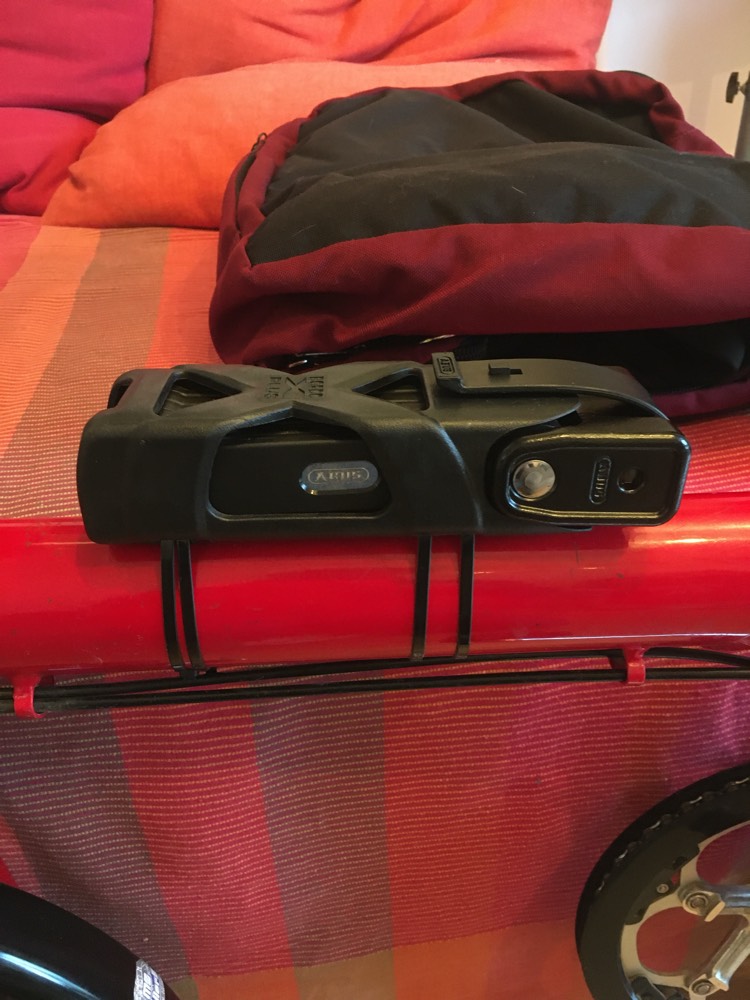
- Lock - Abus Bordo Granit X-Plus 6450/85cm - €74.99 (usually €95.99) (ordered with Decathlon online)
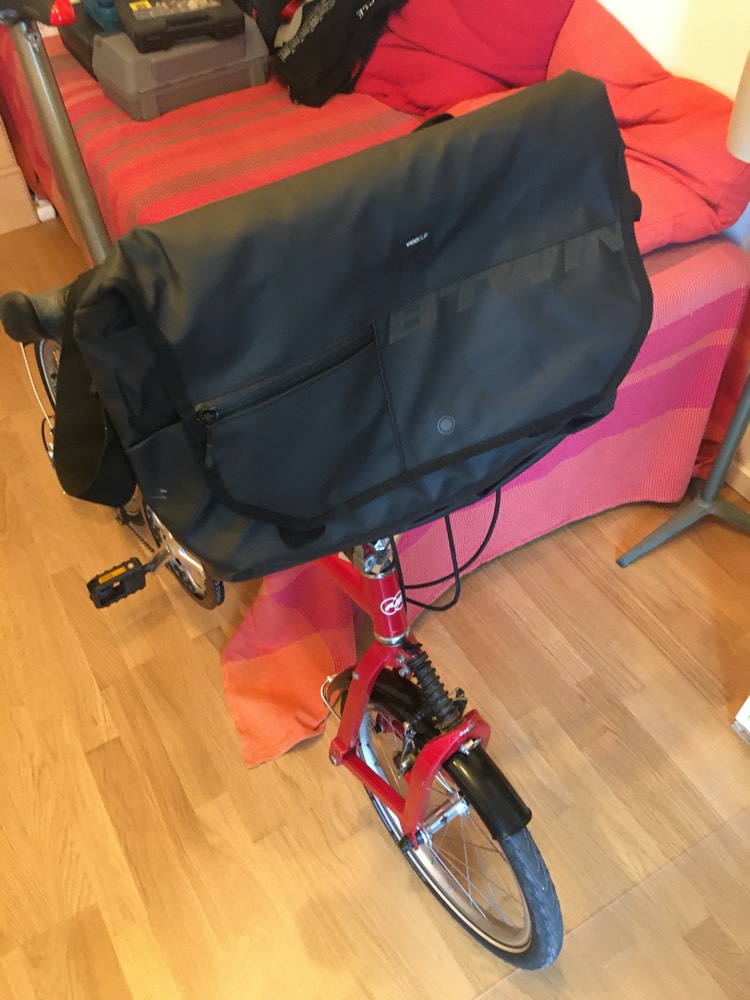
The issue here is where to mount a lock on a folding bike? A D-Lock is too large to mount, and chains I always find messy. So a foldable lock was the best bet. The Abus Bordo Granit was the best rated foldable lock in Stiftung Warentest's May 2019 study, although I went for the shorter and lighter 85cm version as opposed to the 110cm version. - Bag - Decathlon Businessbag 500 15 Litre Black - €39.99 (ordered with Decathlon online)
Most Brompton riders mount bags on the handlebars, but there was no way to put a Brompton mount on the Birdy. A regular rear luggage rack impedes the folding mechanism, so that was out too. So the best compromise was a Decathlon handlebar mounted laptop bag, that uses a standard Rixen & Kaul mounting system.
Shipping for the whole lot was just under 40 Euro, and I needed a few odds and ends from my local DIY store (see below) for about 10 Euro.
So that gives a total of 330 Euro.
UPDATE AFTER 2 MONTHS OF USE - MARCH 2020So the Anti Theft Quick Release QR Skewers and Kickstand arrived from China. Skewers are easy to fit and work well. Kickstand is a pain - because there is basically only one mounting bolt - the axel bolt. This means the kickstand turns a bit. It works, but you cannot put much weight on it.
The front and rear reflectors arrived from eBay but fitting these was a bit of a pain. The front one has to be mounted right at the bolt holding the front mudguard, or else you knock it when folding the Birdy. The back one I mounted under the saddle, and this then cracked at some point when the saddle flexed, and needed to be stuck back together. At some point I need to better reflect how to better resolve this issue, but for now the reflectors are holding.
Despite them initially looking OK, the original brake blocks turned out to be horrible - they produced loads of dust. So I replaced them with PROMAX brake blocks with removable pads (ordered from eBay here) - cost is 20 Euro, but I have these blocks on another bike and like them a lot. This takes my total cost to 350 Euro.
Most annoying however are the mudguards. The aluminium rods I used to secure the mudguards have a tendency to bend (and this can happen when transporting the Birdy) and this then means the mudguards touch the tires. These sometimes need bending back into shape before setting off. The space at the top of the front wheel - between tire and mudguard - is very restricted, and the tire can easily rub here. The allen key bolt I used to secure the back mudguard also kept coming partially loose (loose enough so the mudguard would rattle, but never enough to drop off), and this was then replaced with a longer bolt that seems to hold. In short: what was already a messy process to get the mudguards to work ended up being even more work - but I think things are fine now.
But then the good news: this bike is fantastic. It rides well, and is fun and quick to ride. I have already taken it to Rome, Bruges, Maastricht, Brussels, London and Aix-en-Provence, and cycled it from Tourcoing to Lille, and from Bruges to Blankenberge and back. Having it with me on business trips, especially to small-ish cities where the only public transport is buses, has been transformative.
Then what needed to be done for the repair?
The Birdy has a special system to mount the saddle on the seat pole, but this only needs Allen keys to adjust it.
Tires and inner tubes need bike tire levers to remove and replace, and 18 inch tires are hard to fit (the smaller the tires the harder it is).
Pedals are hard to remove without a dedicated pedal wrench - without that you probably need a bike shop to do it for you.
The old chain had to be removed with a chain tool (you could saw it off I suppose!) and the new chain was precisely the right length had a quick fit link to fit it.
Lights and the elastomer could be mounted without tools. The handlebar bag can be fitted using just screws and a Phillips screwdriver.
The velcro straps provided with the Abus Bordo lock are too short to go around the Birdy frame, so I used 4 long cable ties to mount this - they cost a few Euro at my local DIY store.
The frame and all components needed cleaning - rags, and WD40 for a few places, and some acetone to remove sticker glue residue in a few spots.
In short: all of that is pretty normal...
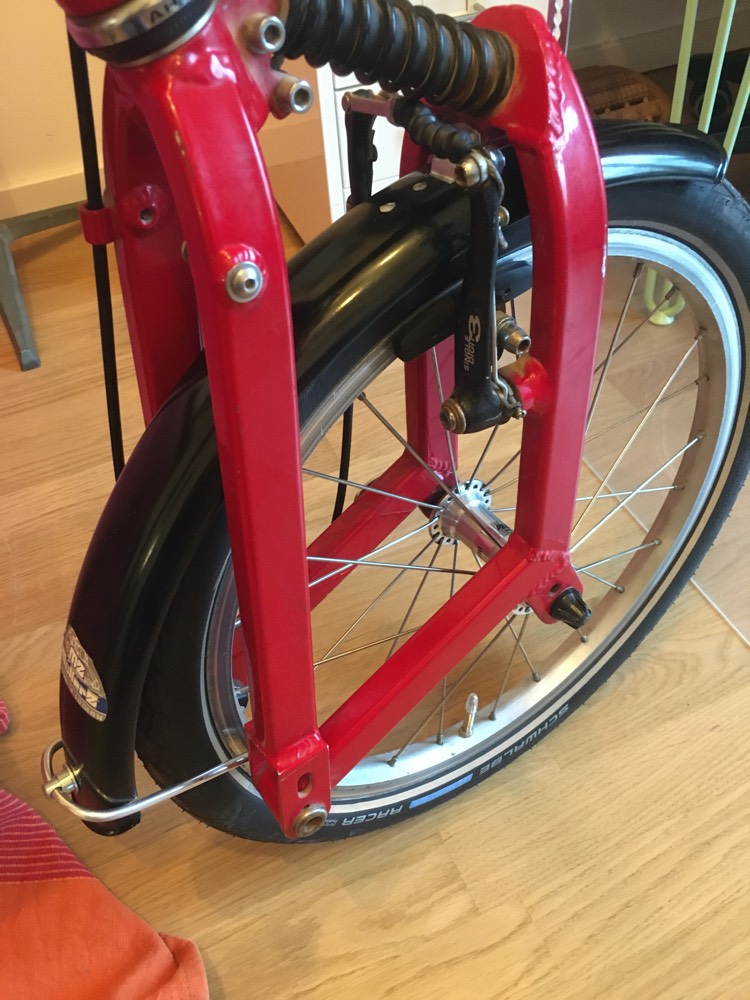
But there is a problem. A big problem. The mudguards.
Lots of Birdy bikes do not have mudguards. For good reason! Because - especially on this early Birdy version - they are an absolute pain to fit. Doing so required hours of work, and a lot of trial and error.
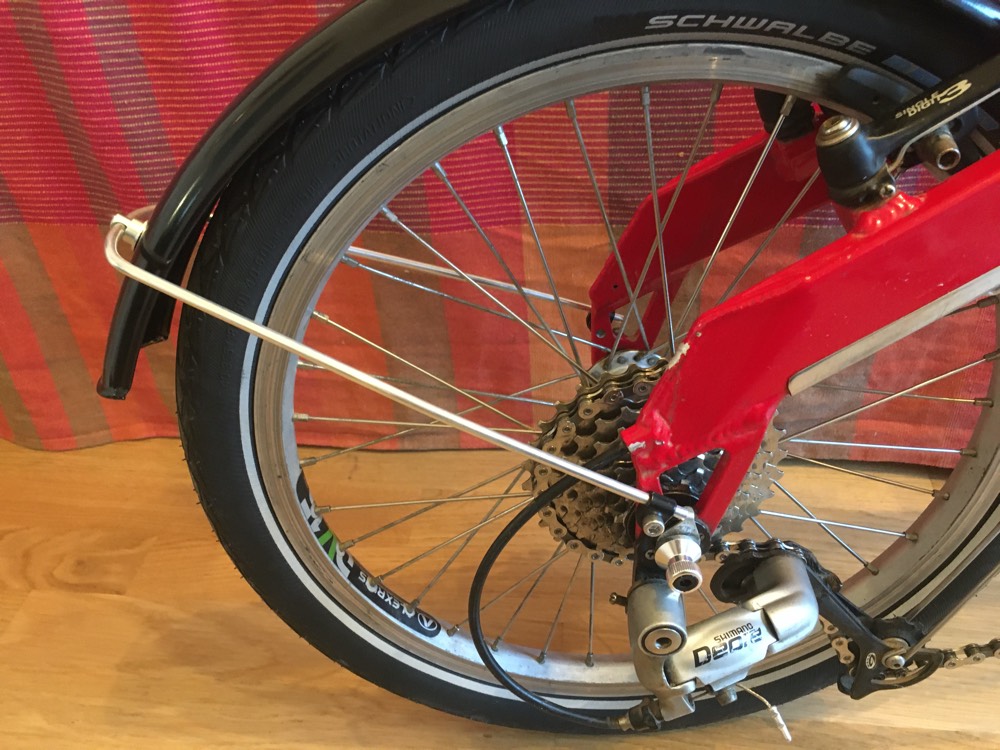
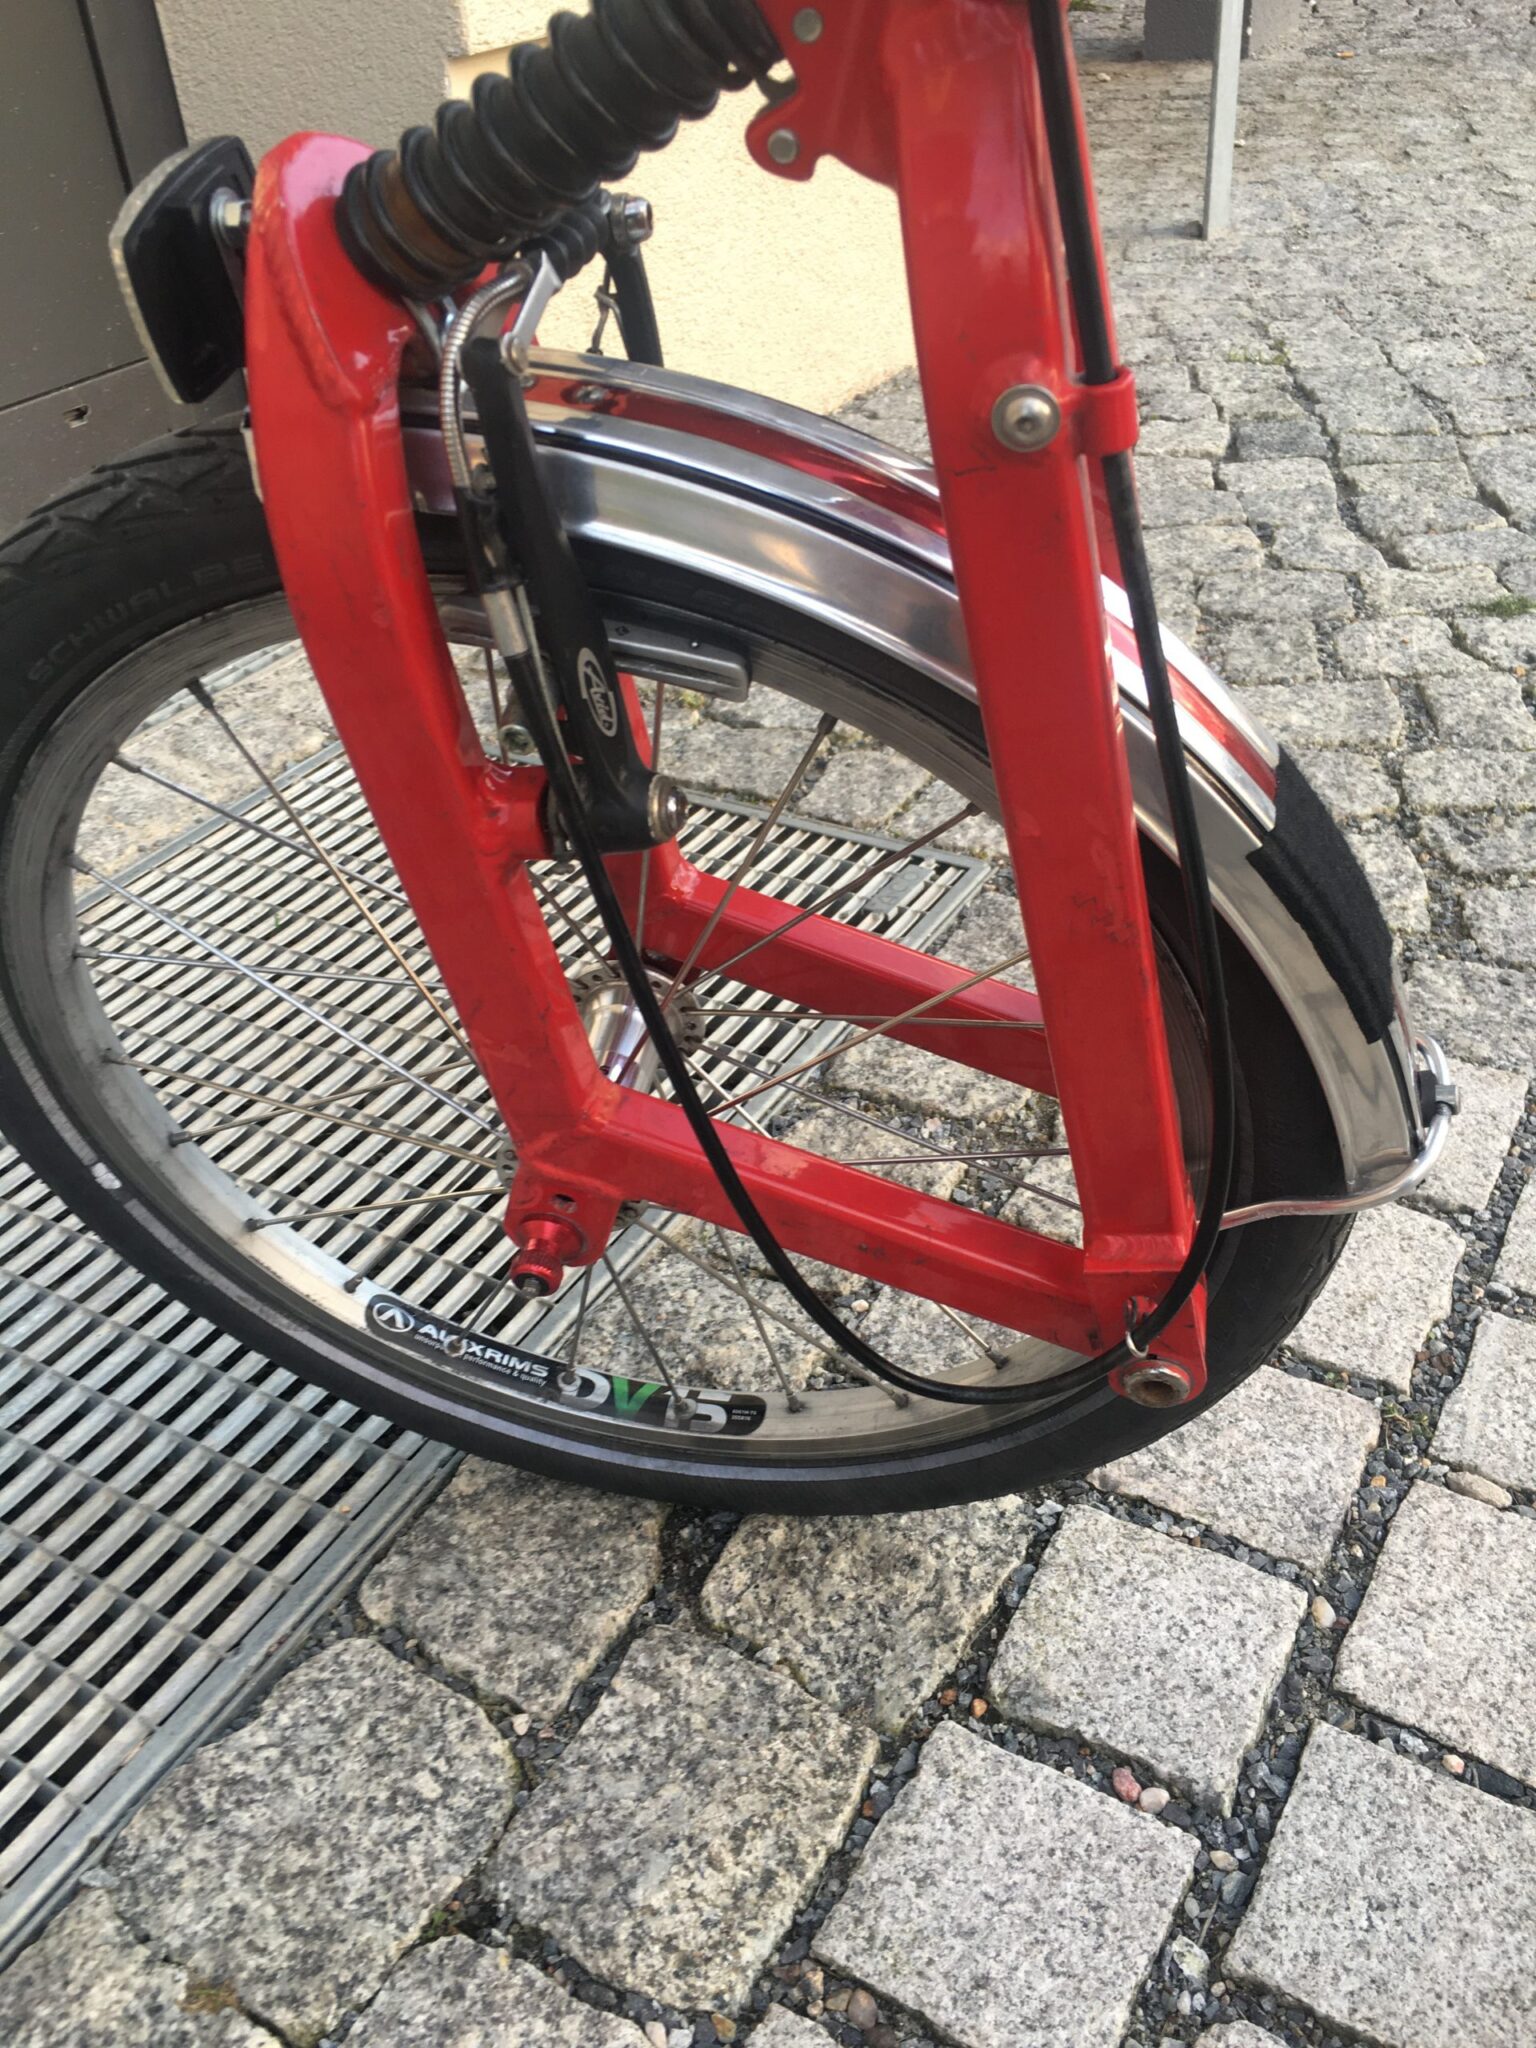
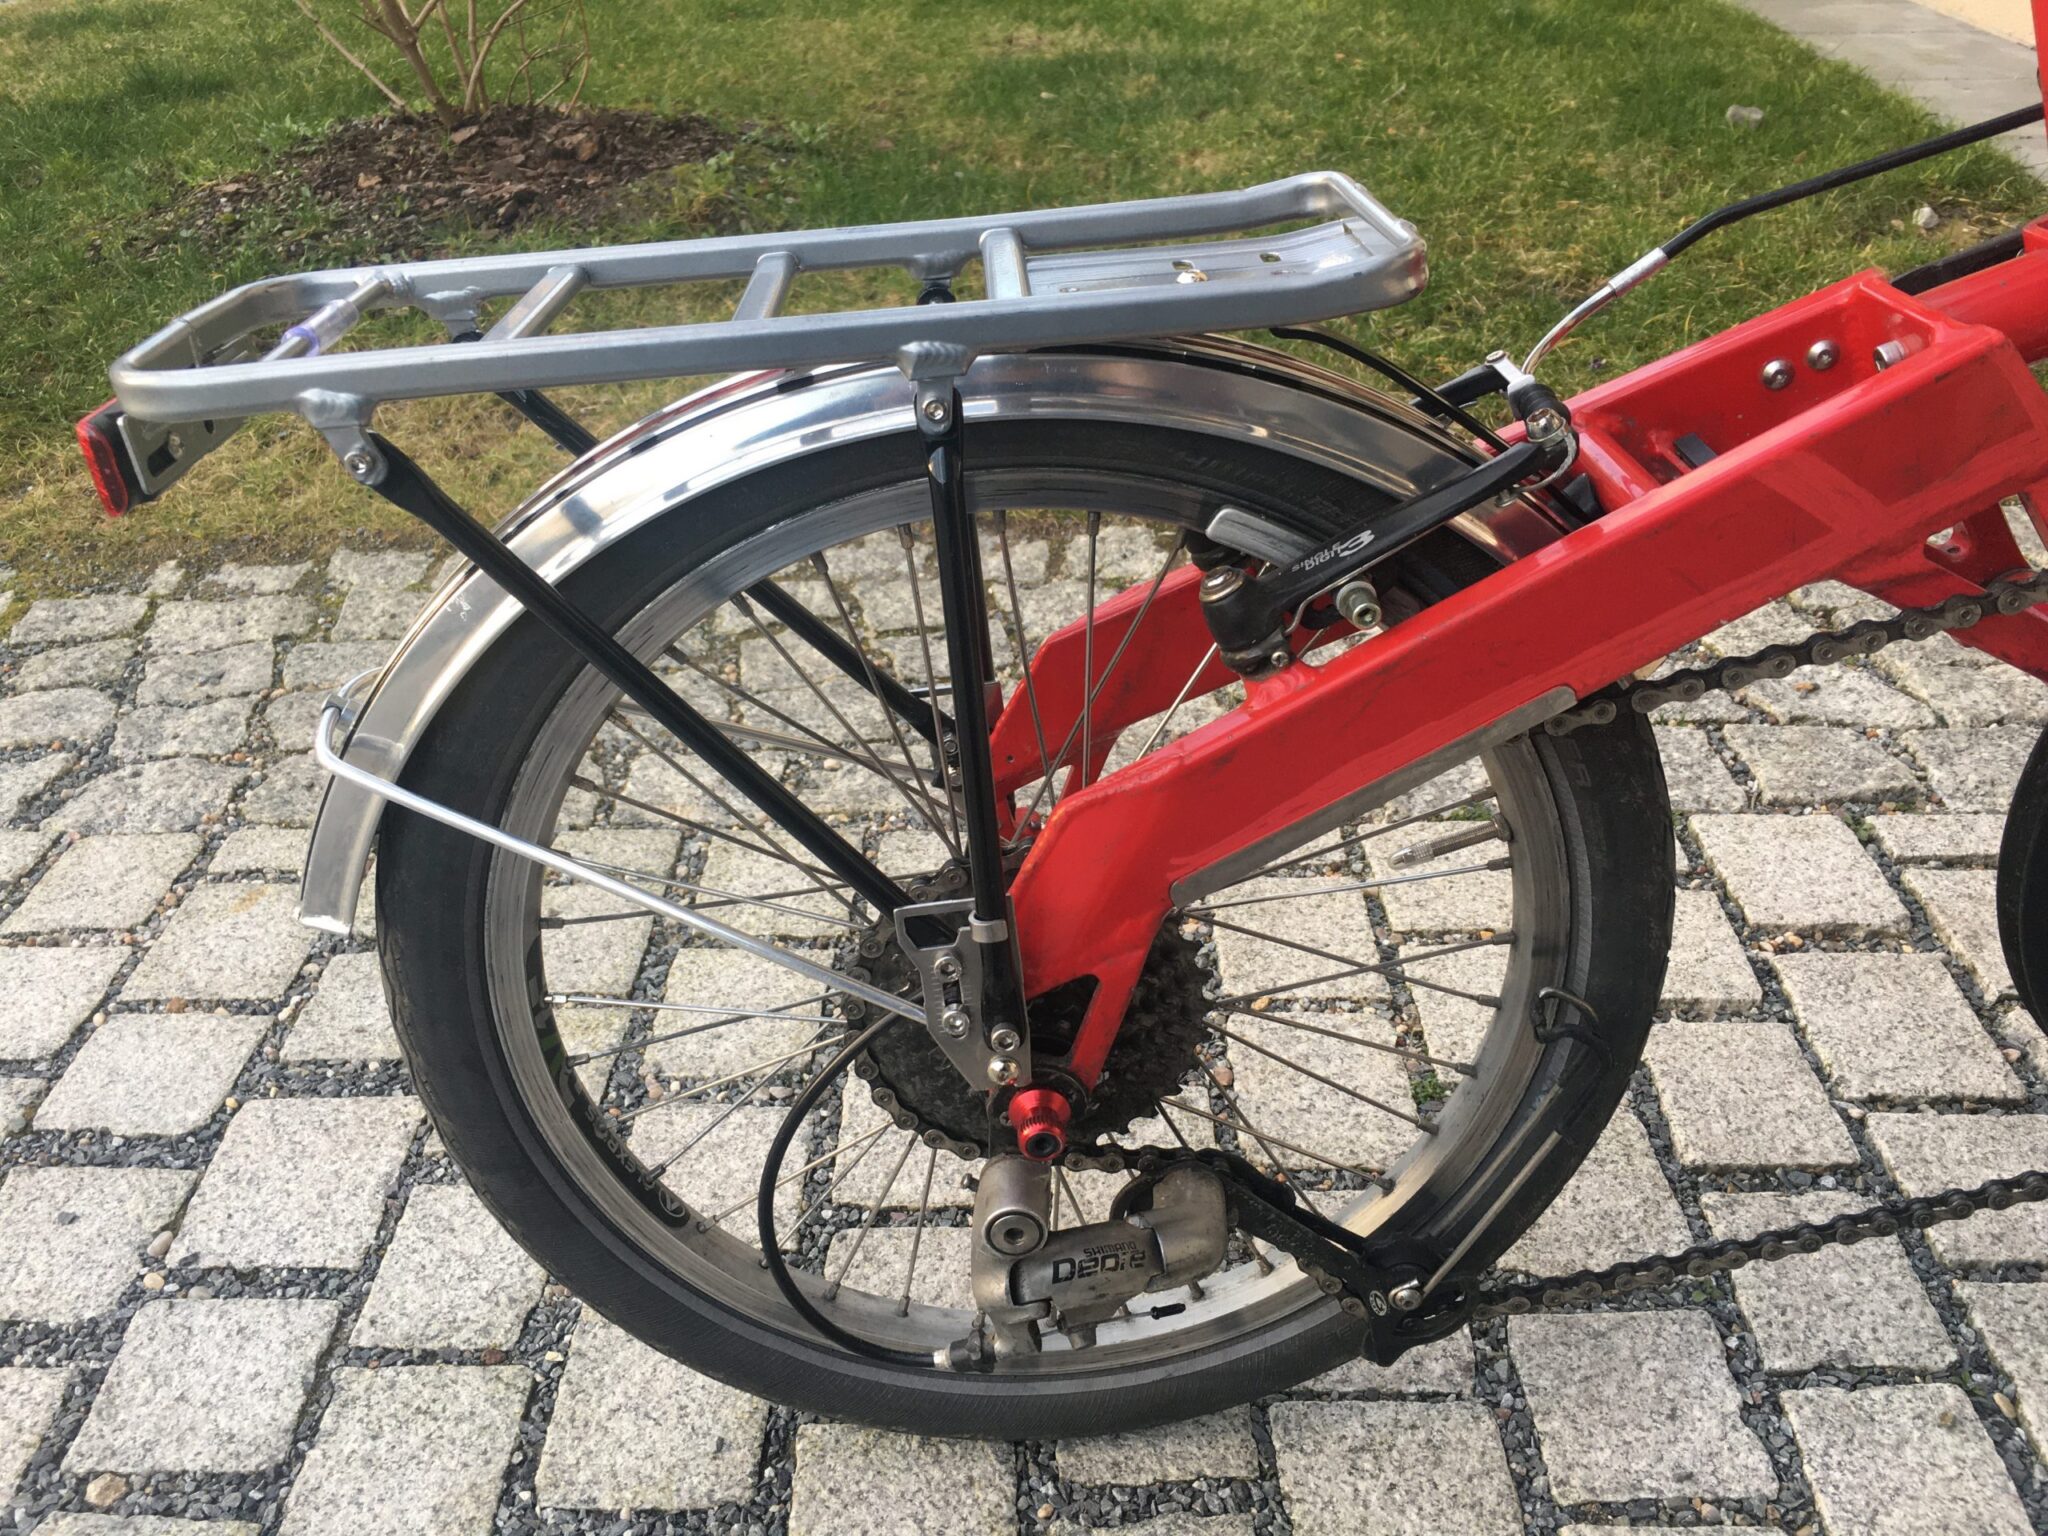
Rear wheel
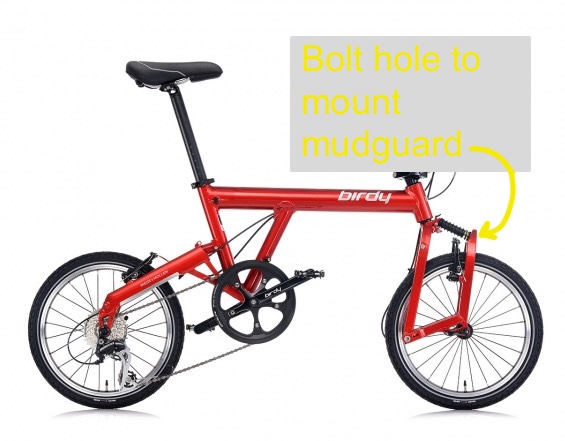
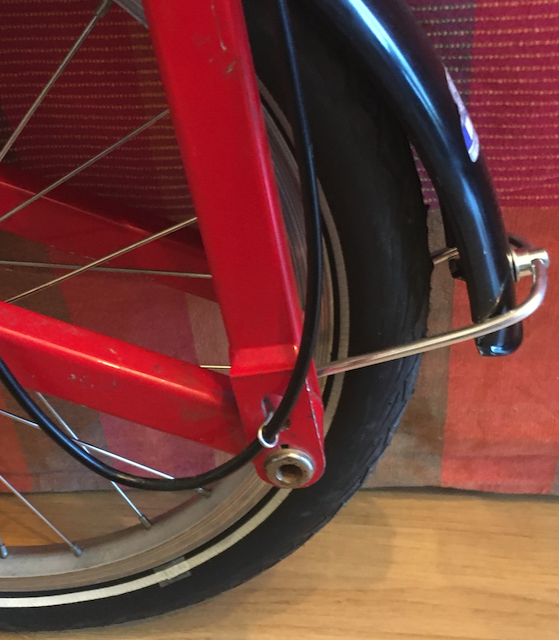
Here how to mount the mudguard is quite obvious - there is a mounting screw hole on the frame above the tire, and two holes above each end of the axels - as shown:
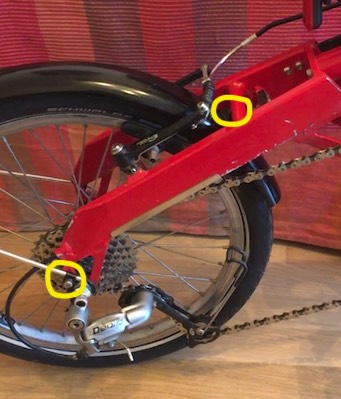
The problem is to then get the mudguard supports mounted at the right angle - position them too low and the bike handlebars will not fold! You need an angle of about 35 degrees upwards at least!

You need a number of different 5mm bolts to secure the guards and the supports, and some fat washers to bring the mudguard closer to the wheel from the frame. I also used a Dremel to cut the supports to the correct length, and I also shortened the mudguard as well - using the Dremel to cut it. You might also need to drill further holes in the mudguard to mount it as well. But, with a few hours of work, and some trial and error, it works.
Take a deep breath. Because that was the easy one!
Front wheel
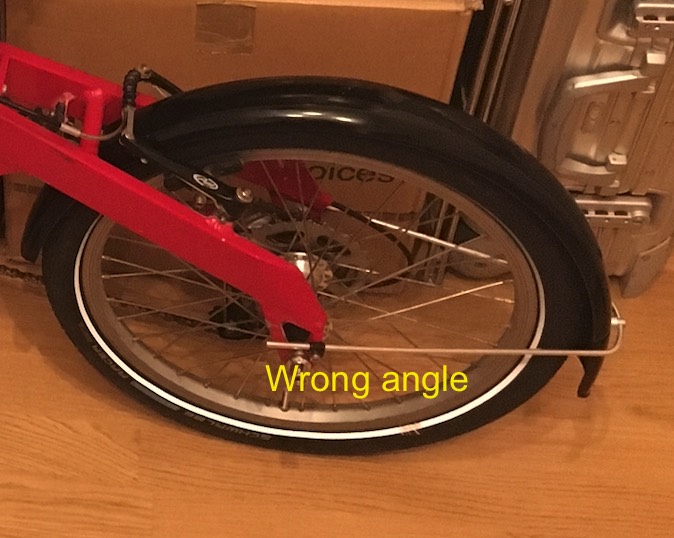
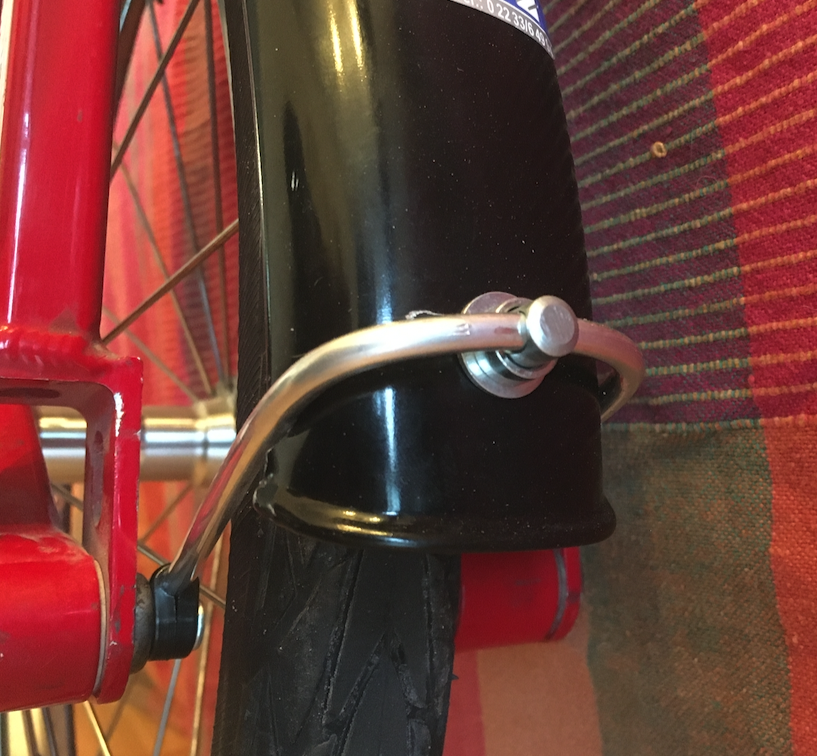
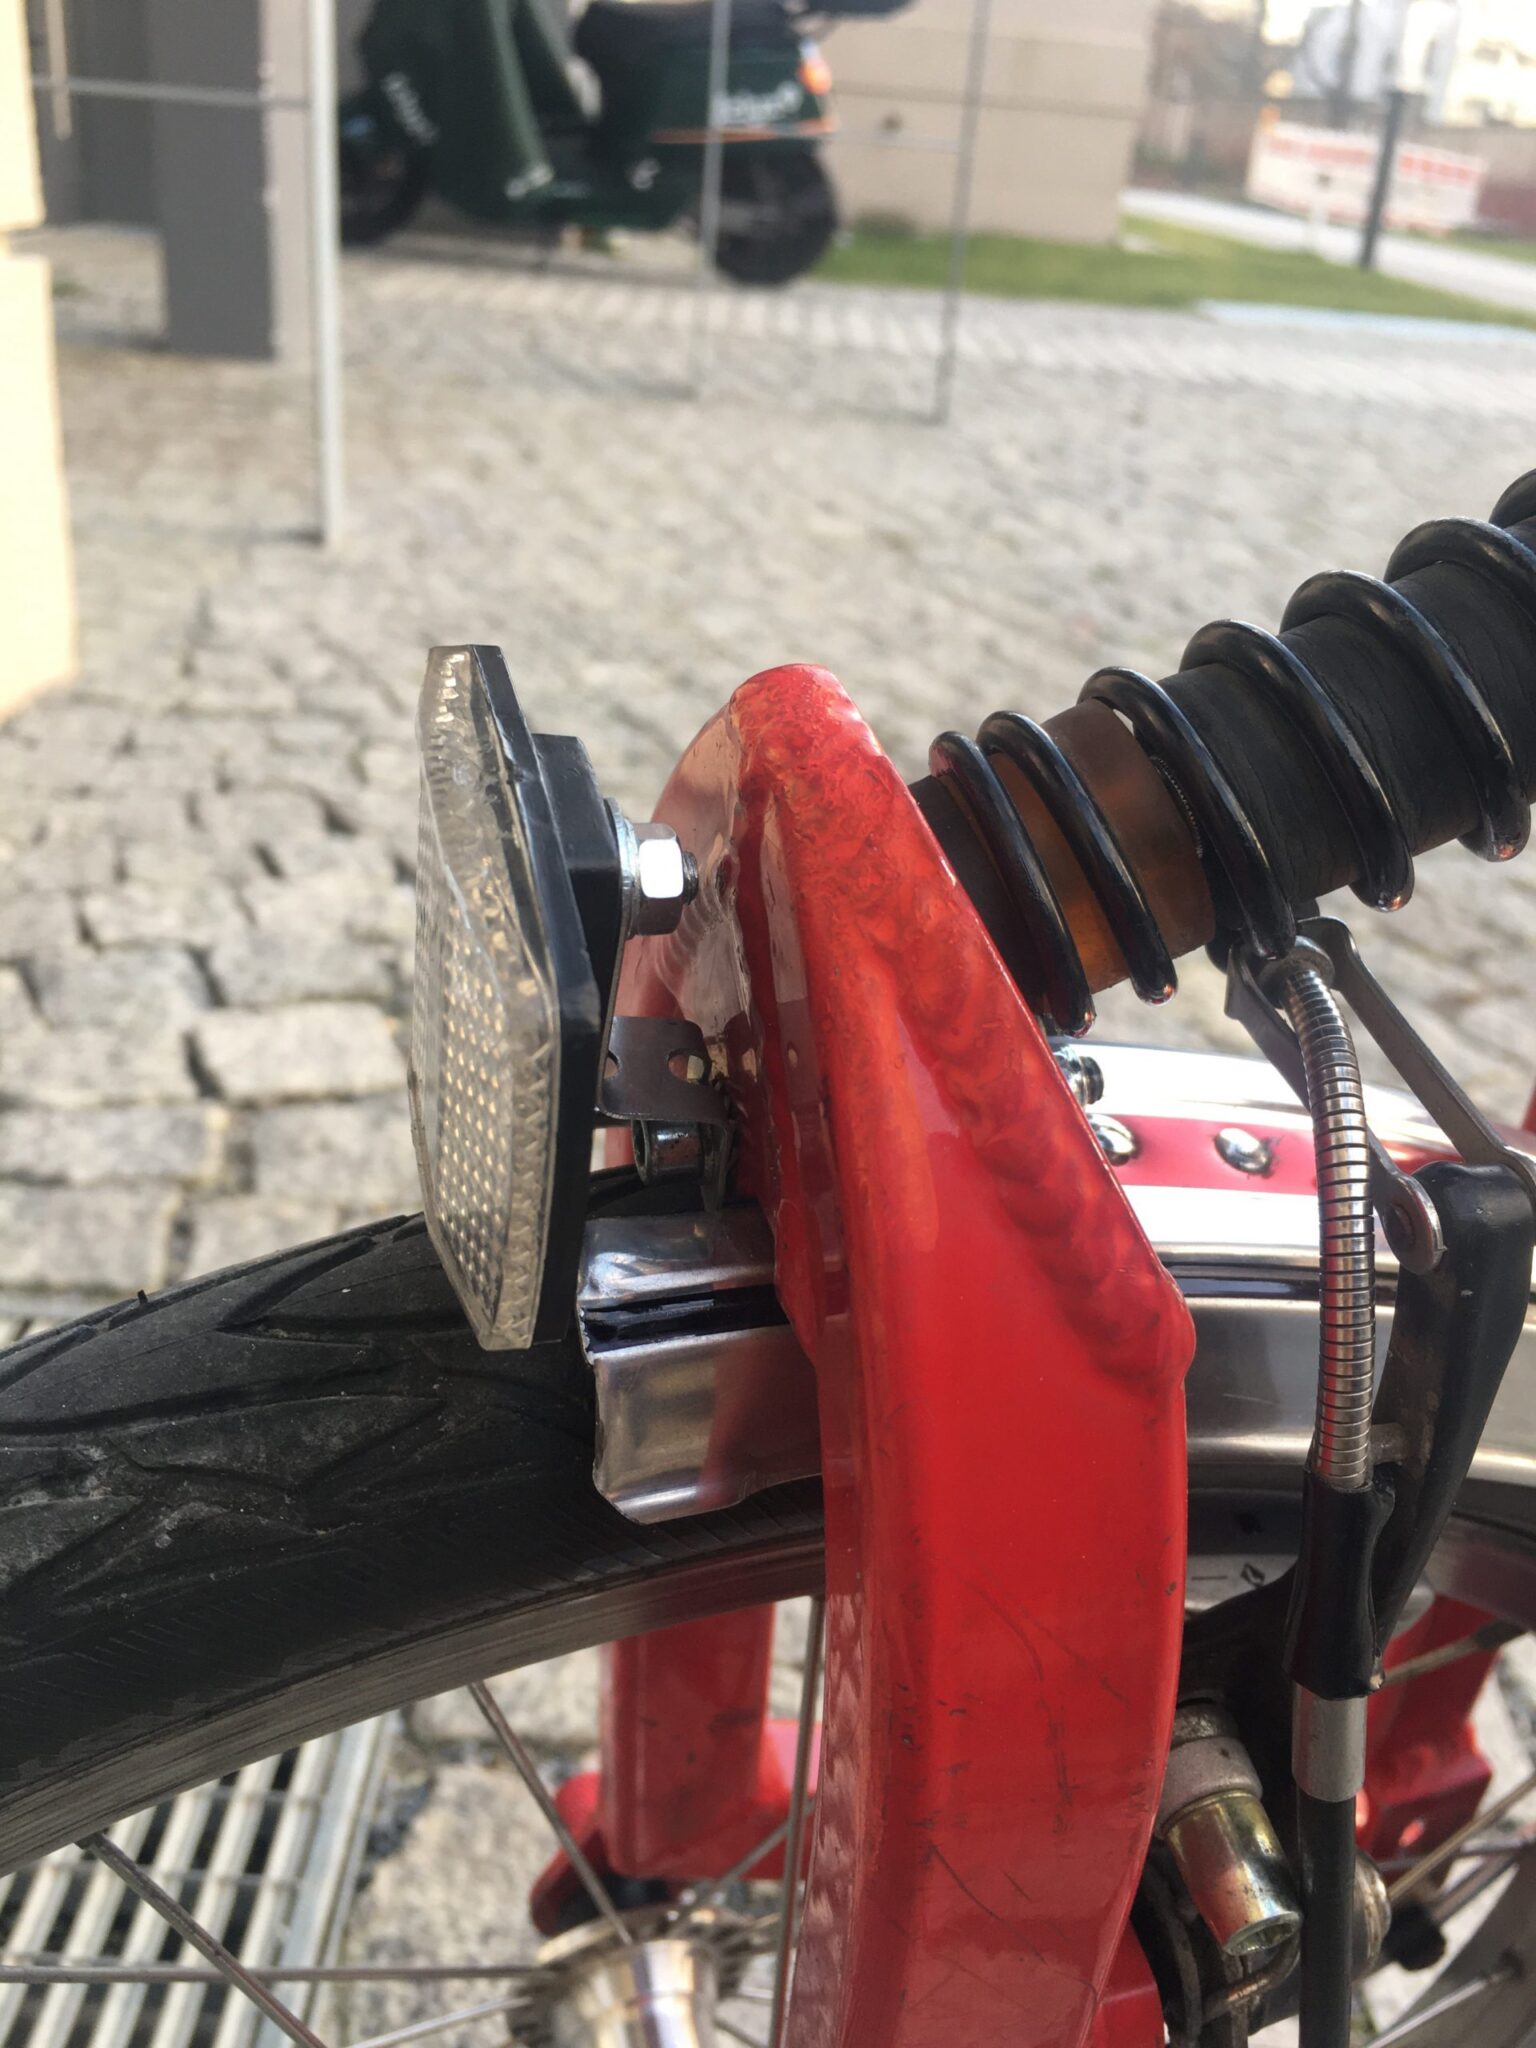
There is only one mounting point for the mudguard on this Birdy - on the front above the wheel, as shown:
The problem is that a mudguard with just one mount is always loose and wobbly. You do need to use this mount though, and need a long bolt, 5mm width, for this - the one I used was 35mm in length, and was bought from my local DIY store.
I then searched for further solutions for the second mount, and started with the one explained by Alexander Gottfried here. This uses a Rawlplug inside each hinge as a mounting point.
This was my first try, as seen from below:
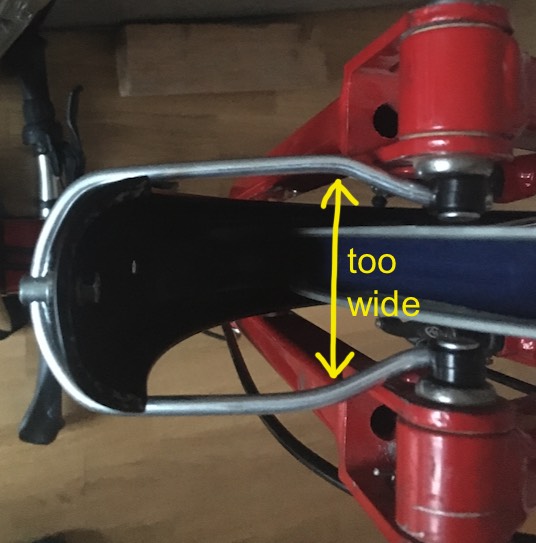
Putting the aluminium mudguard supports on the outside of the mudguard, and cutting and bending them to shape, nevertheless resulted in the supports being too wide - they would snag on the frame when folding the bike (you can see the narrower frame parts in the picture above).
The solution was to cut two notches into the side of the mudguard, again using the Dremel for this, and to keep the supports straighter and narrower, as shown here:
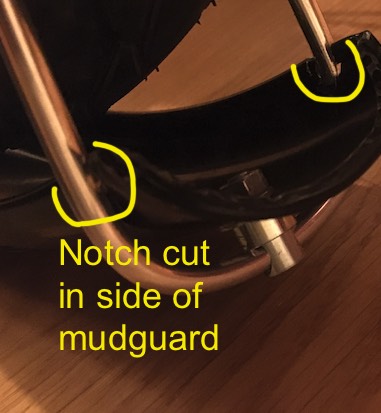
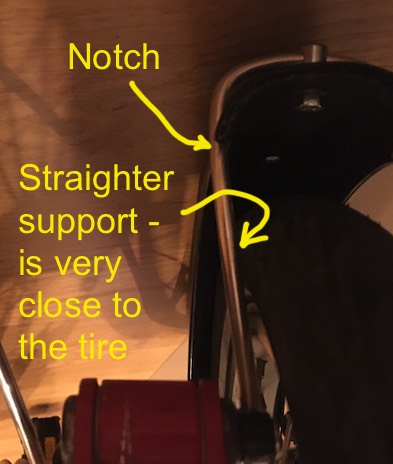
This leaves only 6mm of so between the support and the side of the tire, but I can live with that - and the bike folds! This is how it looks:
This fix took a lot of messing around, and filing and bending metal. And without a Dremel or equivalent tool would not have been possible. Not for the faint hearted!
I contacted Riese and Müller to enquire if a mud guard kit for this Birdy was available, but after three weeks still do not have a reply.
So did all this work make sense?
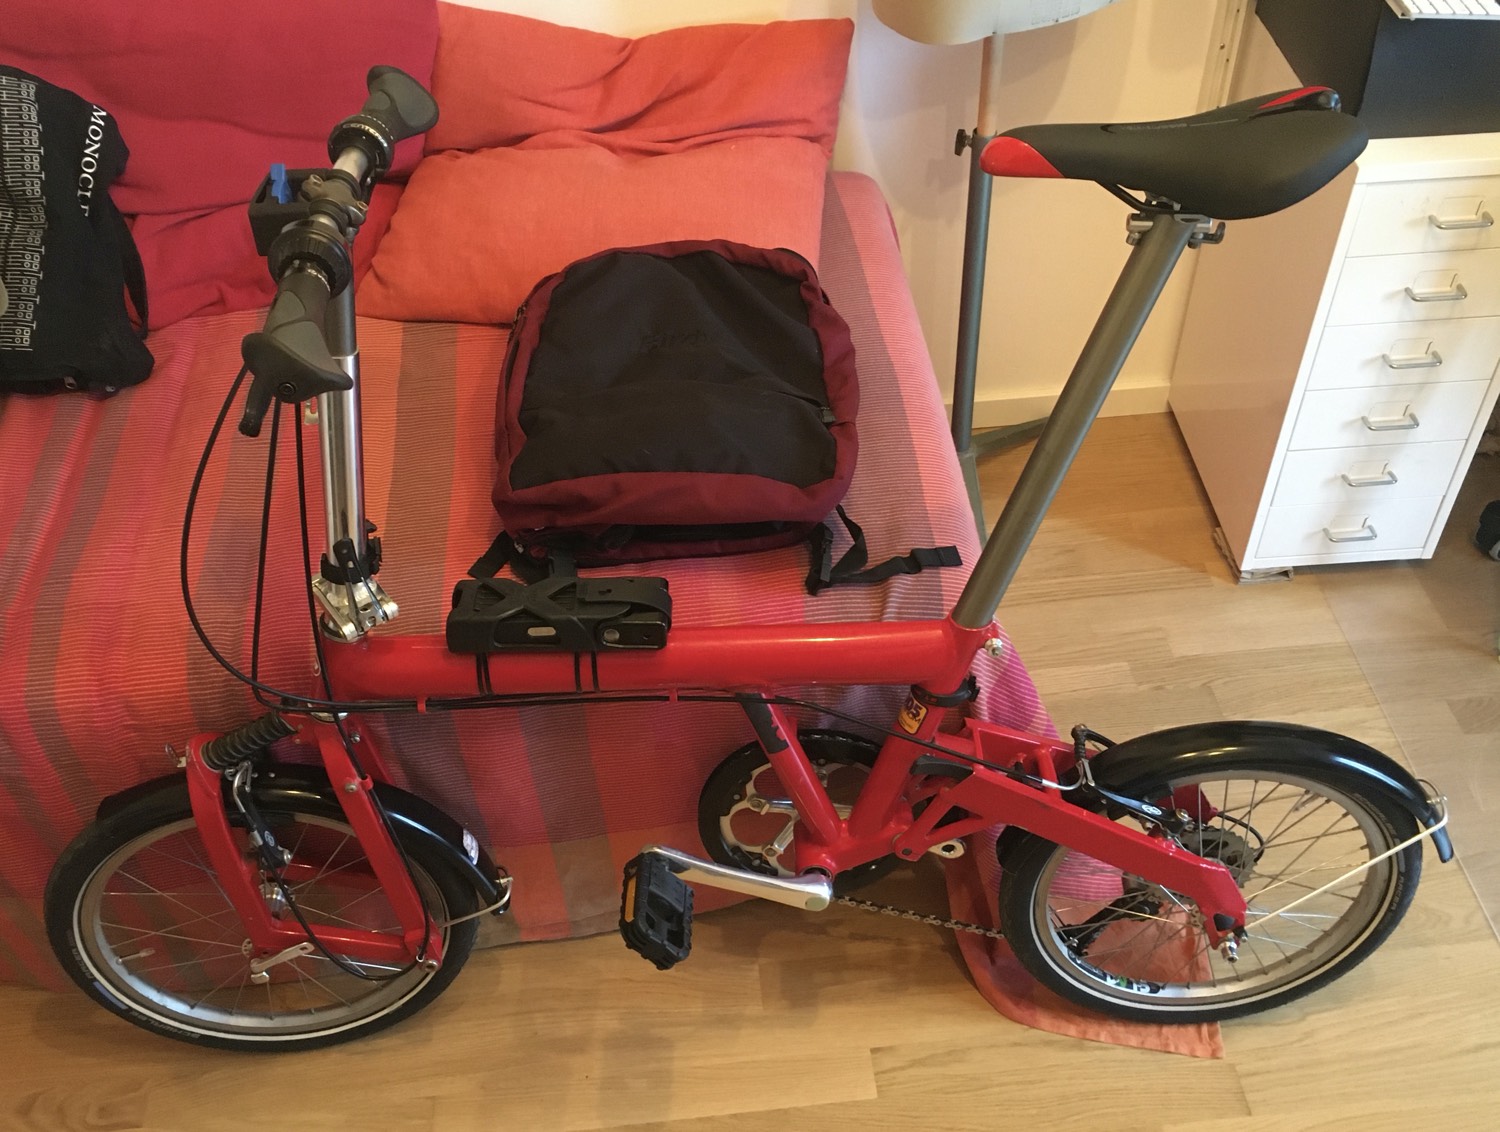
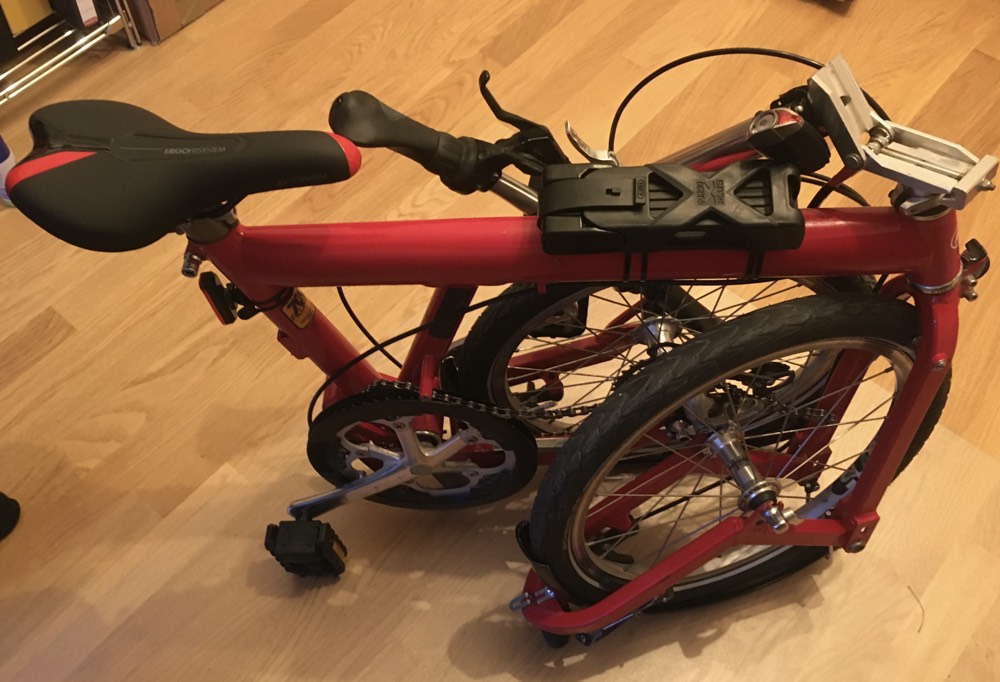
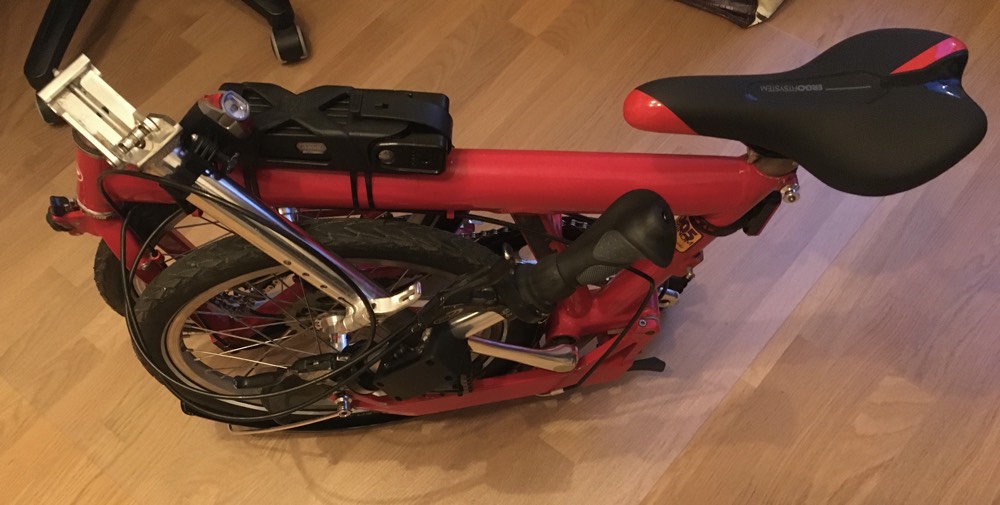
Time will tell. At the time of writing I have only ridden the Birdy for 20 minutes. The ride quality is excellent, and everything works well after the repairs. Folding it is a bit of a pain - I am not as good as this dude yet! All folded it measures 35 x 75 x 57 centimetres, and fits neatly in its carry bag. I will take it with me on a 10 day work trip to France, Belgium and Italy next week, mainly as a means to avoid French rail strikes in a few places, and we will see how it fares. As I gather experience with it I will update the blog post accordingly. But for now I am content - it all works, and seems to behave in the way I want!
For the moment though, here a few photos after the repairs!
November 2021 update
After more than 18 months of intermittent use of the Birdy it's time for an update!
First and foremost, this bike is great. It has allowed me to cycle in places I otherwise would never have been able to visit - it simply allows me to think differently and plan my trips differently. So I am immensely happy to to have completed this project.
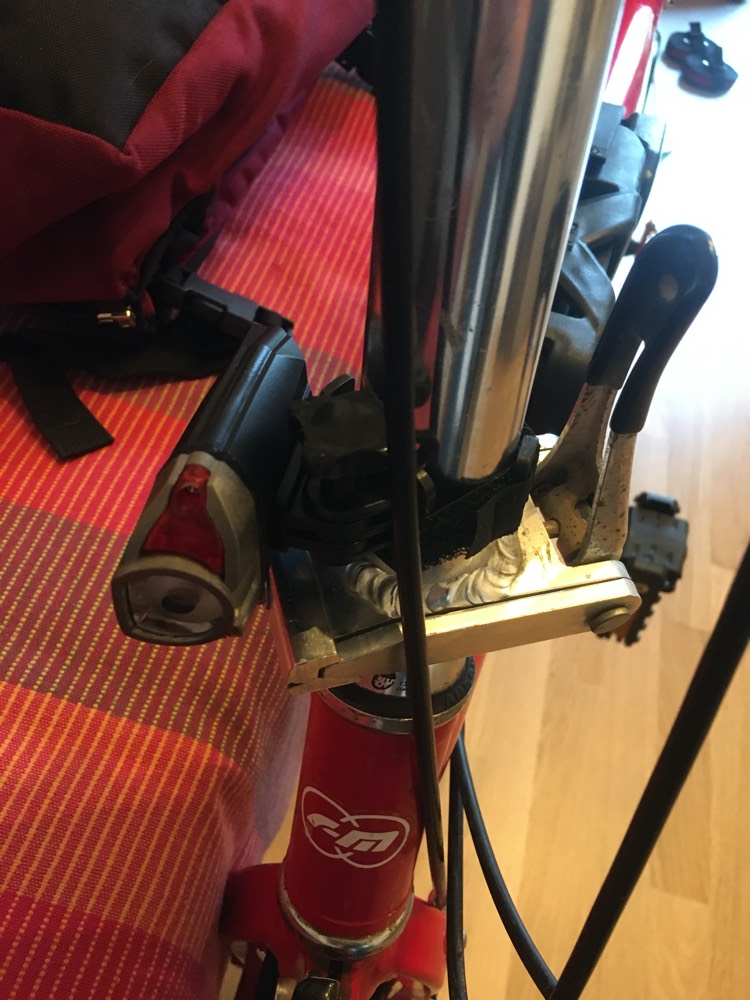
I have only done one small repair since completing all the steps listed above - to replace the old grip shift gear lever with a new SRAM one (€11,64 from eBay here). The rubber on the old grip was coming loose in my hands, and the new one shifts more smoothly too - a simple and worthwhile upgrade.
A few reflections about choices made, and components used...
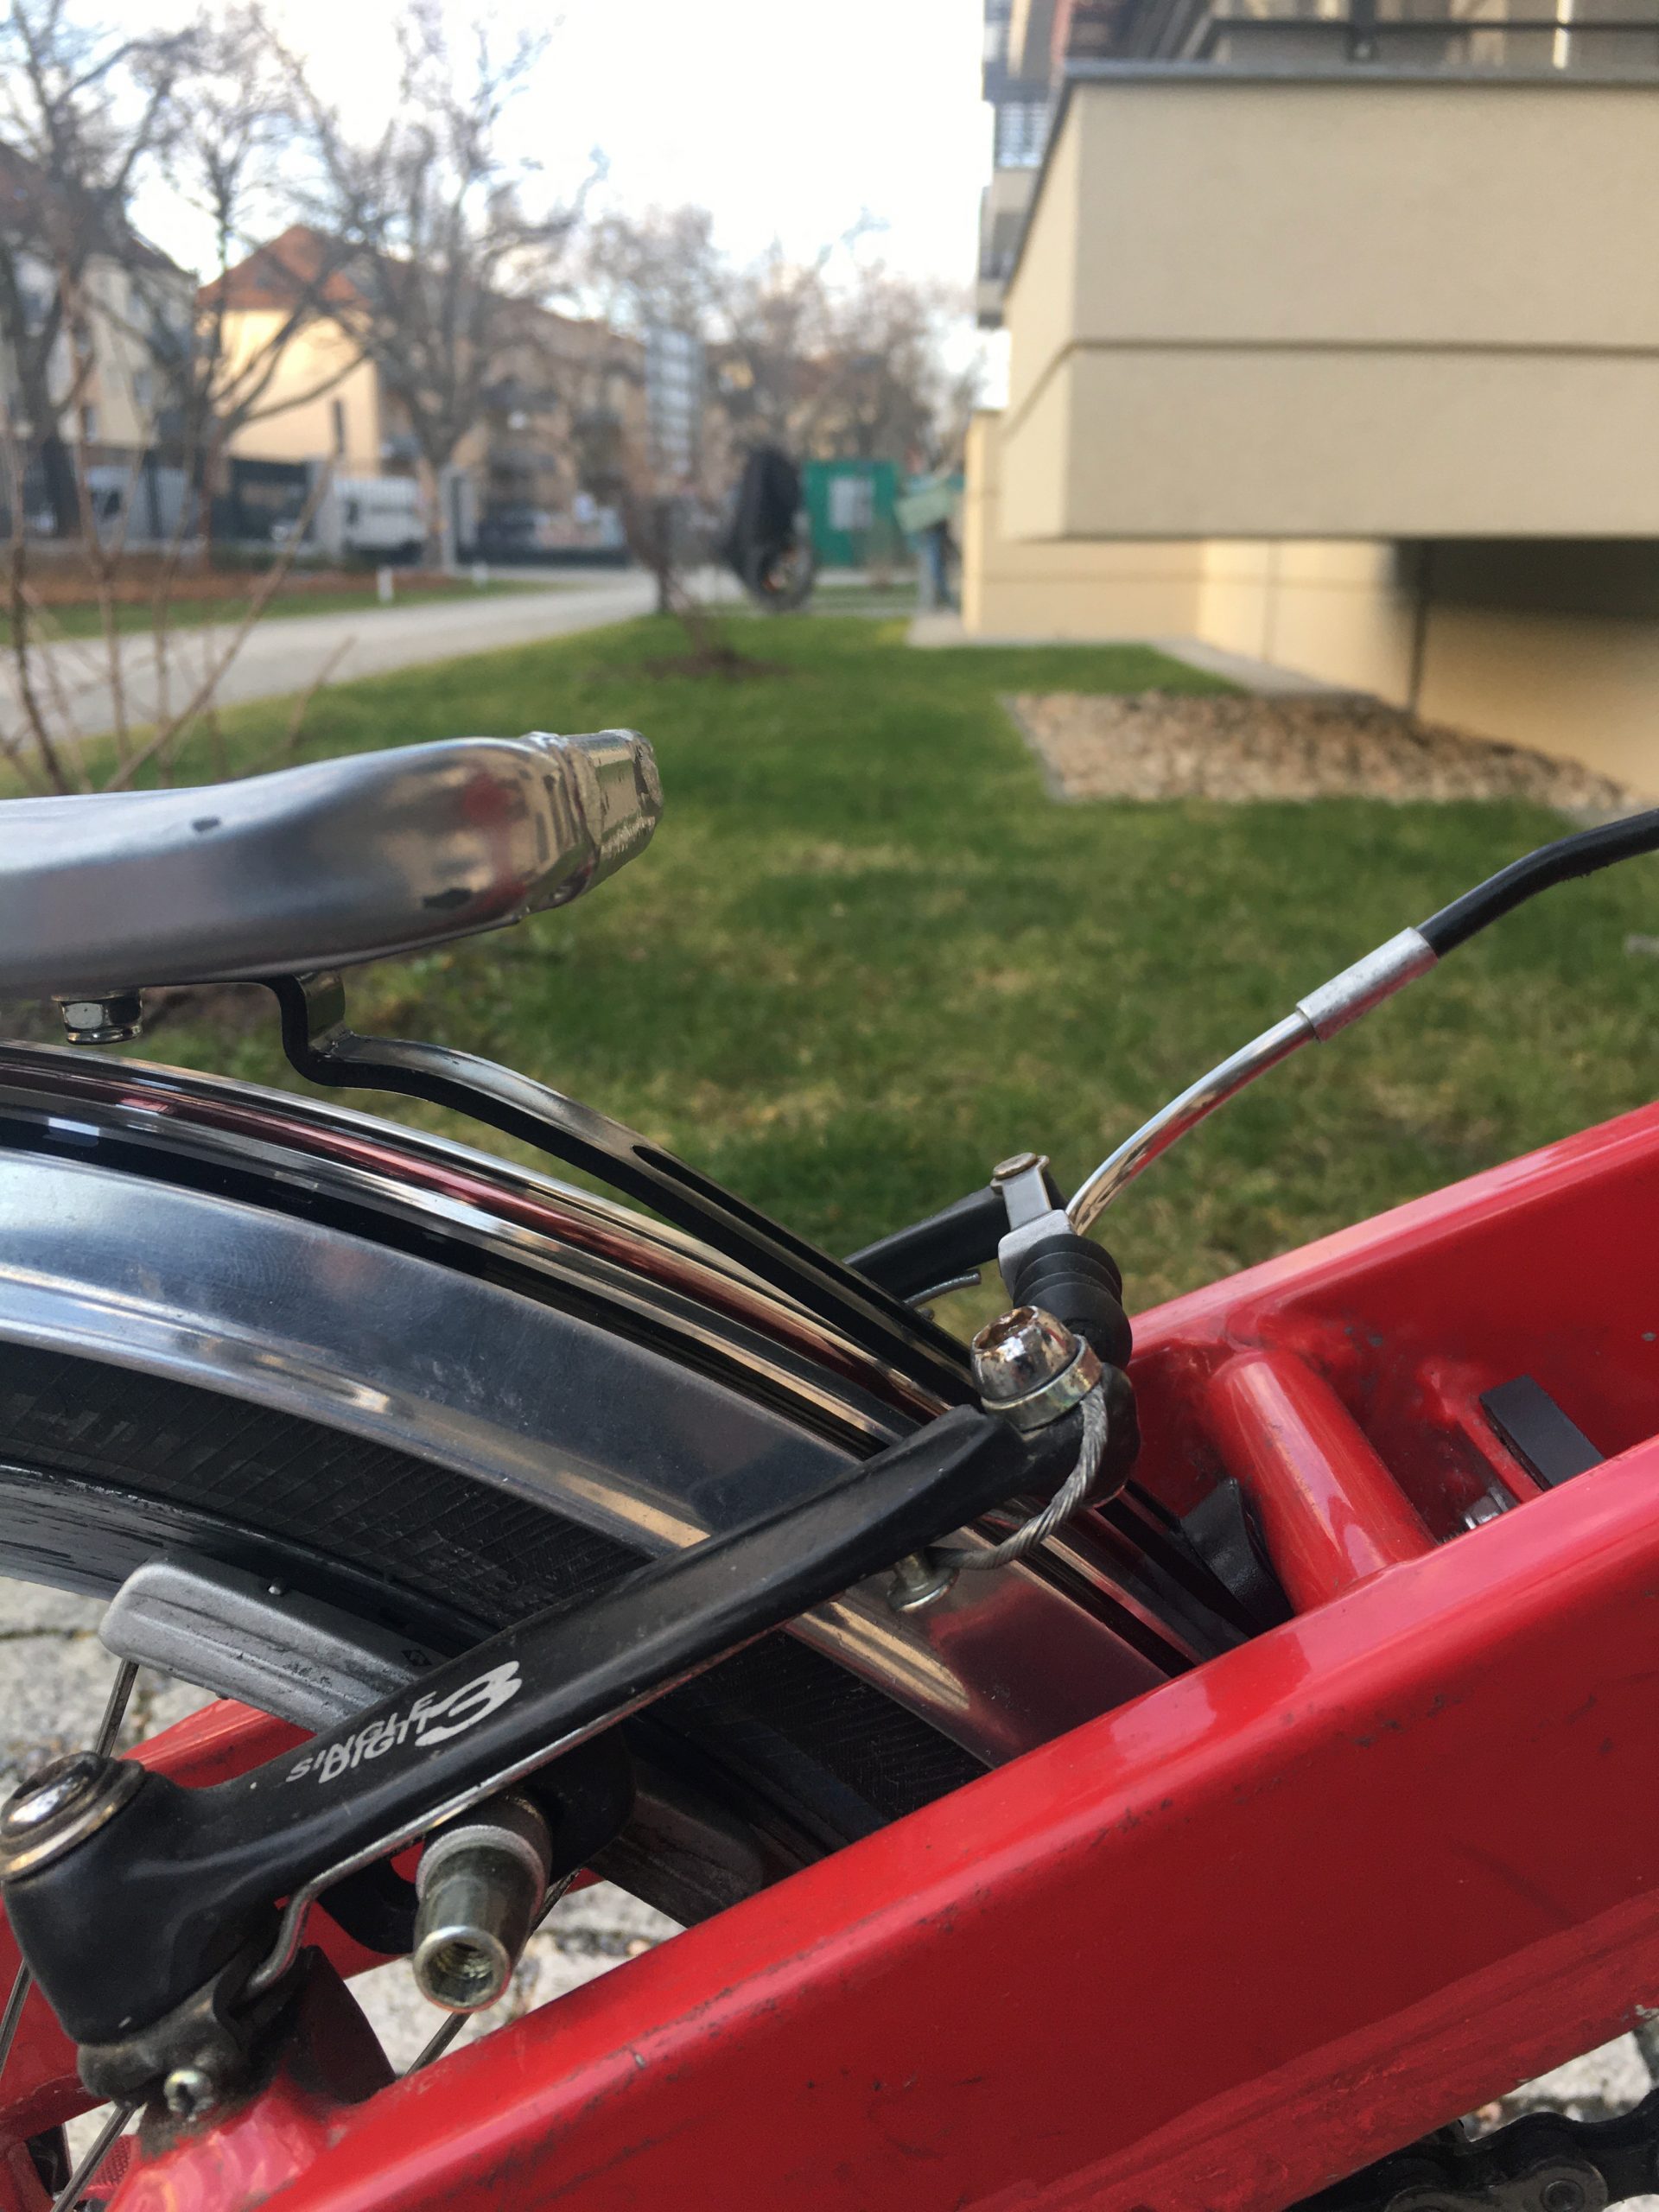
- The front mudguard remains a pain. In retrospect it would have been better to go for plastic rather than metal mudguards, as these ones rattle (especially the front), and scratch easily (especially the back, when folding the bike - scrapes the floor).
- I am not the biggest fan of the Abus Bordo Granit X-Plus 6450/85cm lock. I find it hard to use, and often hard to get the end into the lock at the right angle. Plus the outer rubbery-sort of covering of the lock damages easily. That said I don't know what better alternative is available, and I like how compact the lock is.
- I am glad I added the kickstand, but the design of the one I purchased is pretty poor. It does not really hold the bike very steadily. Although having said that I am not aware of any other sort of design I could have mounted instead!
- The Decathlon folding pedals are quite slippery with some footwear. Going for ones like this - more similar to the ones Dahon uses on its bikes - might have been a better idea.
Anyway, all of those points are comparatively minor - but bear them in mind if you're attempting a similar project!
March 2022 update
As I am currently planning a massive trip for summer 2022 with the Birdy, it was time to do some more fundamental rebuilding of the bike, eliminating some of the problems that have become clear with extended use.
The three areas to address were the mudguards (again), a luggage rack, and the kick stand. And new pedals.
Mudguards
The main problem was with the front mudguard on the original rebuild. The space between the frame below the front suspension spring, and the tire, was so small so as to mean that the tire would from time to time touch the mudguard. This was especially the case if the mudguard had accidentally been knocked when folding the bike. In the end the tire touching the mudguard wore away the rivets holding the mudguard in place.
The problem from the original rebuild reared its head once more though - the lack of availability of 18 inch mudguards to even purchase! I discovered the kids bike manufacturer Puky used to use 18 inch wheels, but could find no stockist with those mudguards in stock. So it was back to eBay for alloy mudguards instead - these unbranded ones were a little narrower than on the original rebuild - €19,99 + €5,99 shipping.
These pictures show how these are mounted - the alloy was sliced away with a Dremel cutter to mean there is no metal between frame and wheel, behind the reflector, any more (2nd picture). Edges were filed down to make them less sharp, and mounting was done in the same way as in the original rebuild, and a strip of Tesa textile sticky backed band added at the point where folding the bike scratches the mudguard on the floor.
The rear mudguard likewise needed to be shortened, but was simply mounted in the same way as the one in the original rebuild.
Luggage rack, and kick stand
The luggage solution in the original rebuild has its limits - the handlebar mounted office bag is fine for a laptop, and clothes for a couple of days can go in the Birdy rucksack. But as I am planning a longer trip this year I needed a better solution - a luggage rack. But the problem is that unless this rack is low (so as to not block the folding mechanism) and far back (to avoid the problem of my foot snagging on pannier bags). And of course Riese+Müller no longer sells luggage racks for this old Birdy.
So the solution was to combine two different racks - the top of a Fahrrad Gepäckträger Aluminium 24-26-28 Zoll verstellbar Silber (eBay €16,99) and the supports from a Bike-Parts Gepäckträger 16-20" (Schwarz) (Fahrrad24 €14,35):
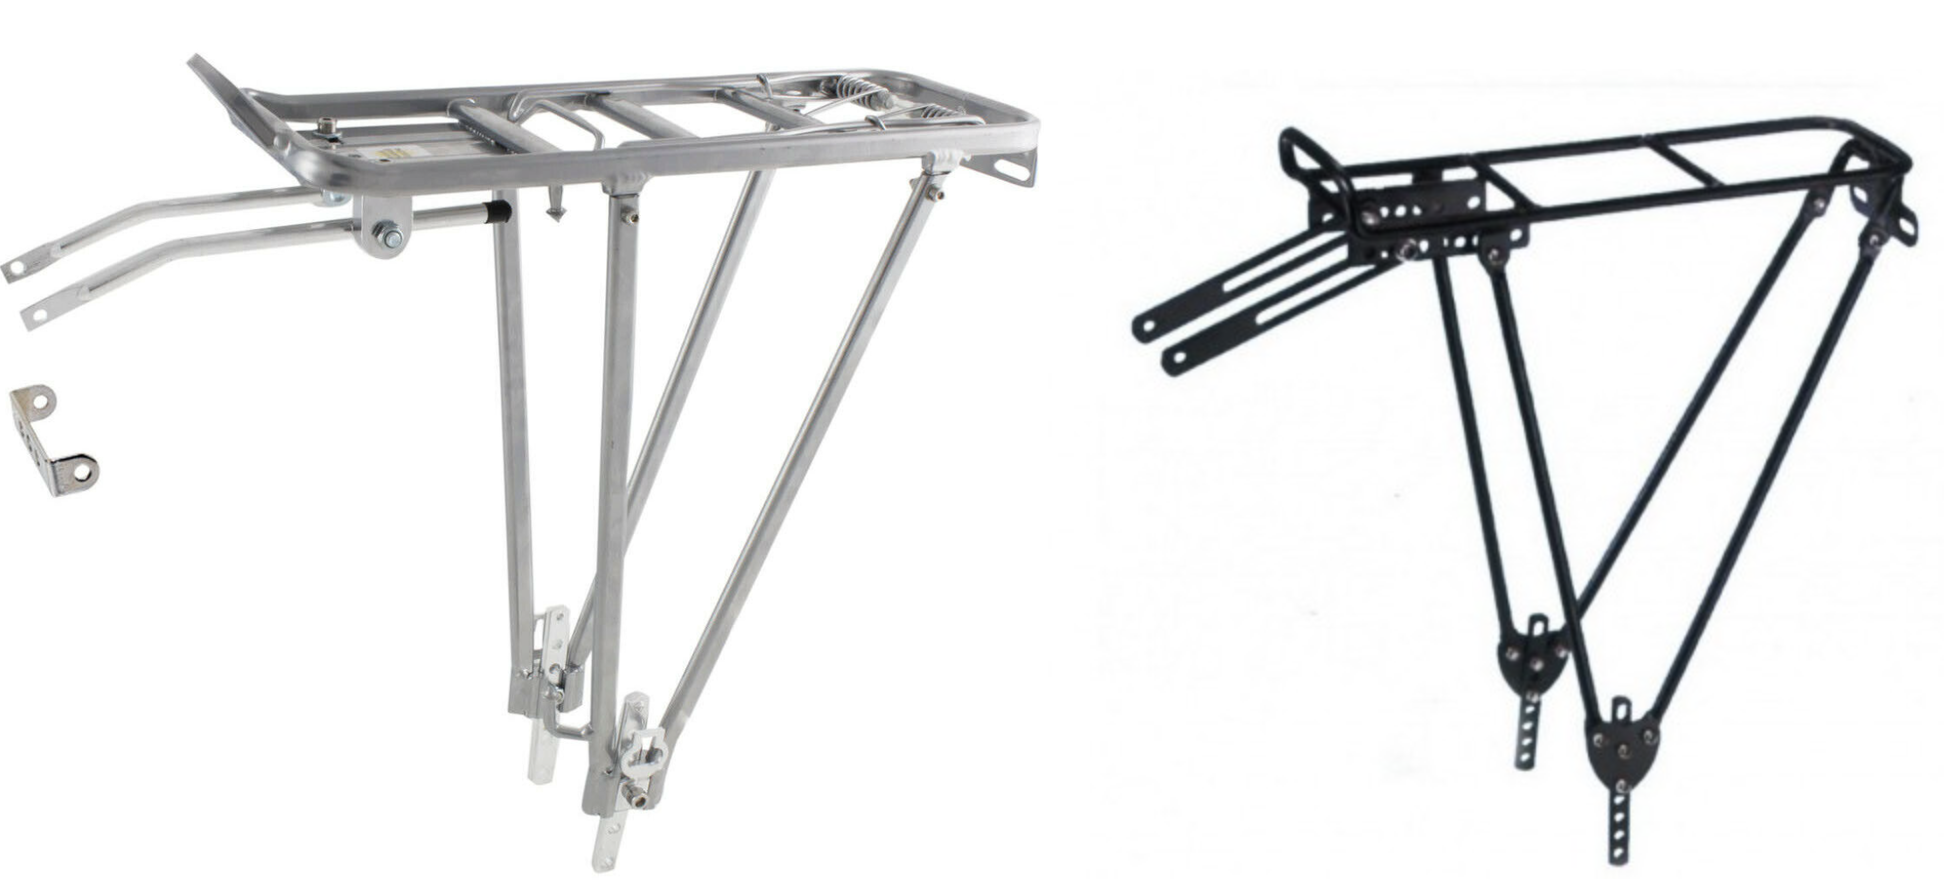
These were mounted at the bottom unto the frame with Pletscher Strebenendplatten verstellbar (Fahrrad24 €6,90). A Busch & Müller reflector (eBay €4,29 + €2,55 postage) was mounted on the back.
This is how it looks:
The luggage rack has to be as flat as possible - so as to not cause problems in the folded position. I used a Dremel to cut off the curved D-shape bar on the brake end of the luggage rack - you can see where this was removed here:
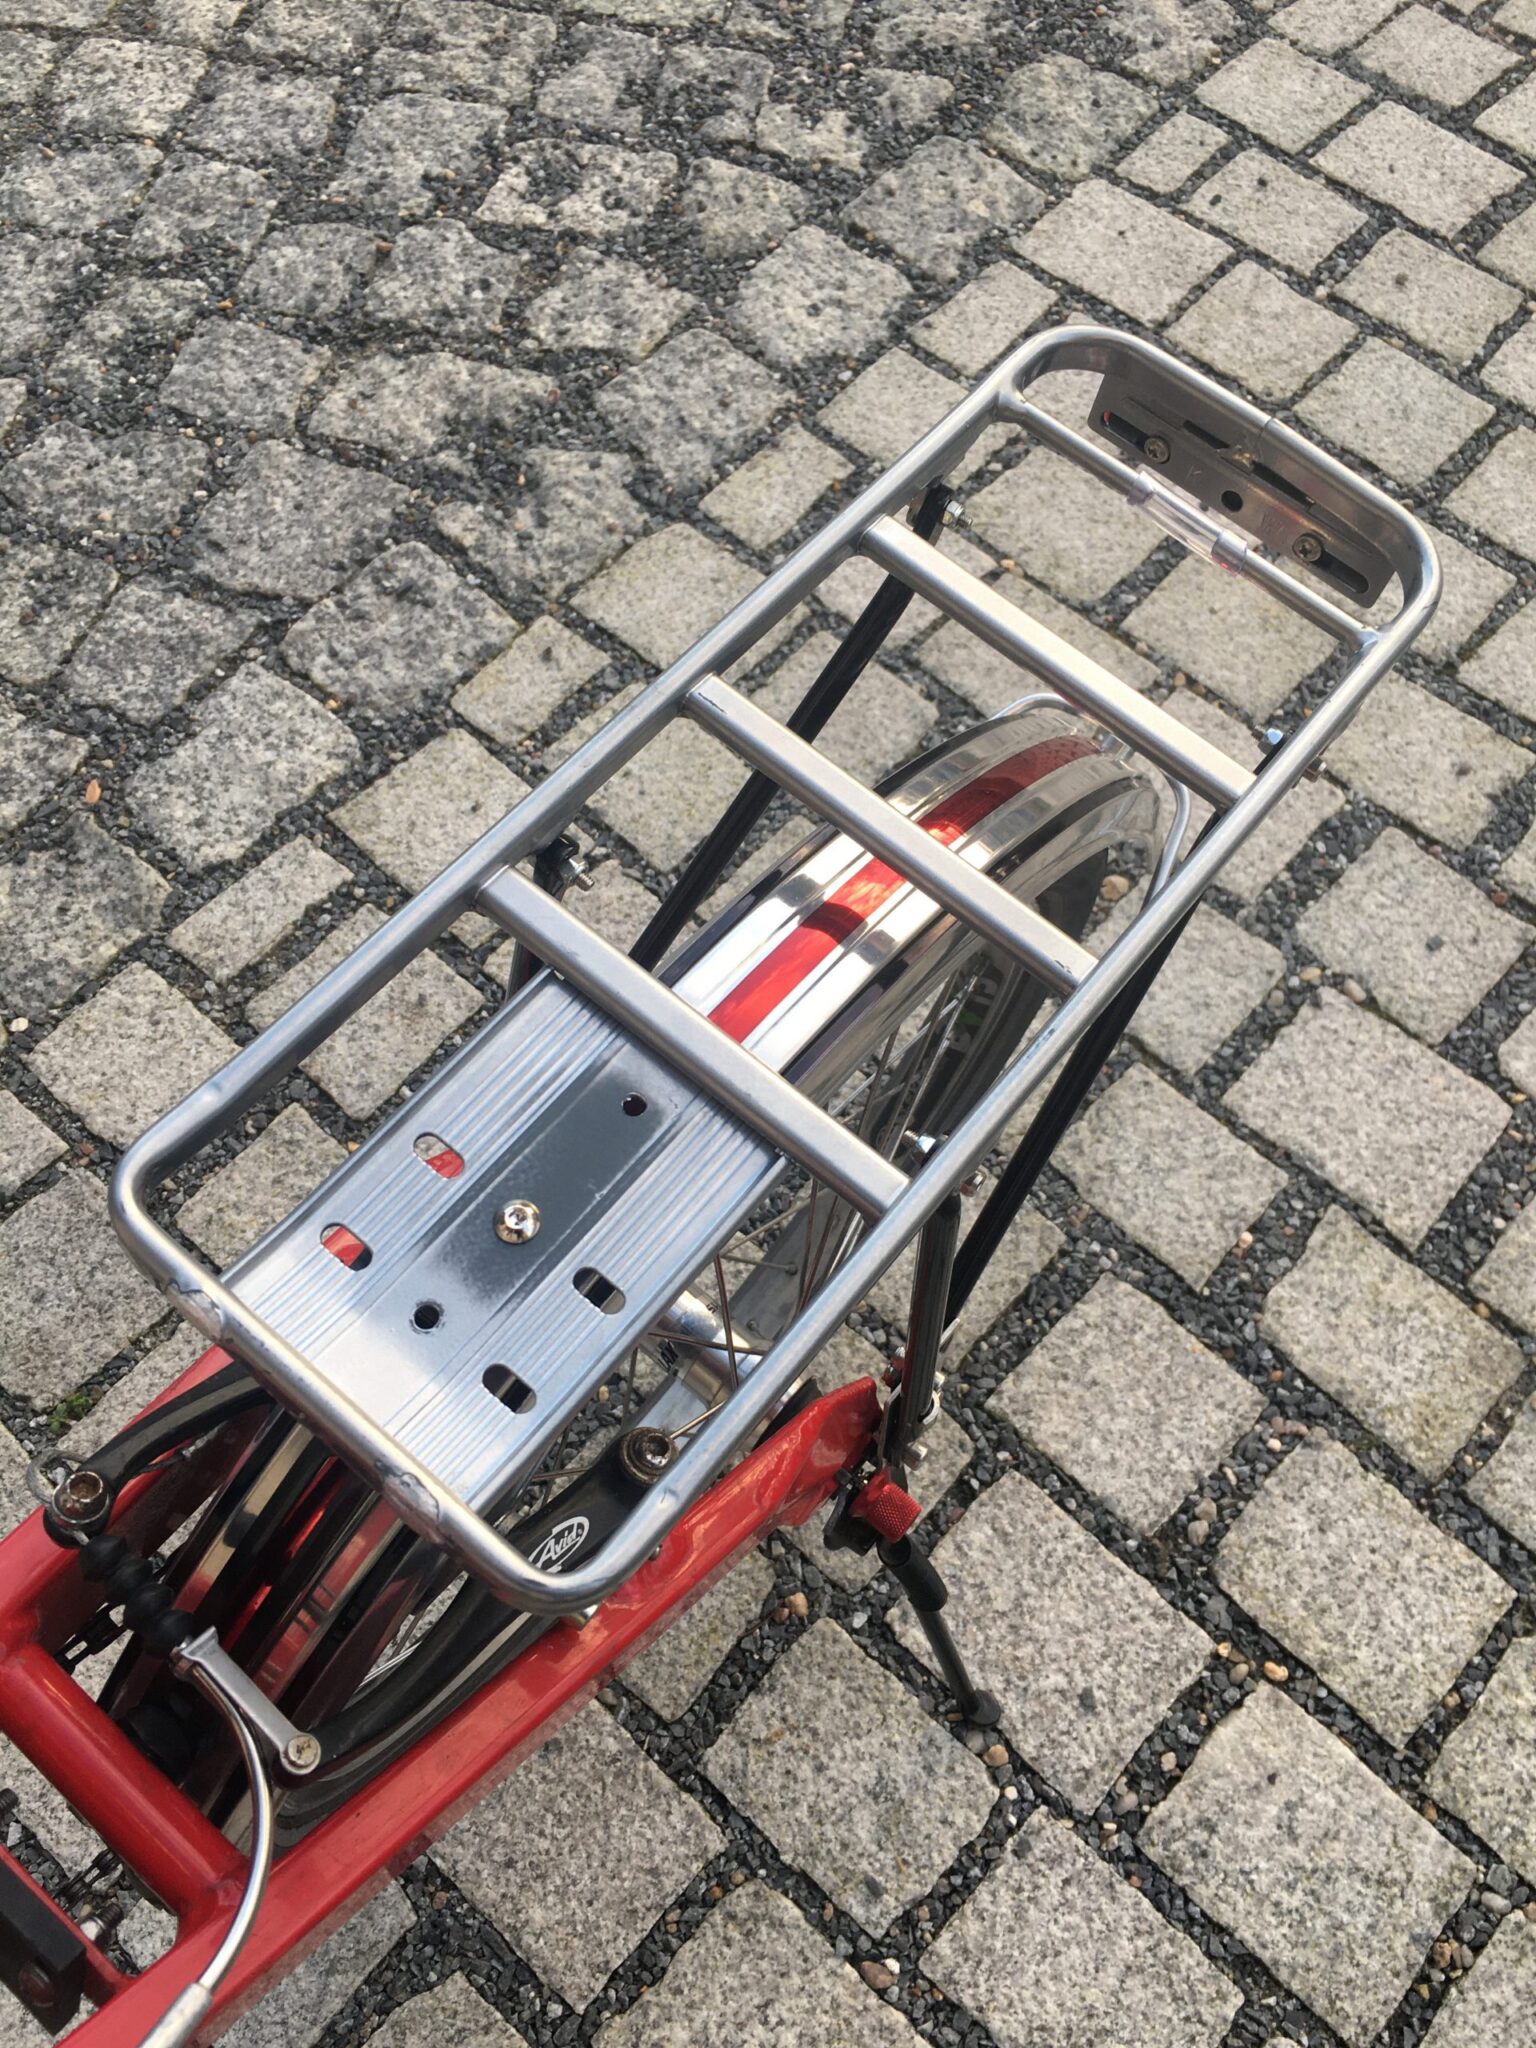
One off the support bars from the Bike-Parts Gepäckträger 16-20" (Schwarz) was rotated 90 degrees and deployed parallel to the mudguard to make sure the luggage rack does not tilt backwards when loaded:
And this is the bottom of the luggage rack - with the wheel arch support also mounted here on the Pletscher plate. The bottom bolt also now secures the kick stand as well, preventing it swivelling as it did before:
And what about the luggage to then mount on the bike?
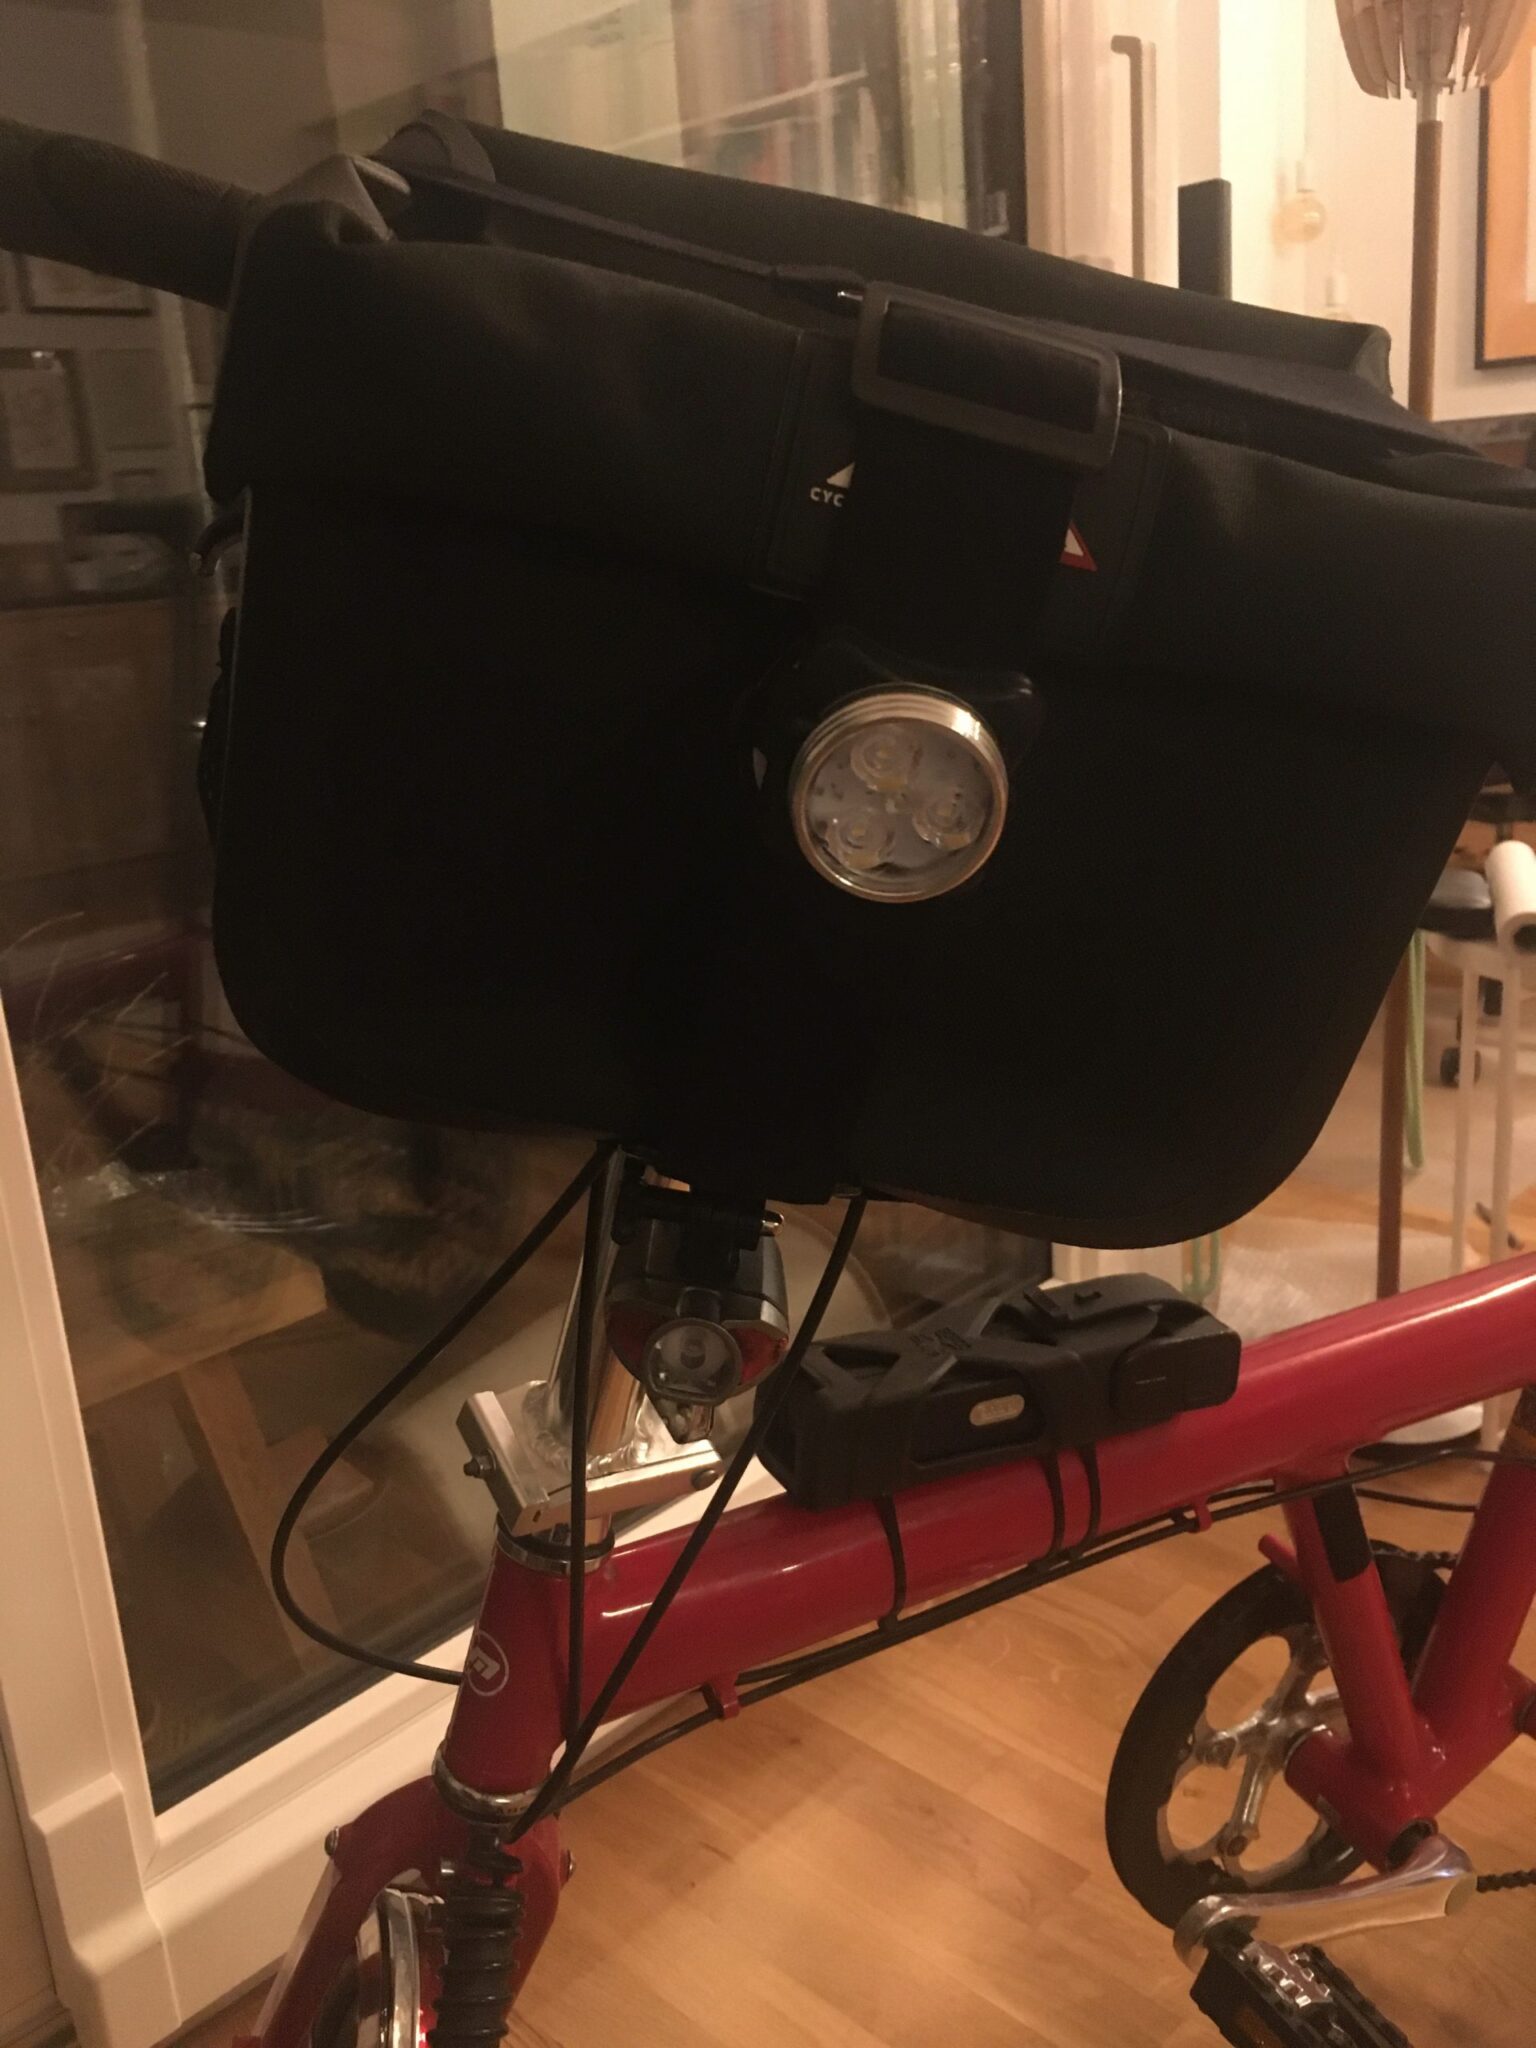
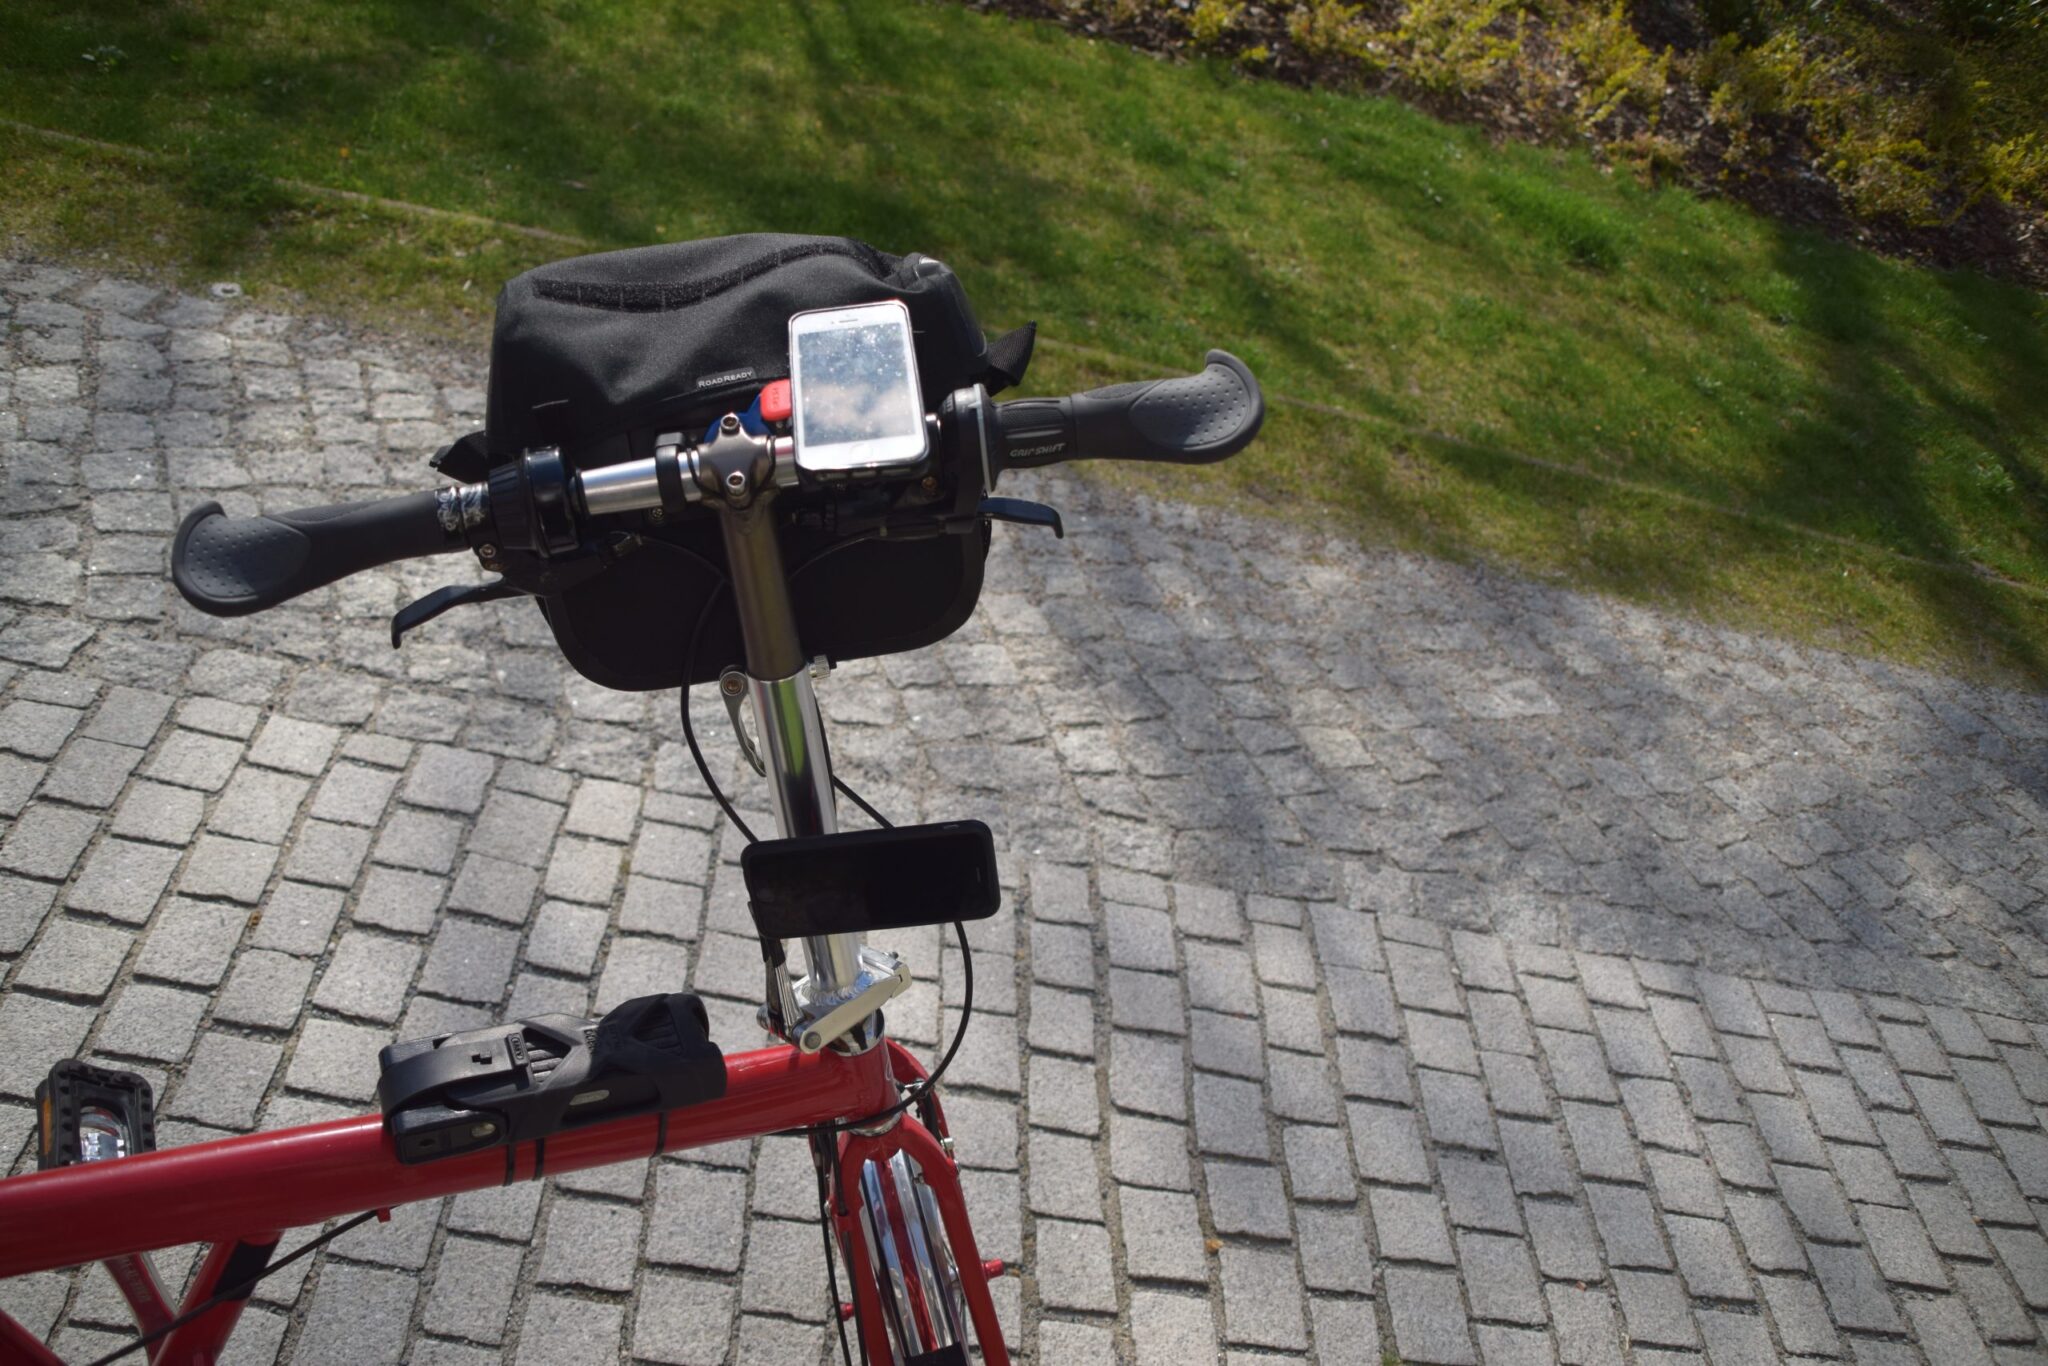
The Decathlon office bag uses an older style twist Klick-fix mount. But I was lucky enough to be able to find an end of line Red Cycling Products WP100 Pro II Handlebar Bag Red (cost €28,48, but no longer available) that fits on the same mount - I will keep camera kit in here on my tour. I have bought some clip-on USB front and back lights (eBay €6.78) and mounted these on an old GoPro mount on the bag:
I had originally planned to mount Vaude Karakorum Pro panniers on the luggage rack, but this proved to be a problem - more on this below!
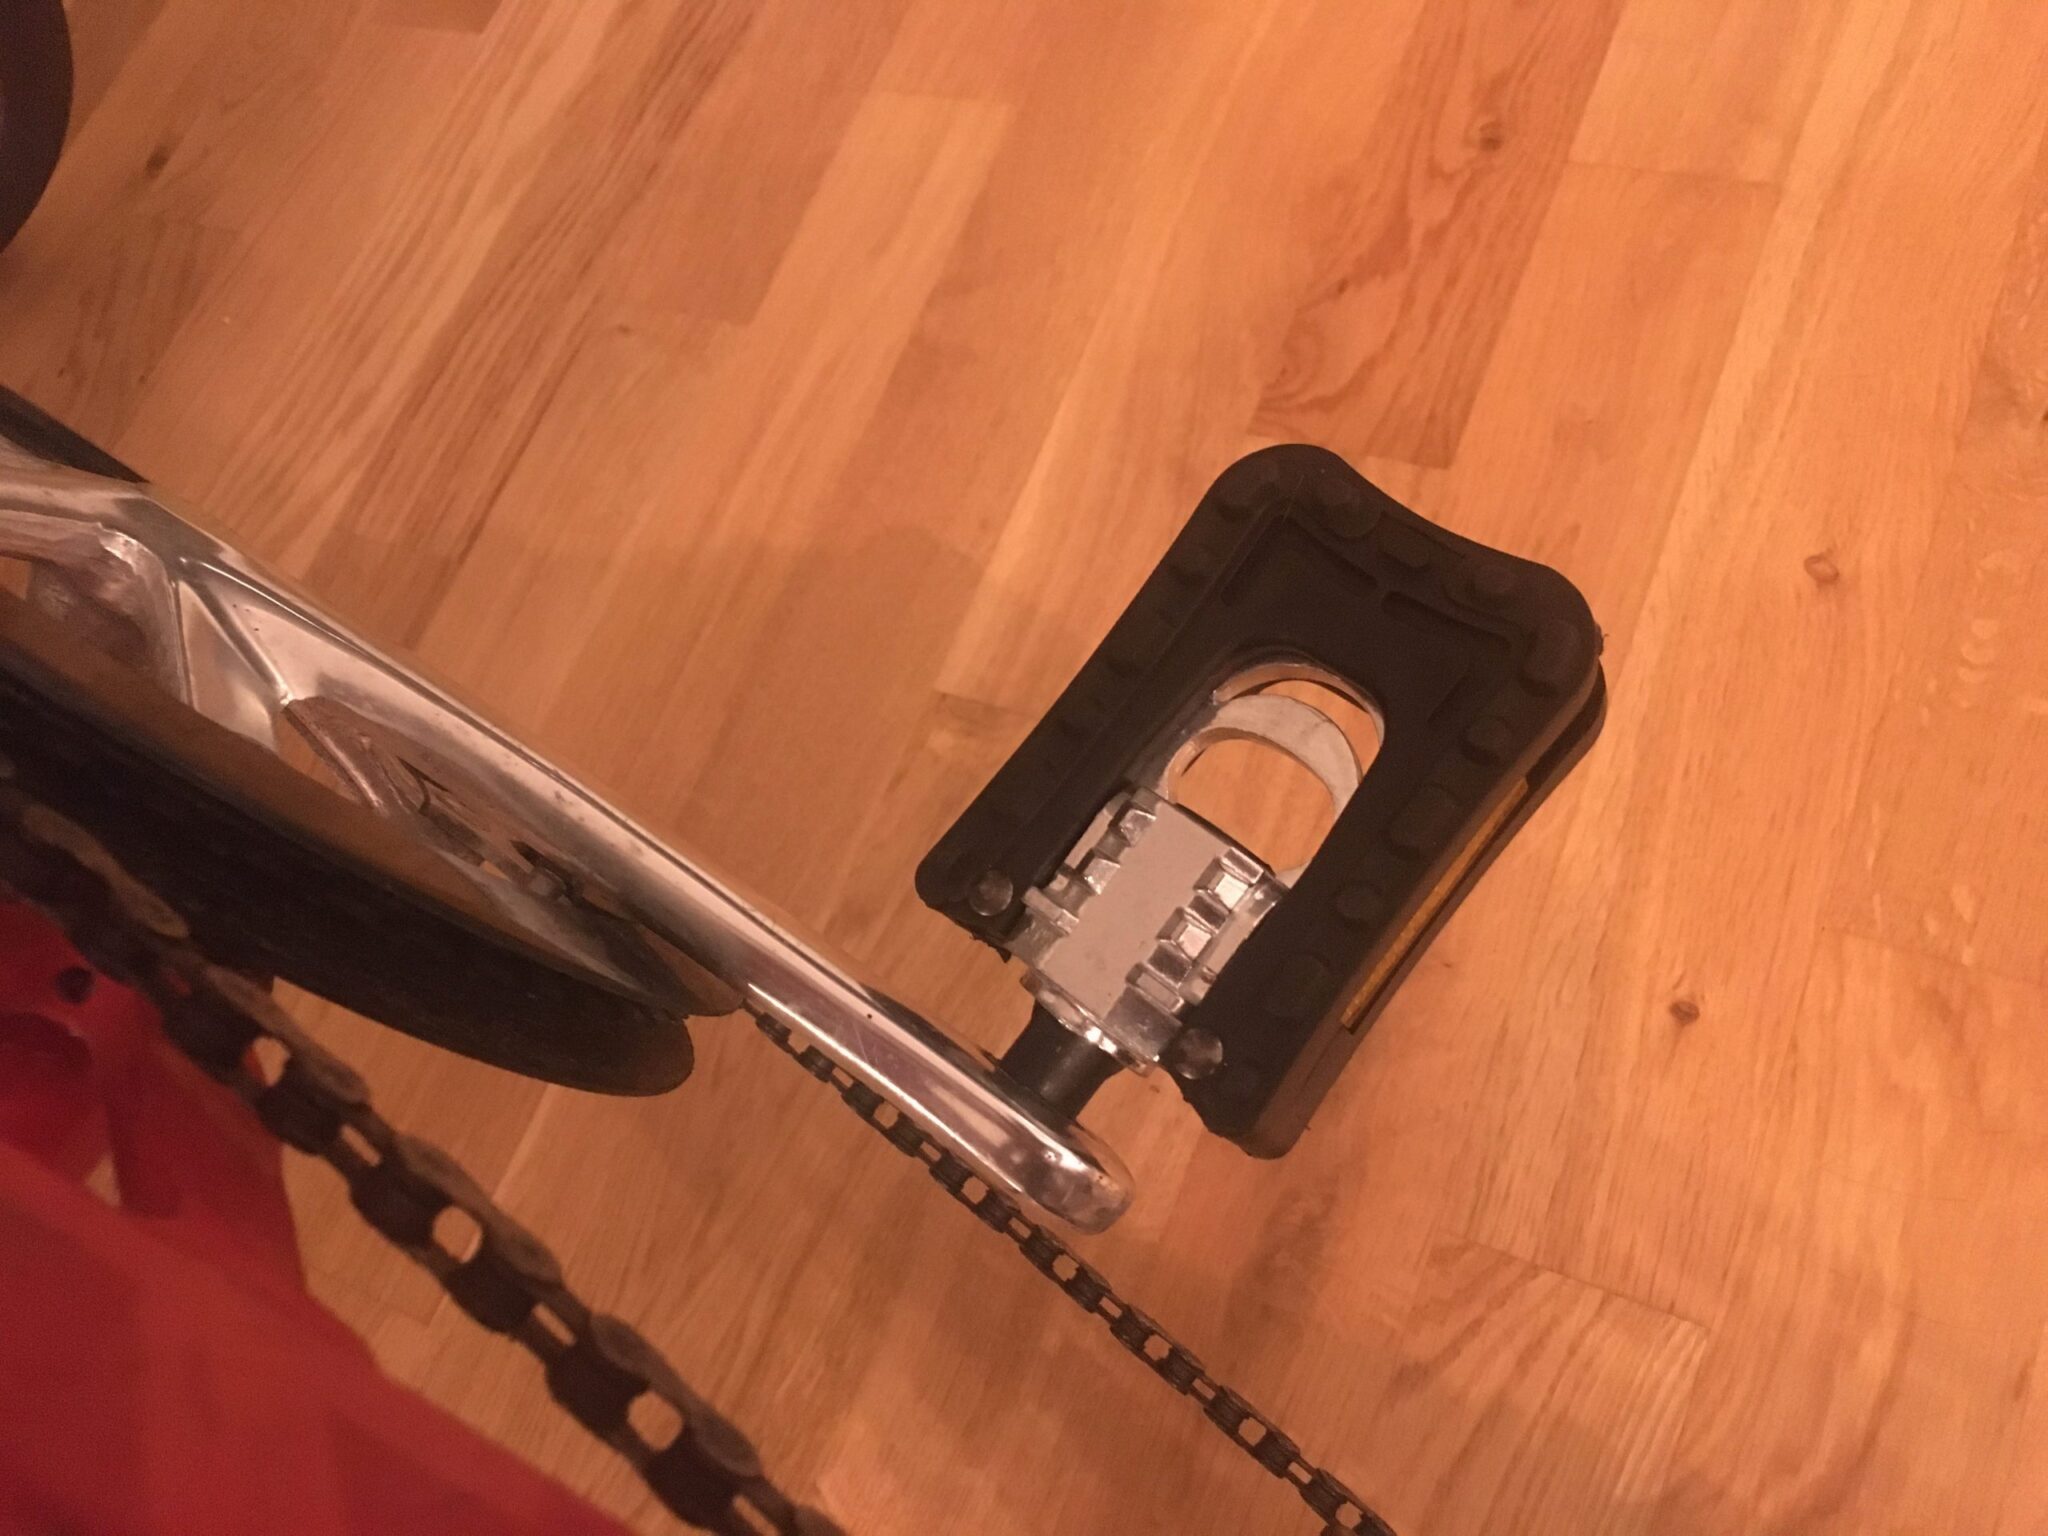
Pedals
I put the Decathlon pedals from the original re-build on my other foldable bike, and wanted something with a more rubberised grip for the Birdy. Messingschlager folding pedals (Fahrrad24 €11,00) were the solution - although I hope the bearings in these loosen up a bit!
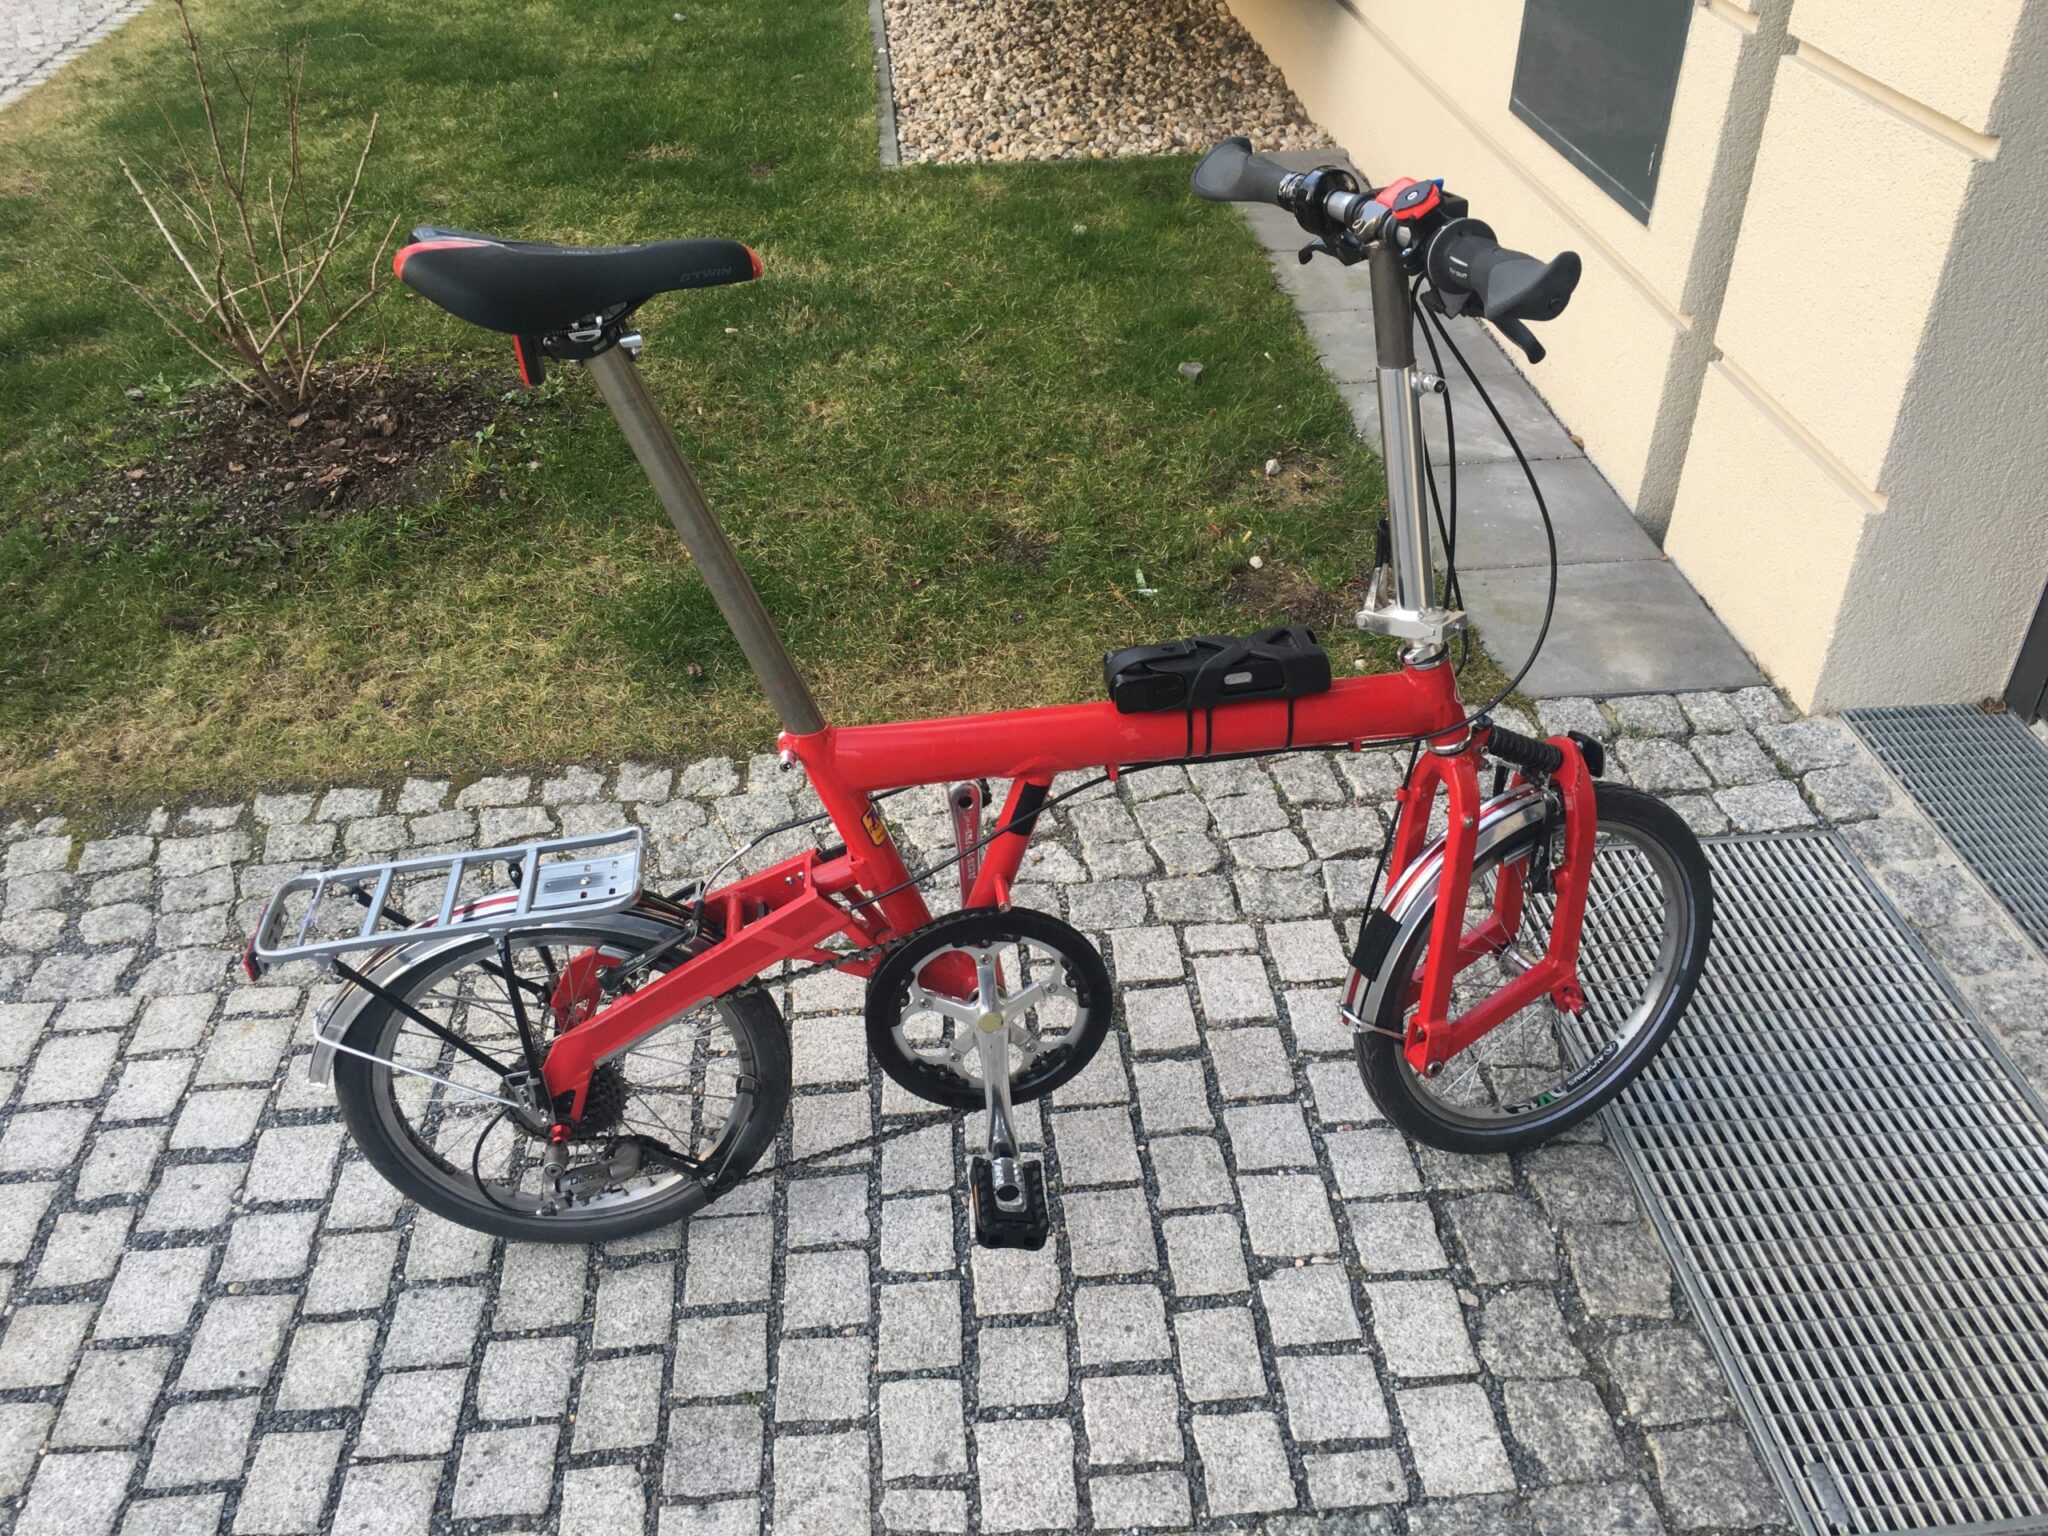
The result
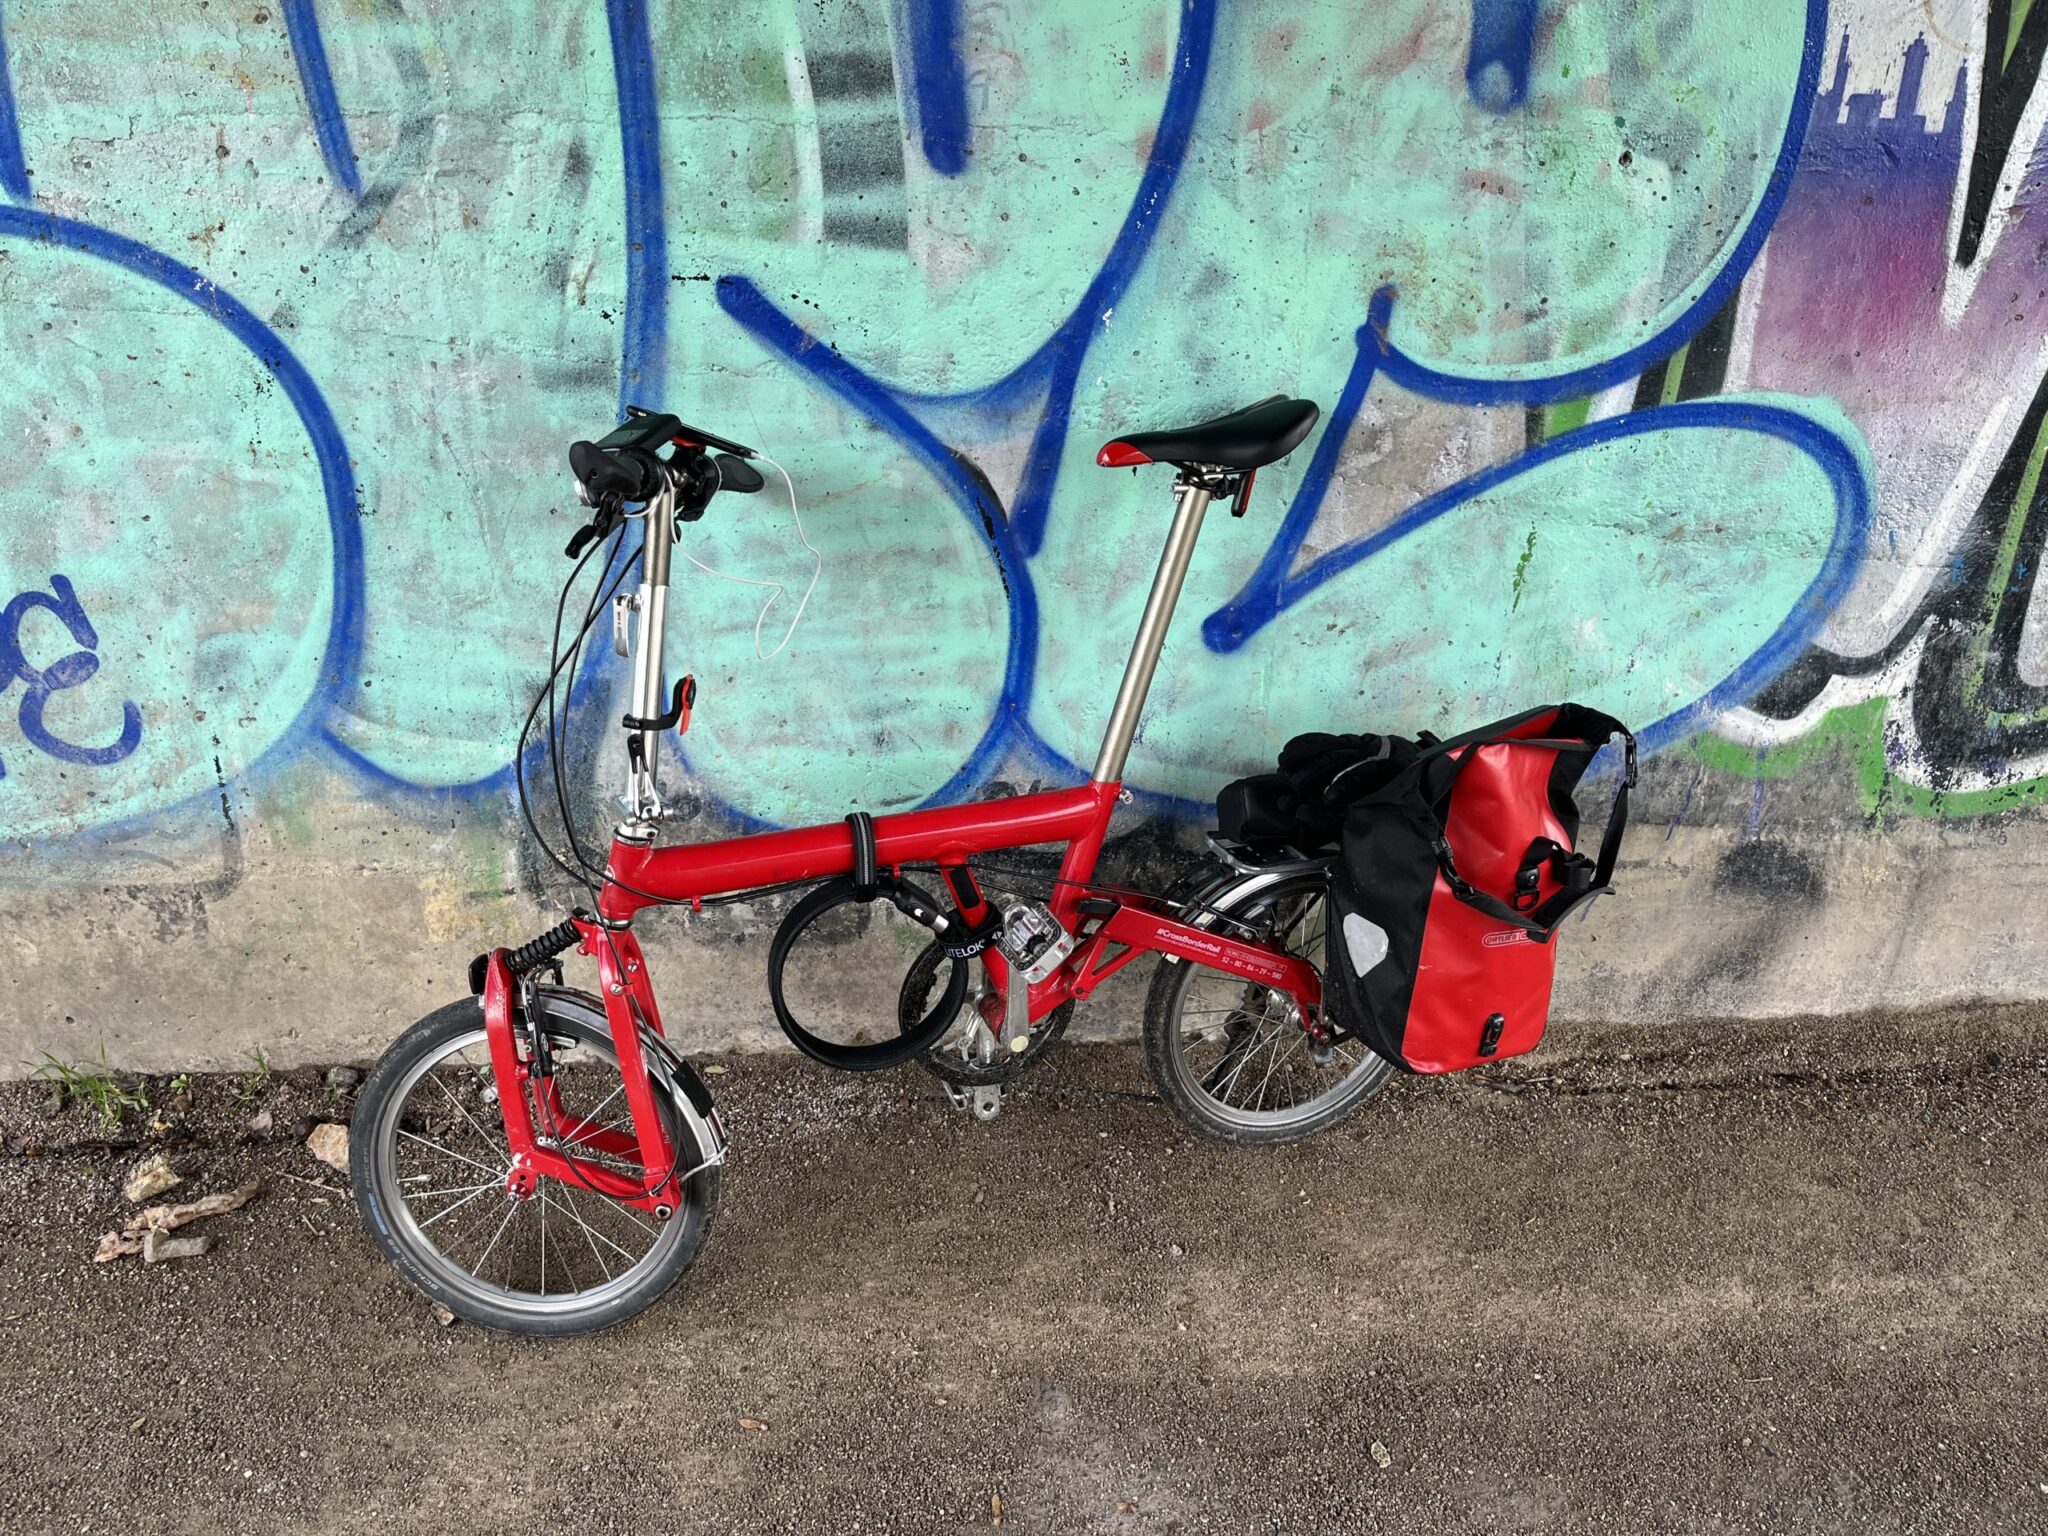
Here is the rebuilt bike - with a Quad Lock compatible mobile phone mount (eBay €13,99) also added, and the USB rear light moved to be mounted under the seat. All the revisions cost approx. 85 Euro, so I am now at a total of 435 Euro - and this is how it all looks:
April 2022 update
The #CrossBorderRail project, and the kit I am going to need to take along for it, has prompted a bit more re-thinking.
The luggage rack mounted in March 2022 is rock solid, but trying to mount Vaude Karakorum Pro panniers on it did not work - as those are about 40cm long - and hence snag on the derailleur. So it was back to the drawing board...
This led me back to Ortlieb - my favourite company for the supply of bike bags. Ortlieb Sport-Roller Classic bags are only 30cm high, and are intended to be used on a rack on the front fork. Even those proved to be too long for the Birdy rack on the back - as you can see on the left here:
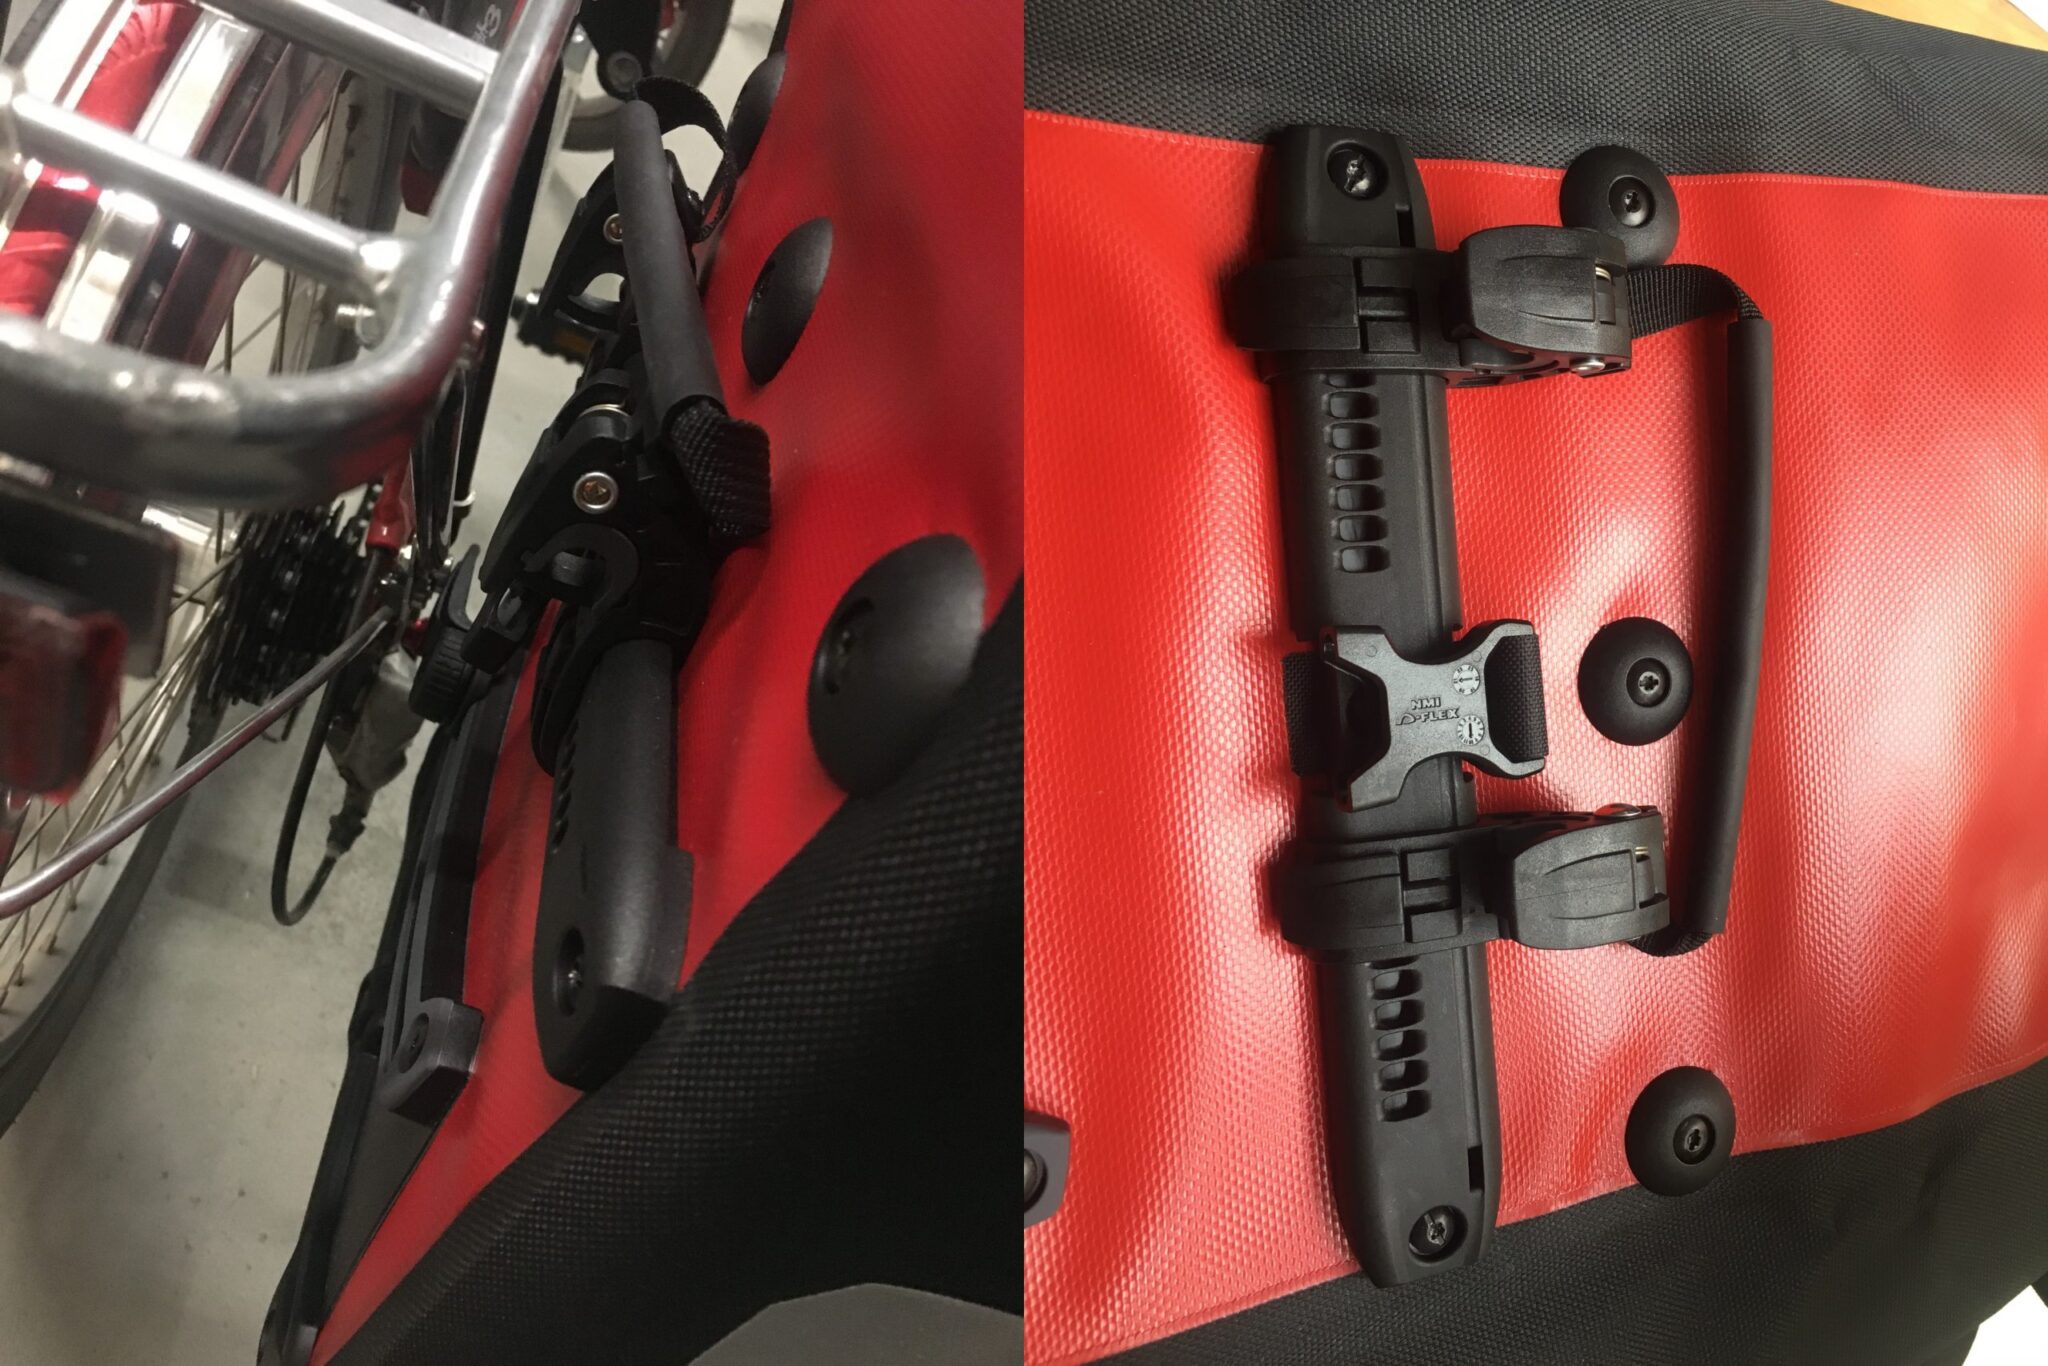
The solution was to drill three extra holes in the panniers, and move the Quick-Lock2.1 mount down by 6.5cm. The extra holes were then filled with the stoppers as shown on the right picture - supplied for €0,99 inc. the screws each from the Ortlieb replacement parts shop (these stoppers are standard on some other Ortlieb bags, hence how I knew the system).
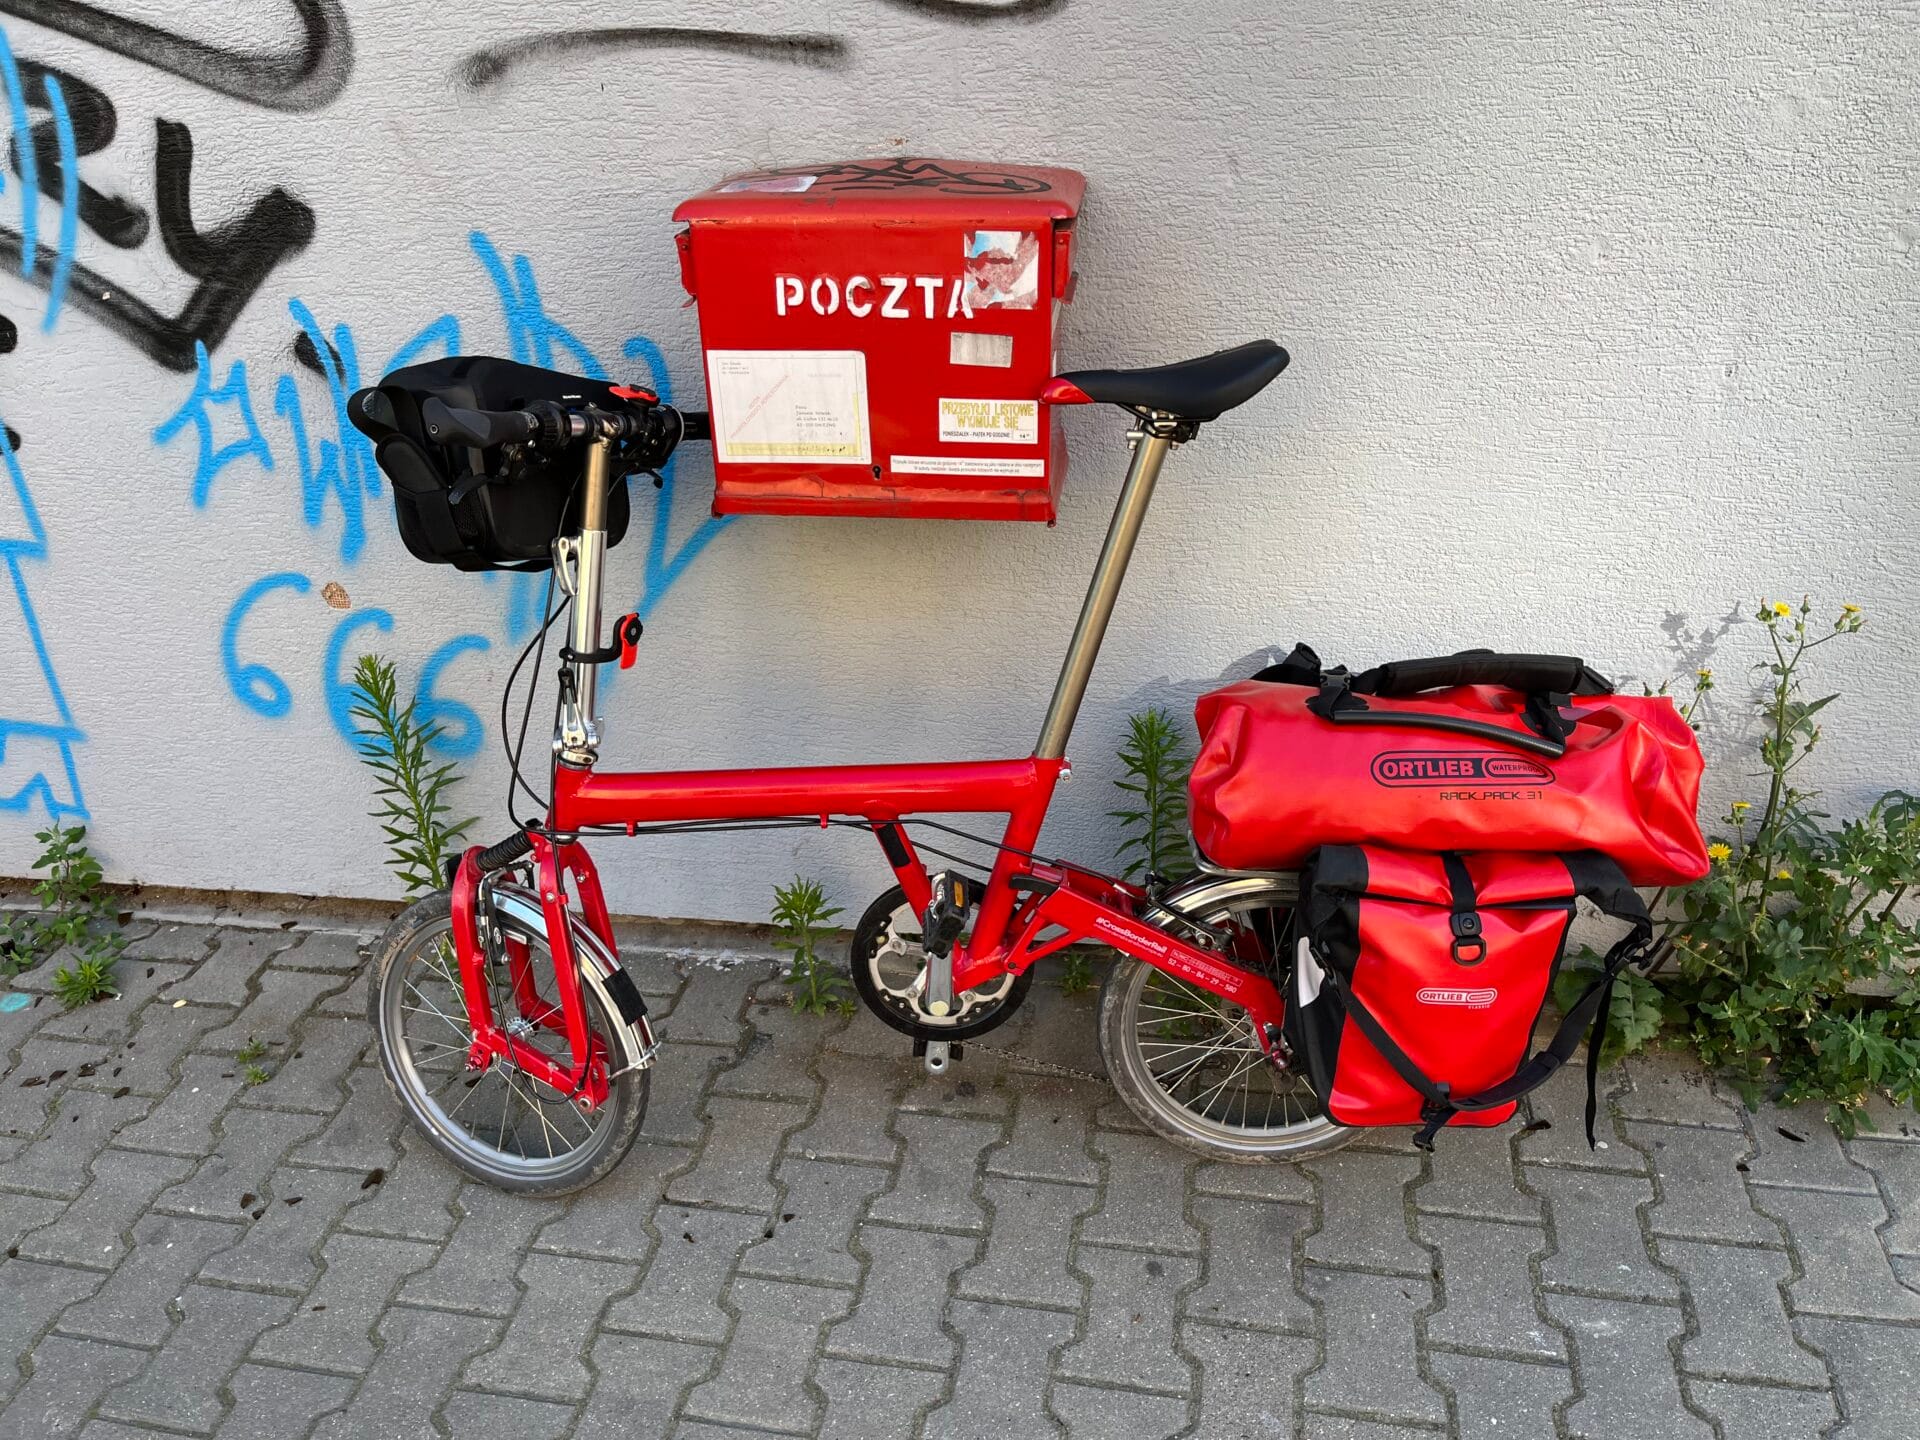
In terms of total volume the two small Sport-Roller Classic bags are not going to be enough, so I then added a 31 litre Ortlieb Rack-Pack on top, longitudinally, and bound this on with some bungee cords. The whole setup looks like this:
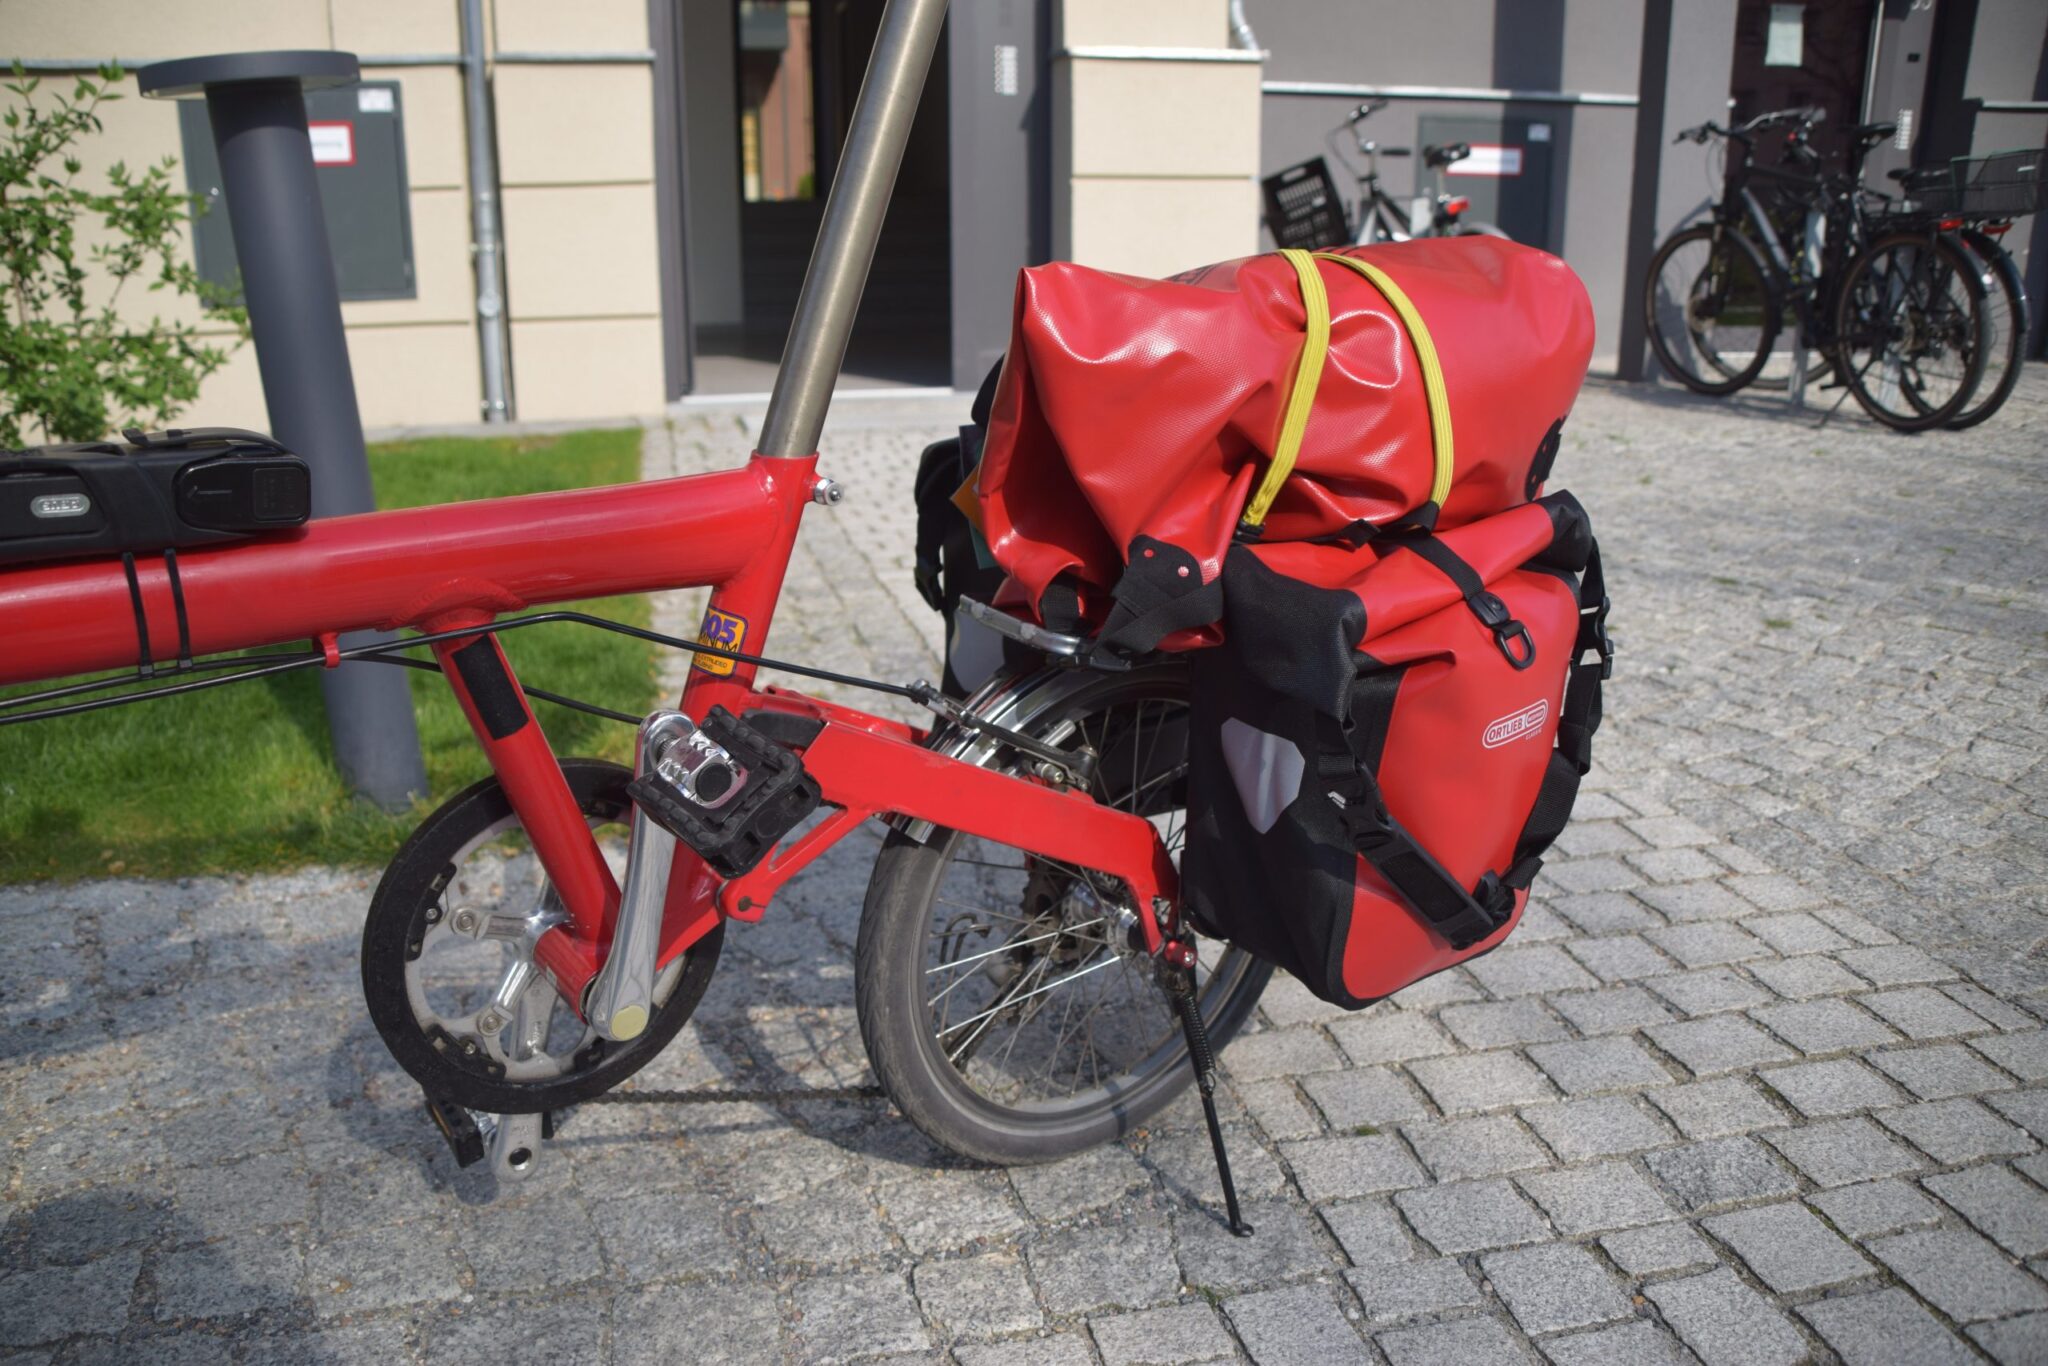
And there was then one further addition: Quad Lock mounts. I have one on the handlebars for navigation (with an old iPhone) and one on the step (for when I want forward facing video when I am cycling) - it looks like this:
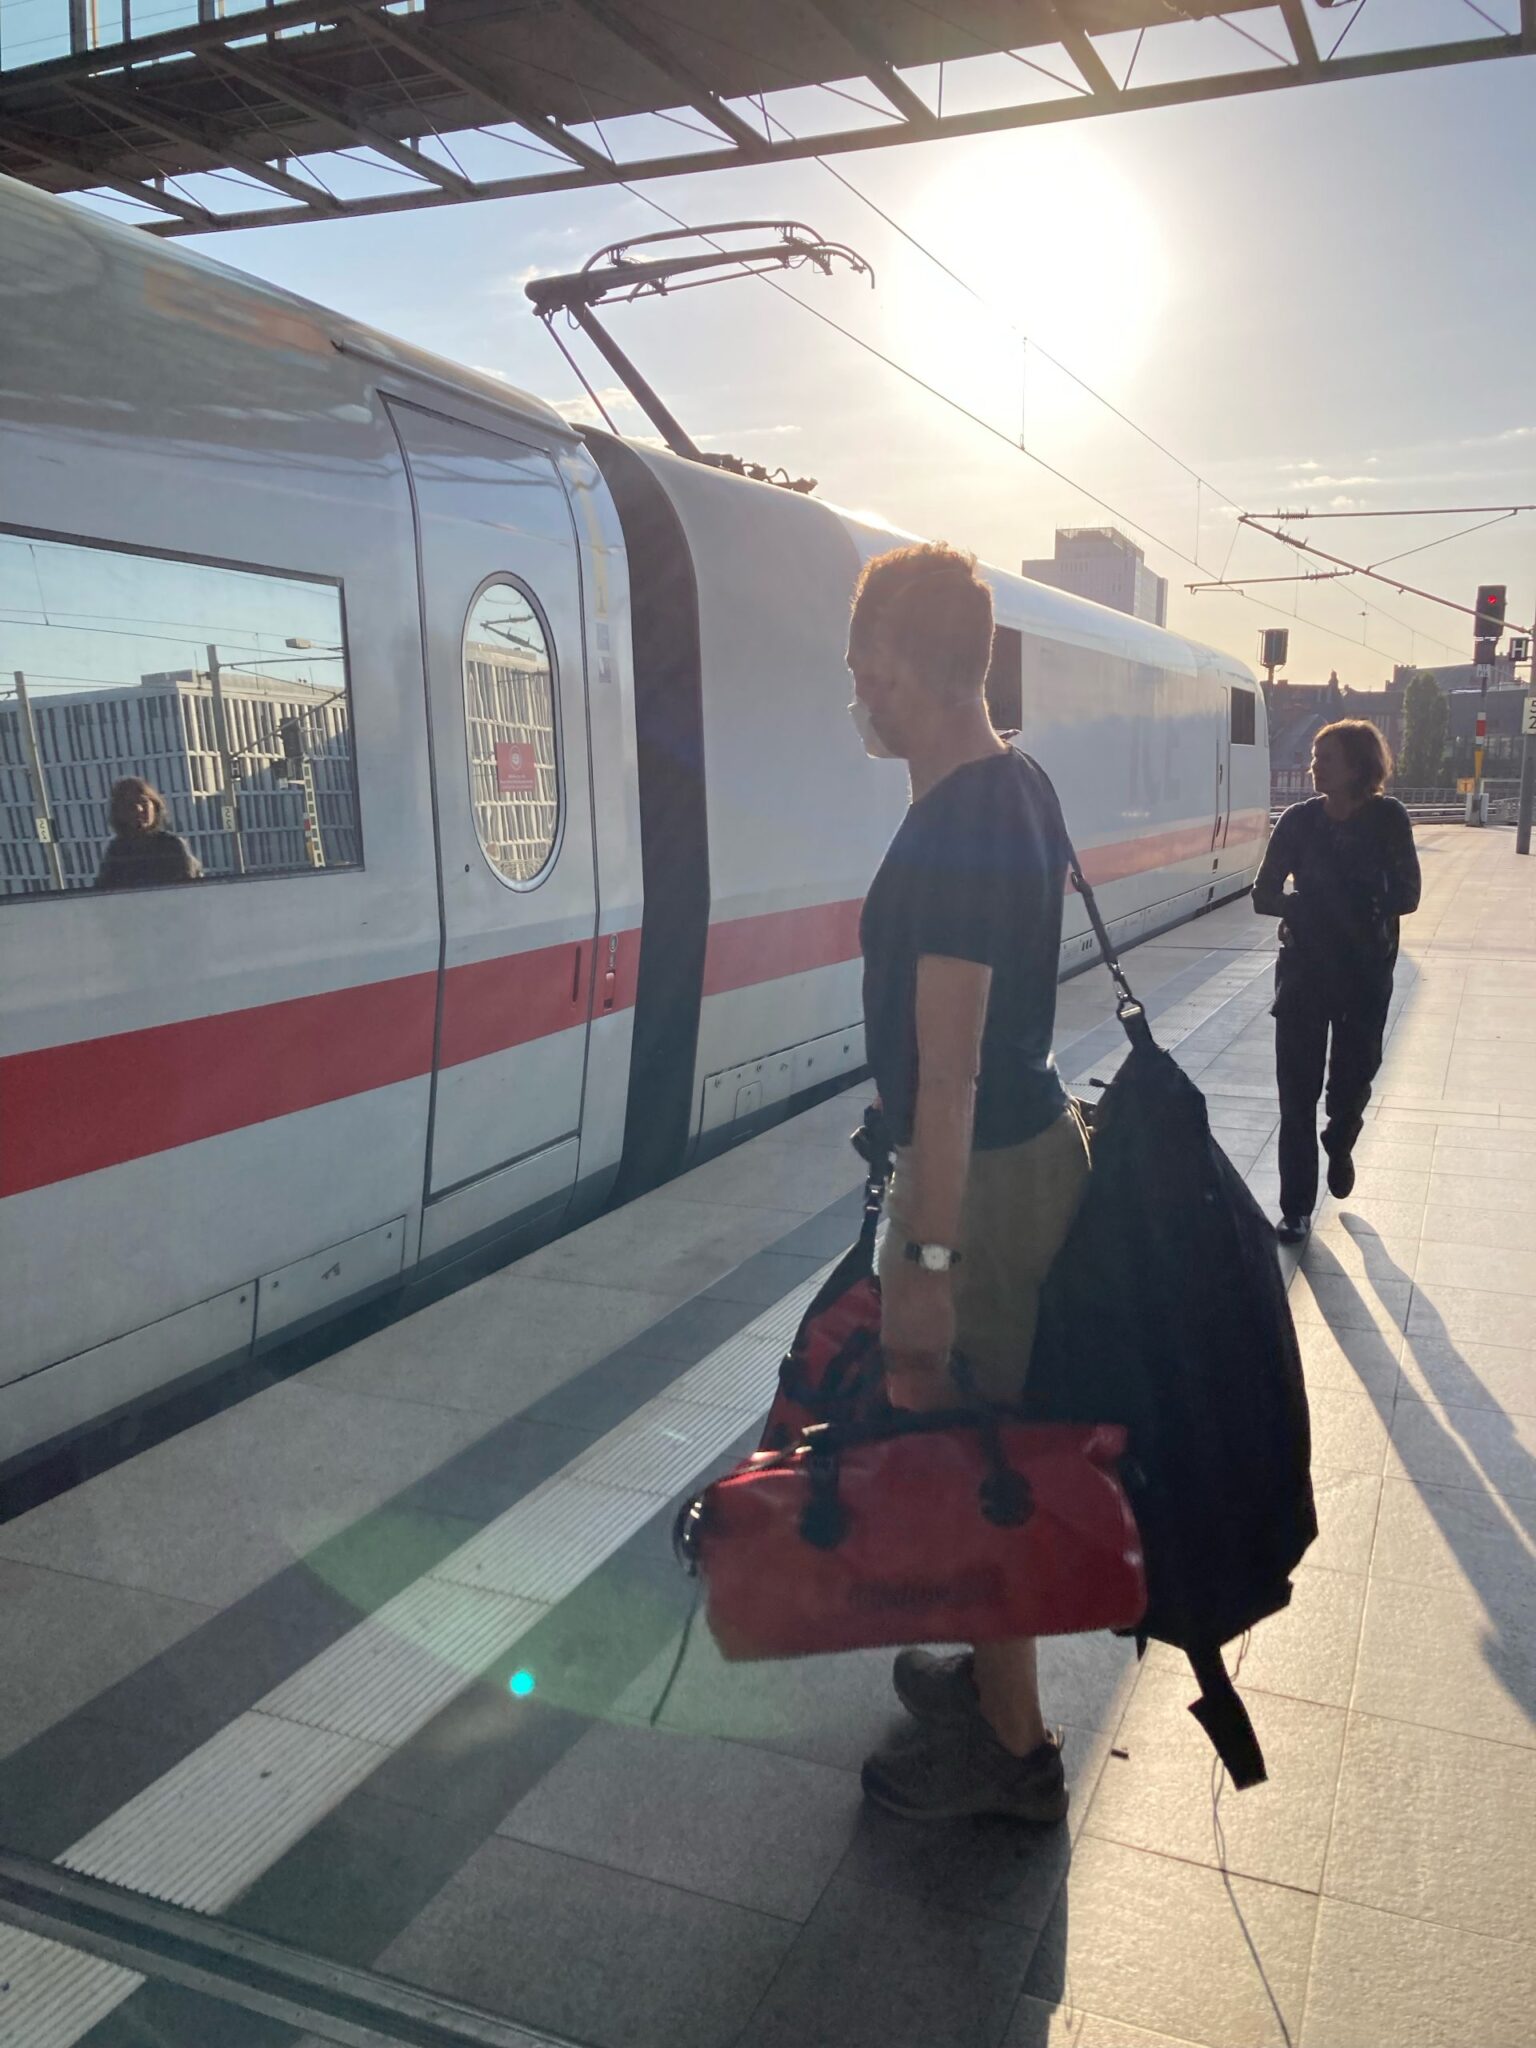
January 2023 updateI cycled more than 800km on the Birdy during my #CrossBorderRail project this summer, and that understandably put some strain on the bike!
Since writing the original post I have long abandoned using the original Birdy rucksack / cover, and have replaced it with a Tern Carry On Cover (€44,95 on eBay). This works in a different way to other covers - there are two straps you fix onto the bike frame, and these are connected to the shoulder strap. The cover over the bike itself is very thin, and just keeps the muck off you - the cover takes none of the weight. And that means the cover folds down super small (it has an integrated bag). It works very well, and I can highly recommend it over any other cover I have tried. Here I am at Berlin Hbf with it.
And then to changes to the bike itself...
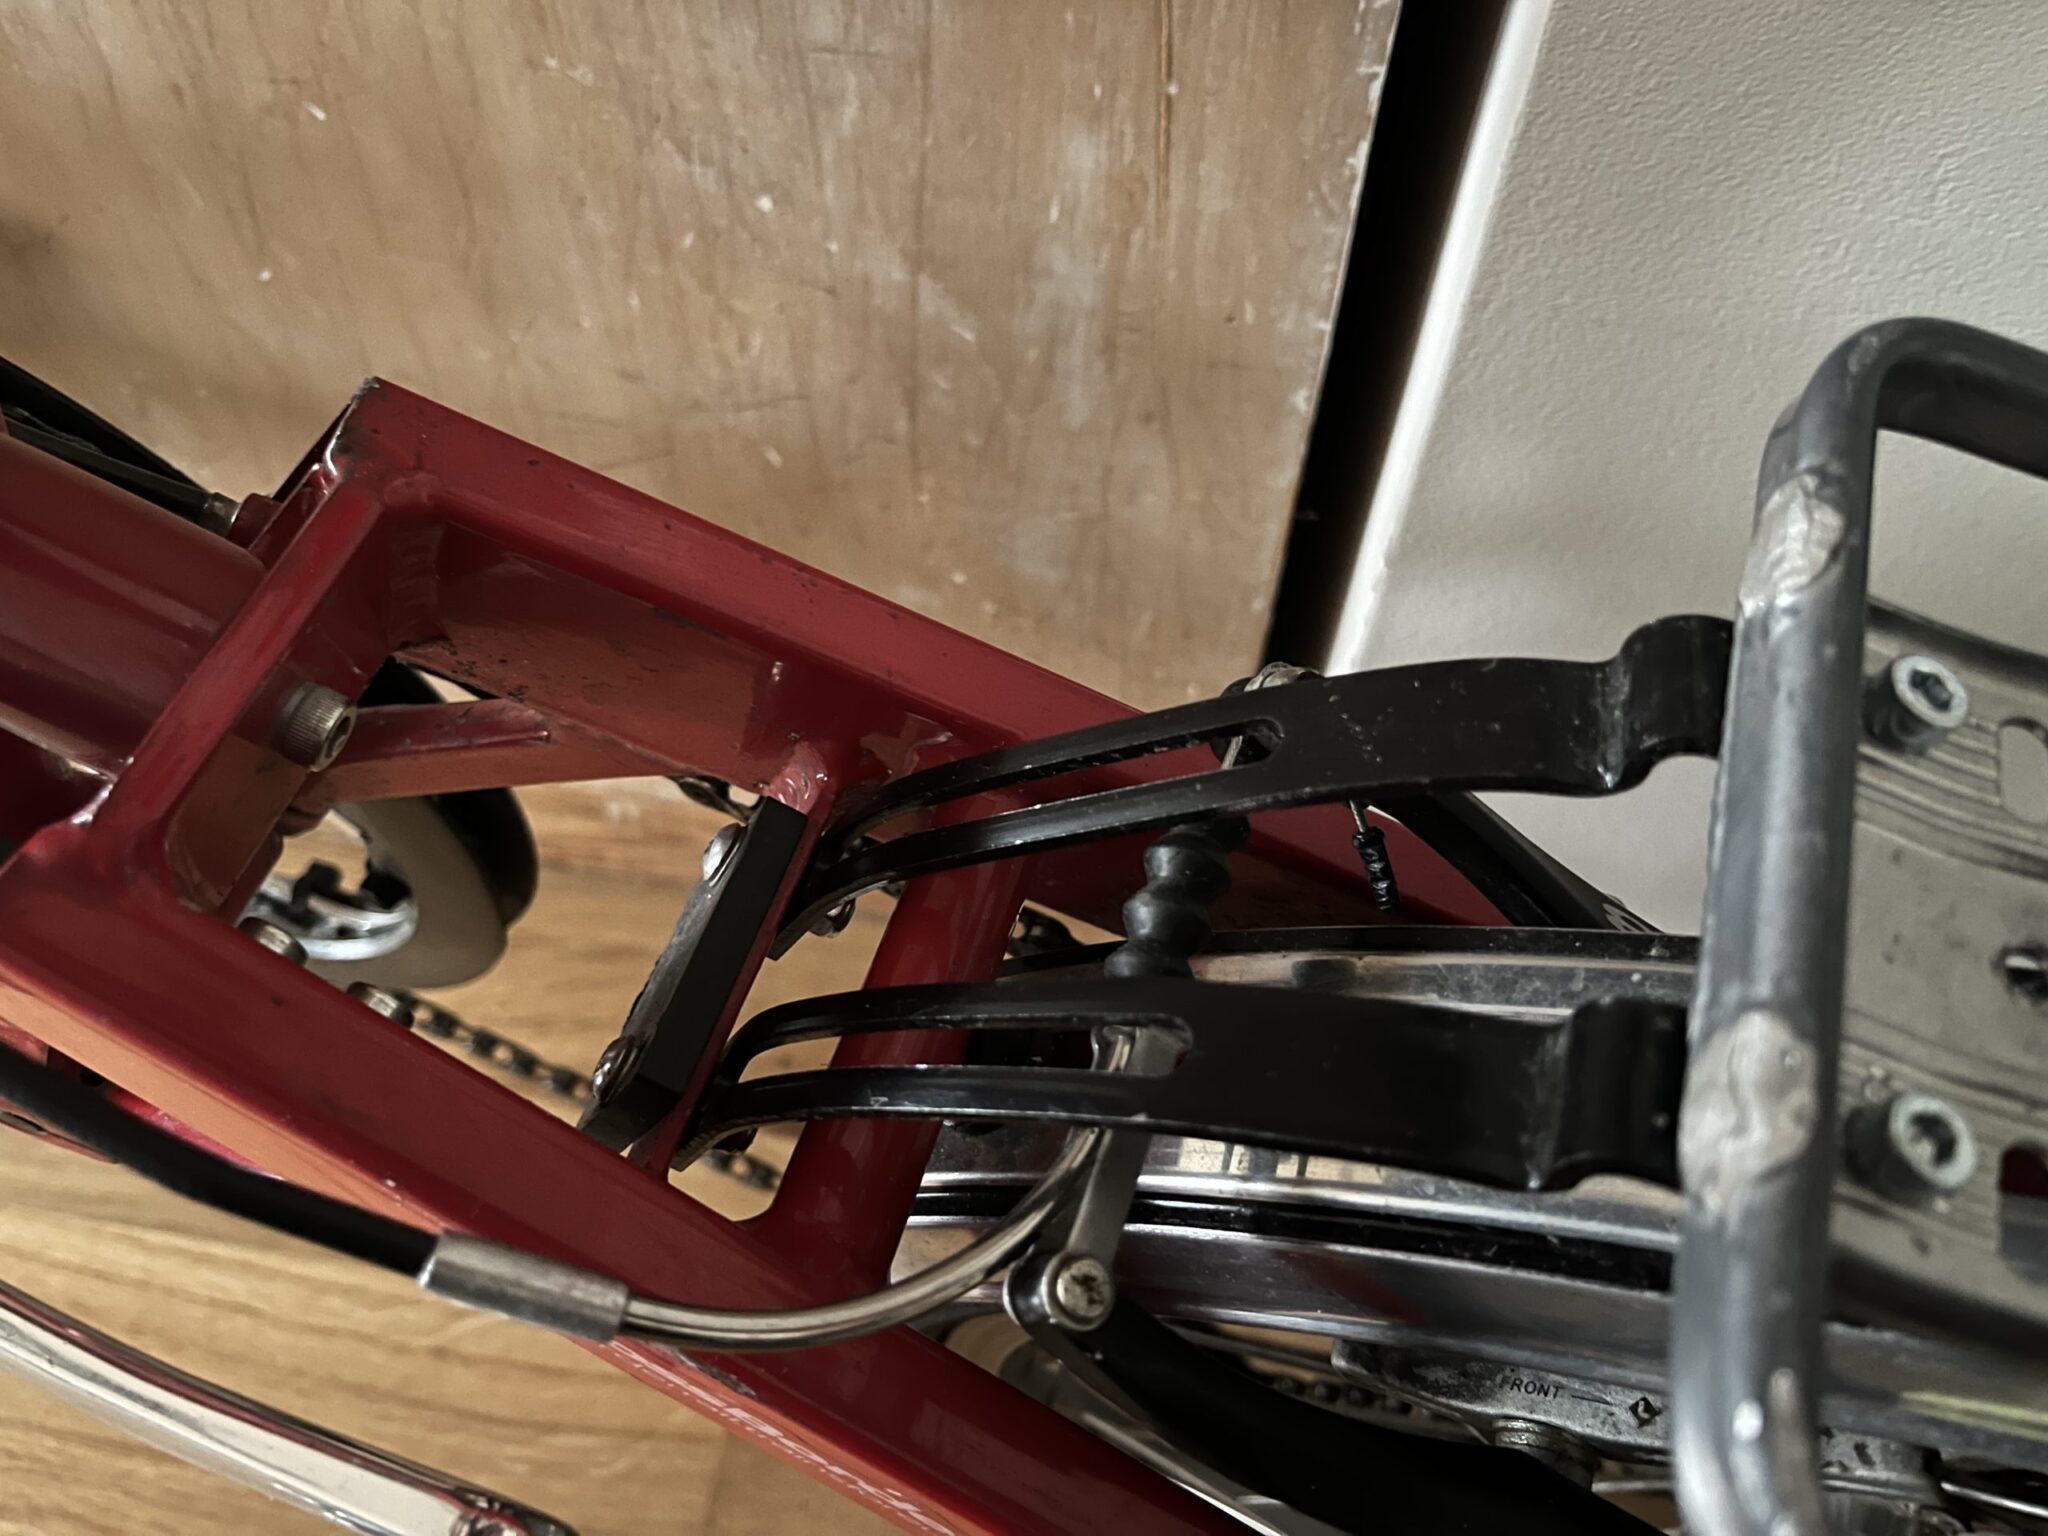
First, the luggage rack began to wobble due to the single mounting strut above the mudguard (see above), so this was replaced with dual struts connected to the part of the frame where the seat post goes when the bike is folded. This design is rock solid.
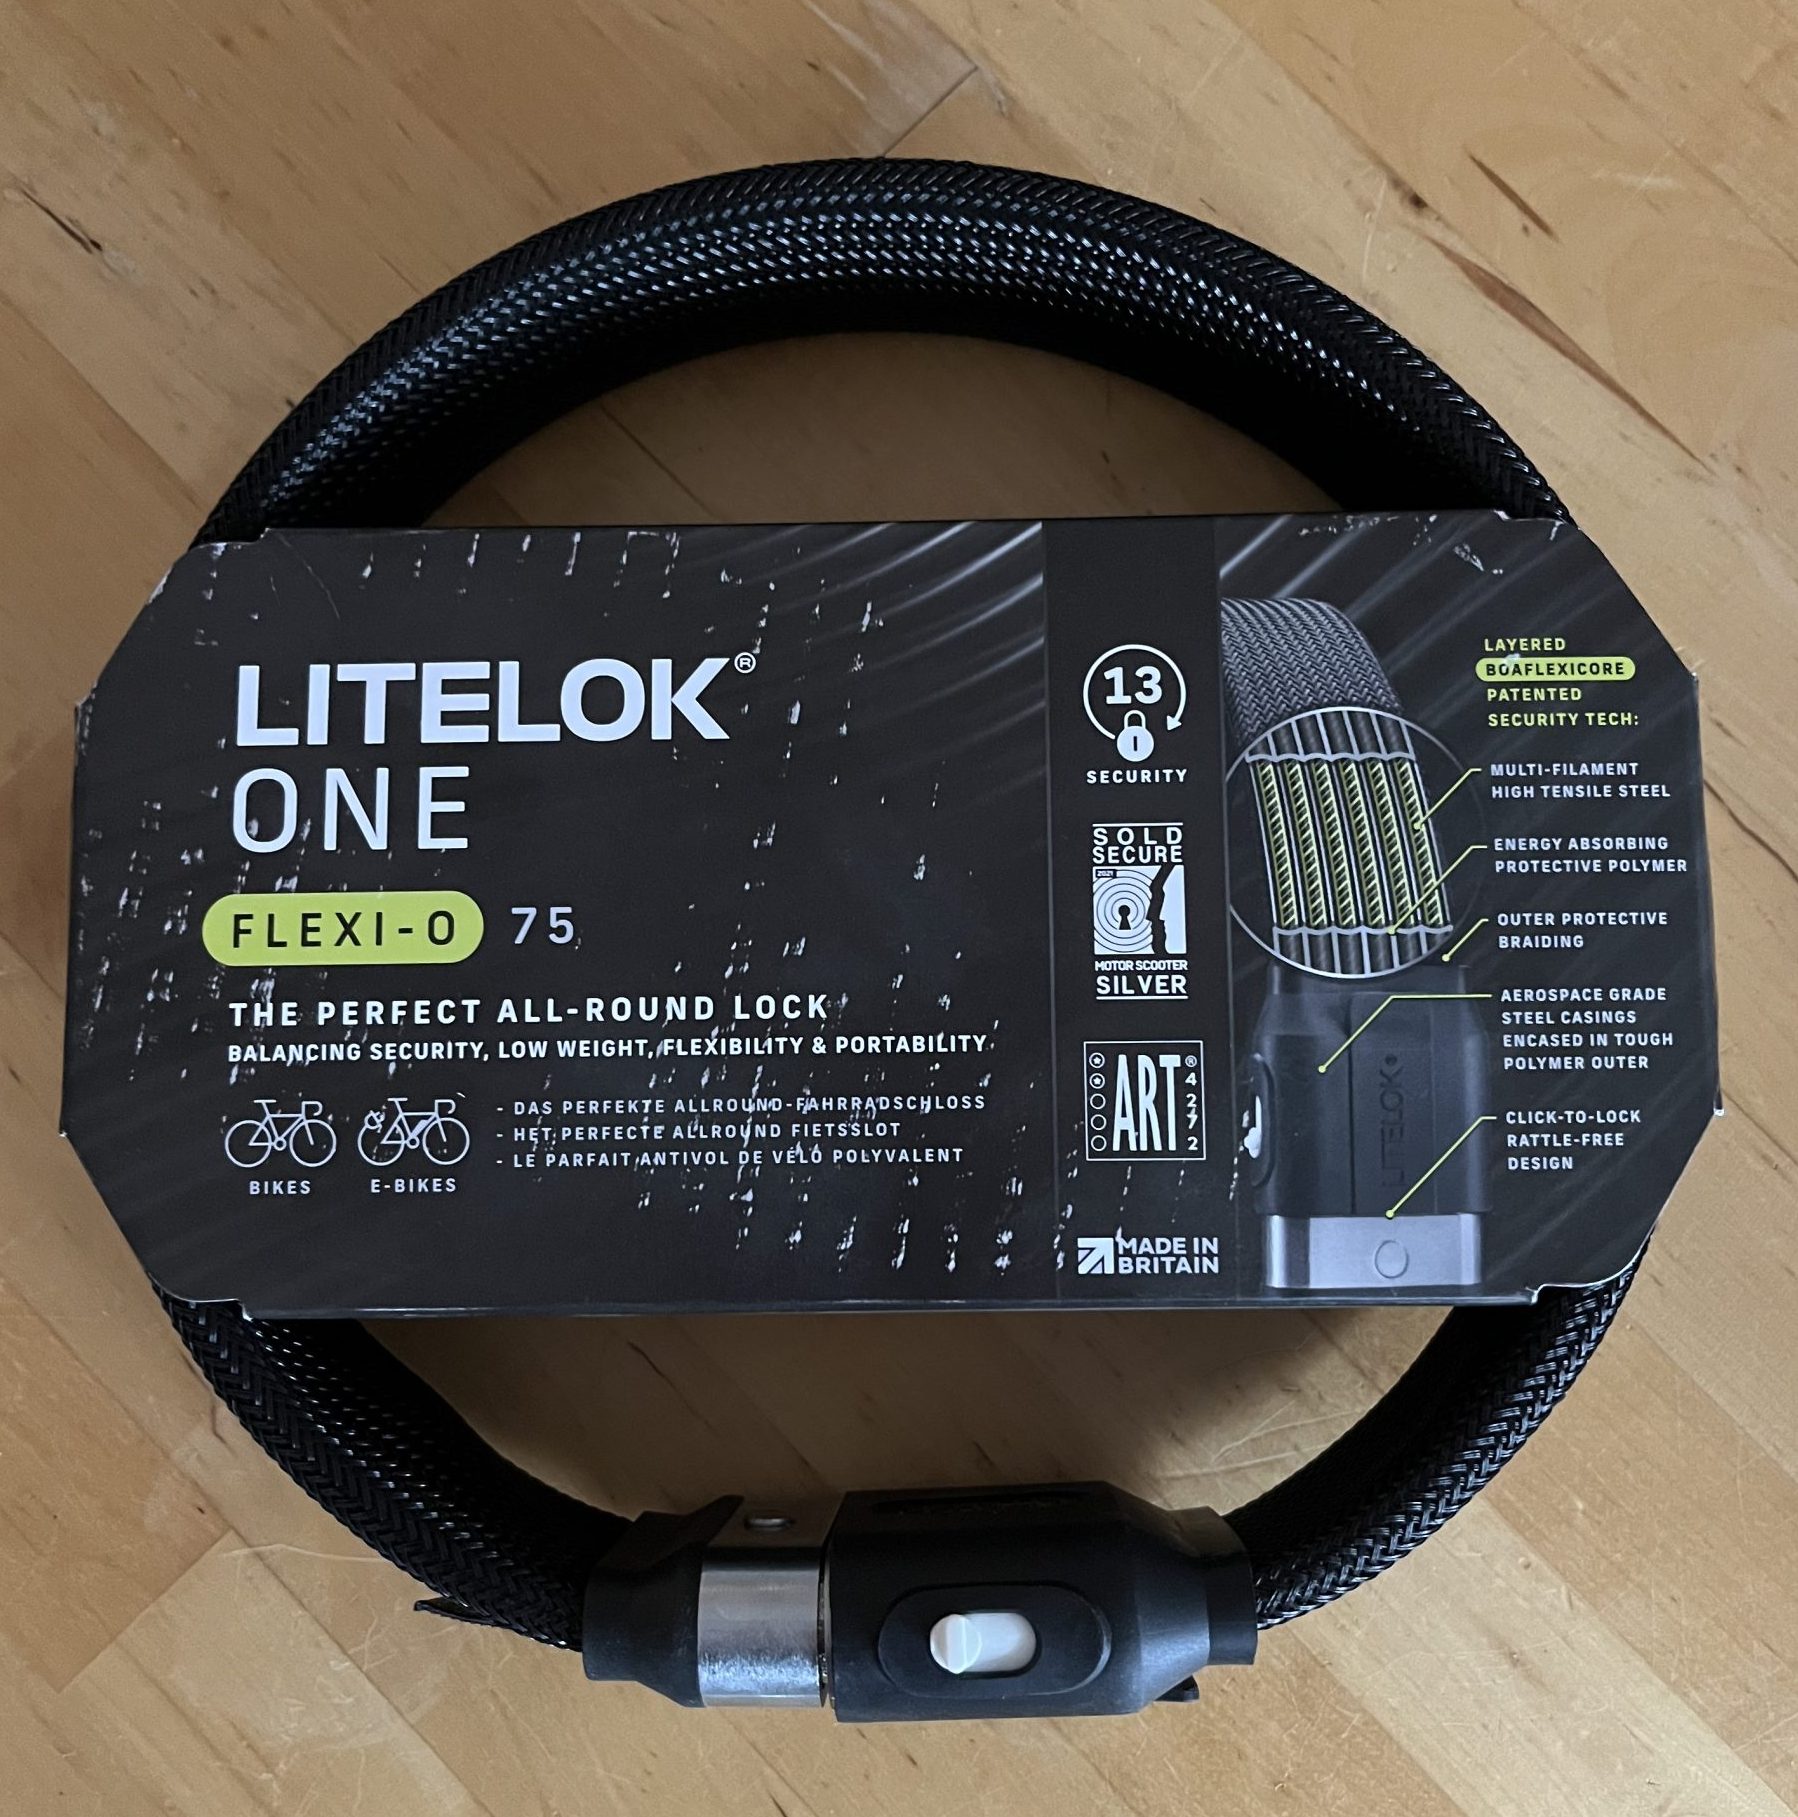
Second, the Abus Bordo lock proved to be really annoying. Sure, it folds small, but I always get it snagged on things when locking the bike with it. So I sold it, and replaced it with a Litelok One - 500g lighter, and much nicer to use. This is mounted below the frame, and hung over the saddle when the bike is folded. It works very well so far!
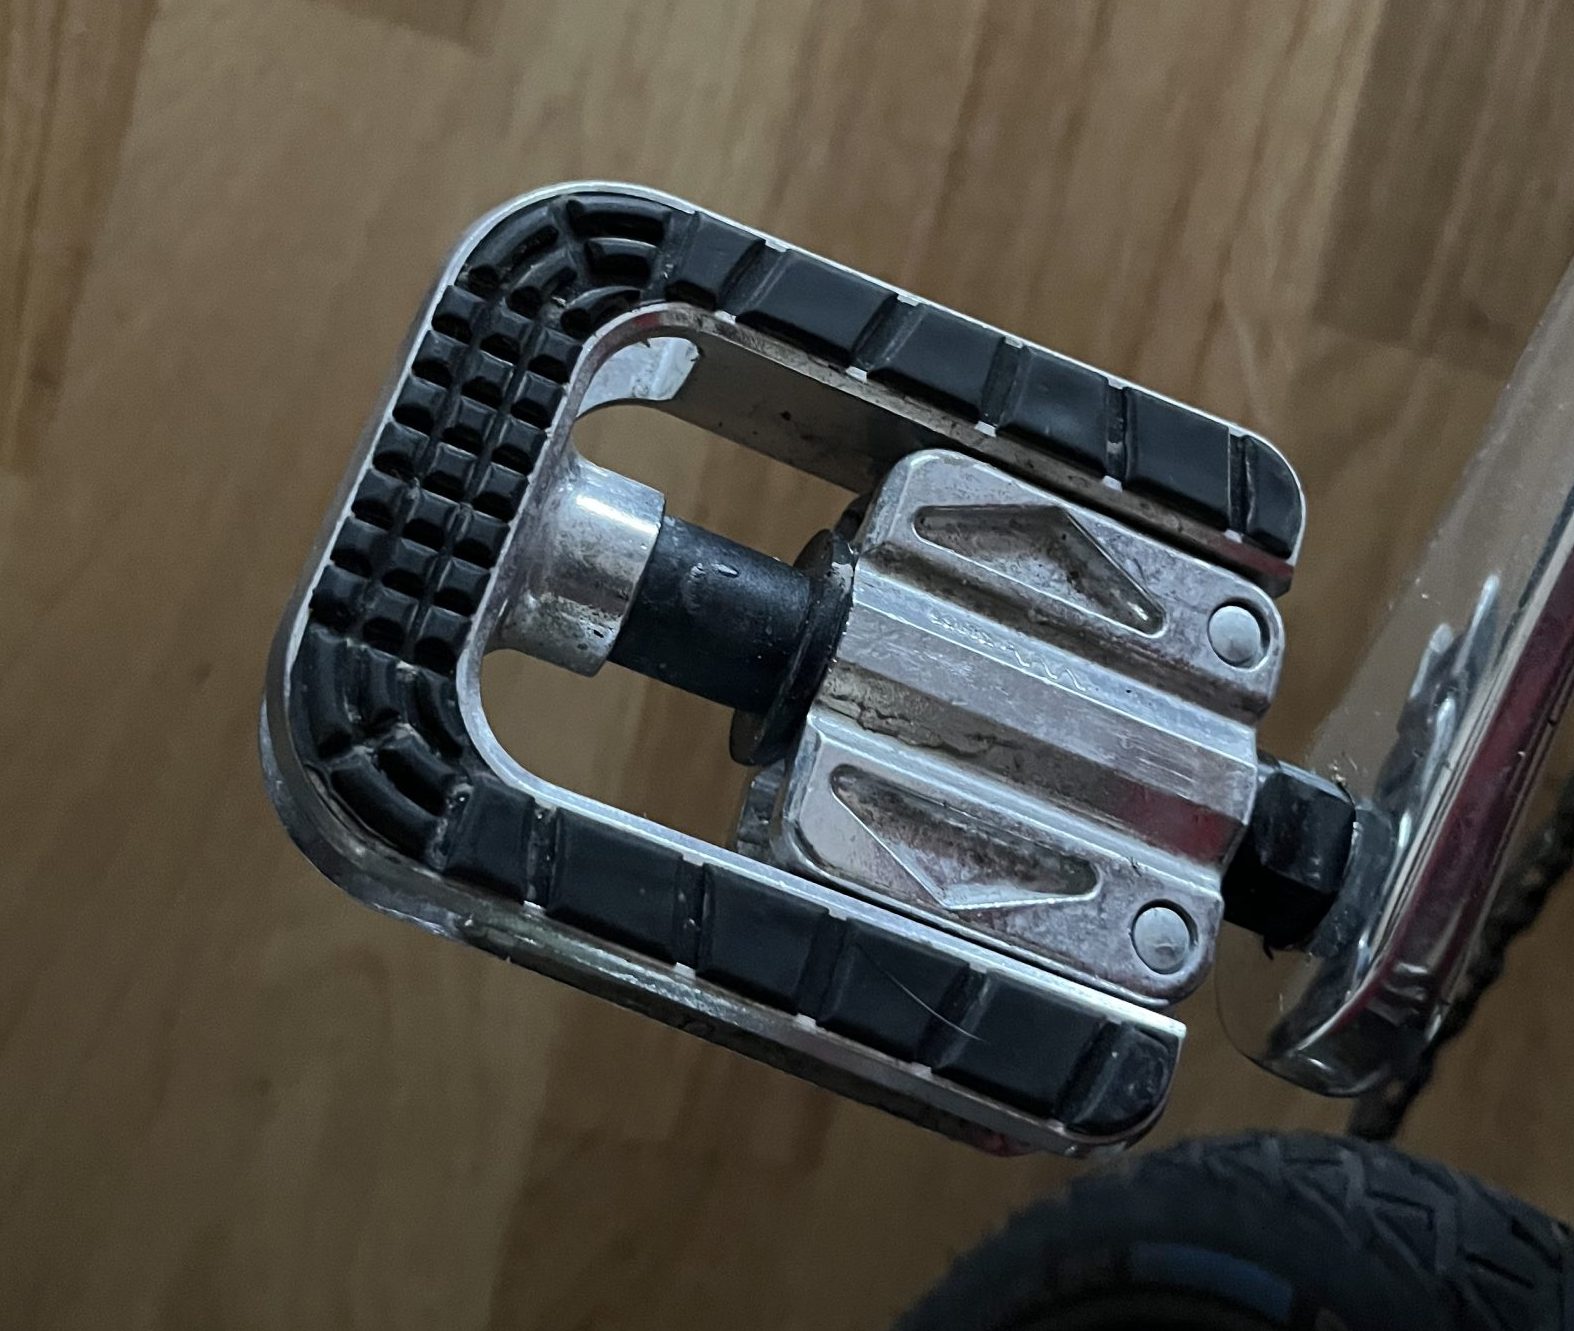
Third, the Messingschlager folding pedals (see above) proved little better than the old Decathlon ones - the rubber on the edges fell off, and the folding mechanism did not fit firmly. These no name cro-mo folding pedals - €17,99 on eBay - are doing a much better job so far. The fold is not quite as small as the Messingschlager ones, but when folded out they are firmer, and the rubber to stop your foot slipping much better. They are the best folding pedals I have found so far.
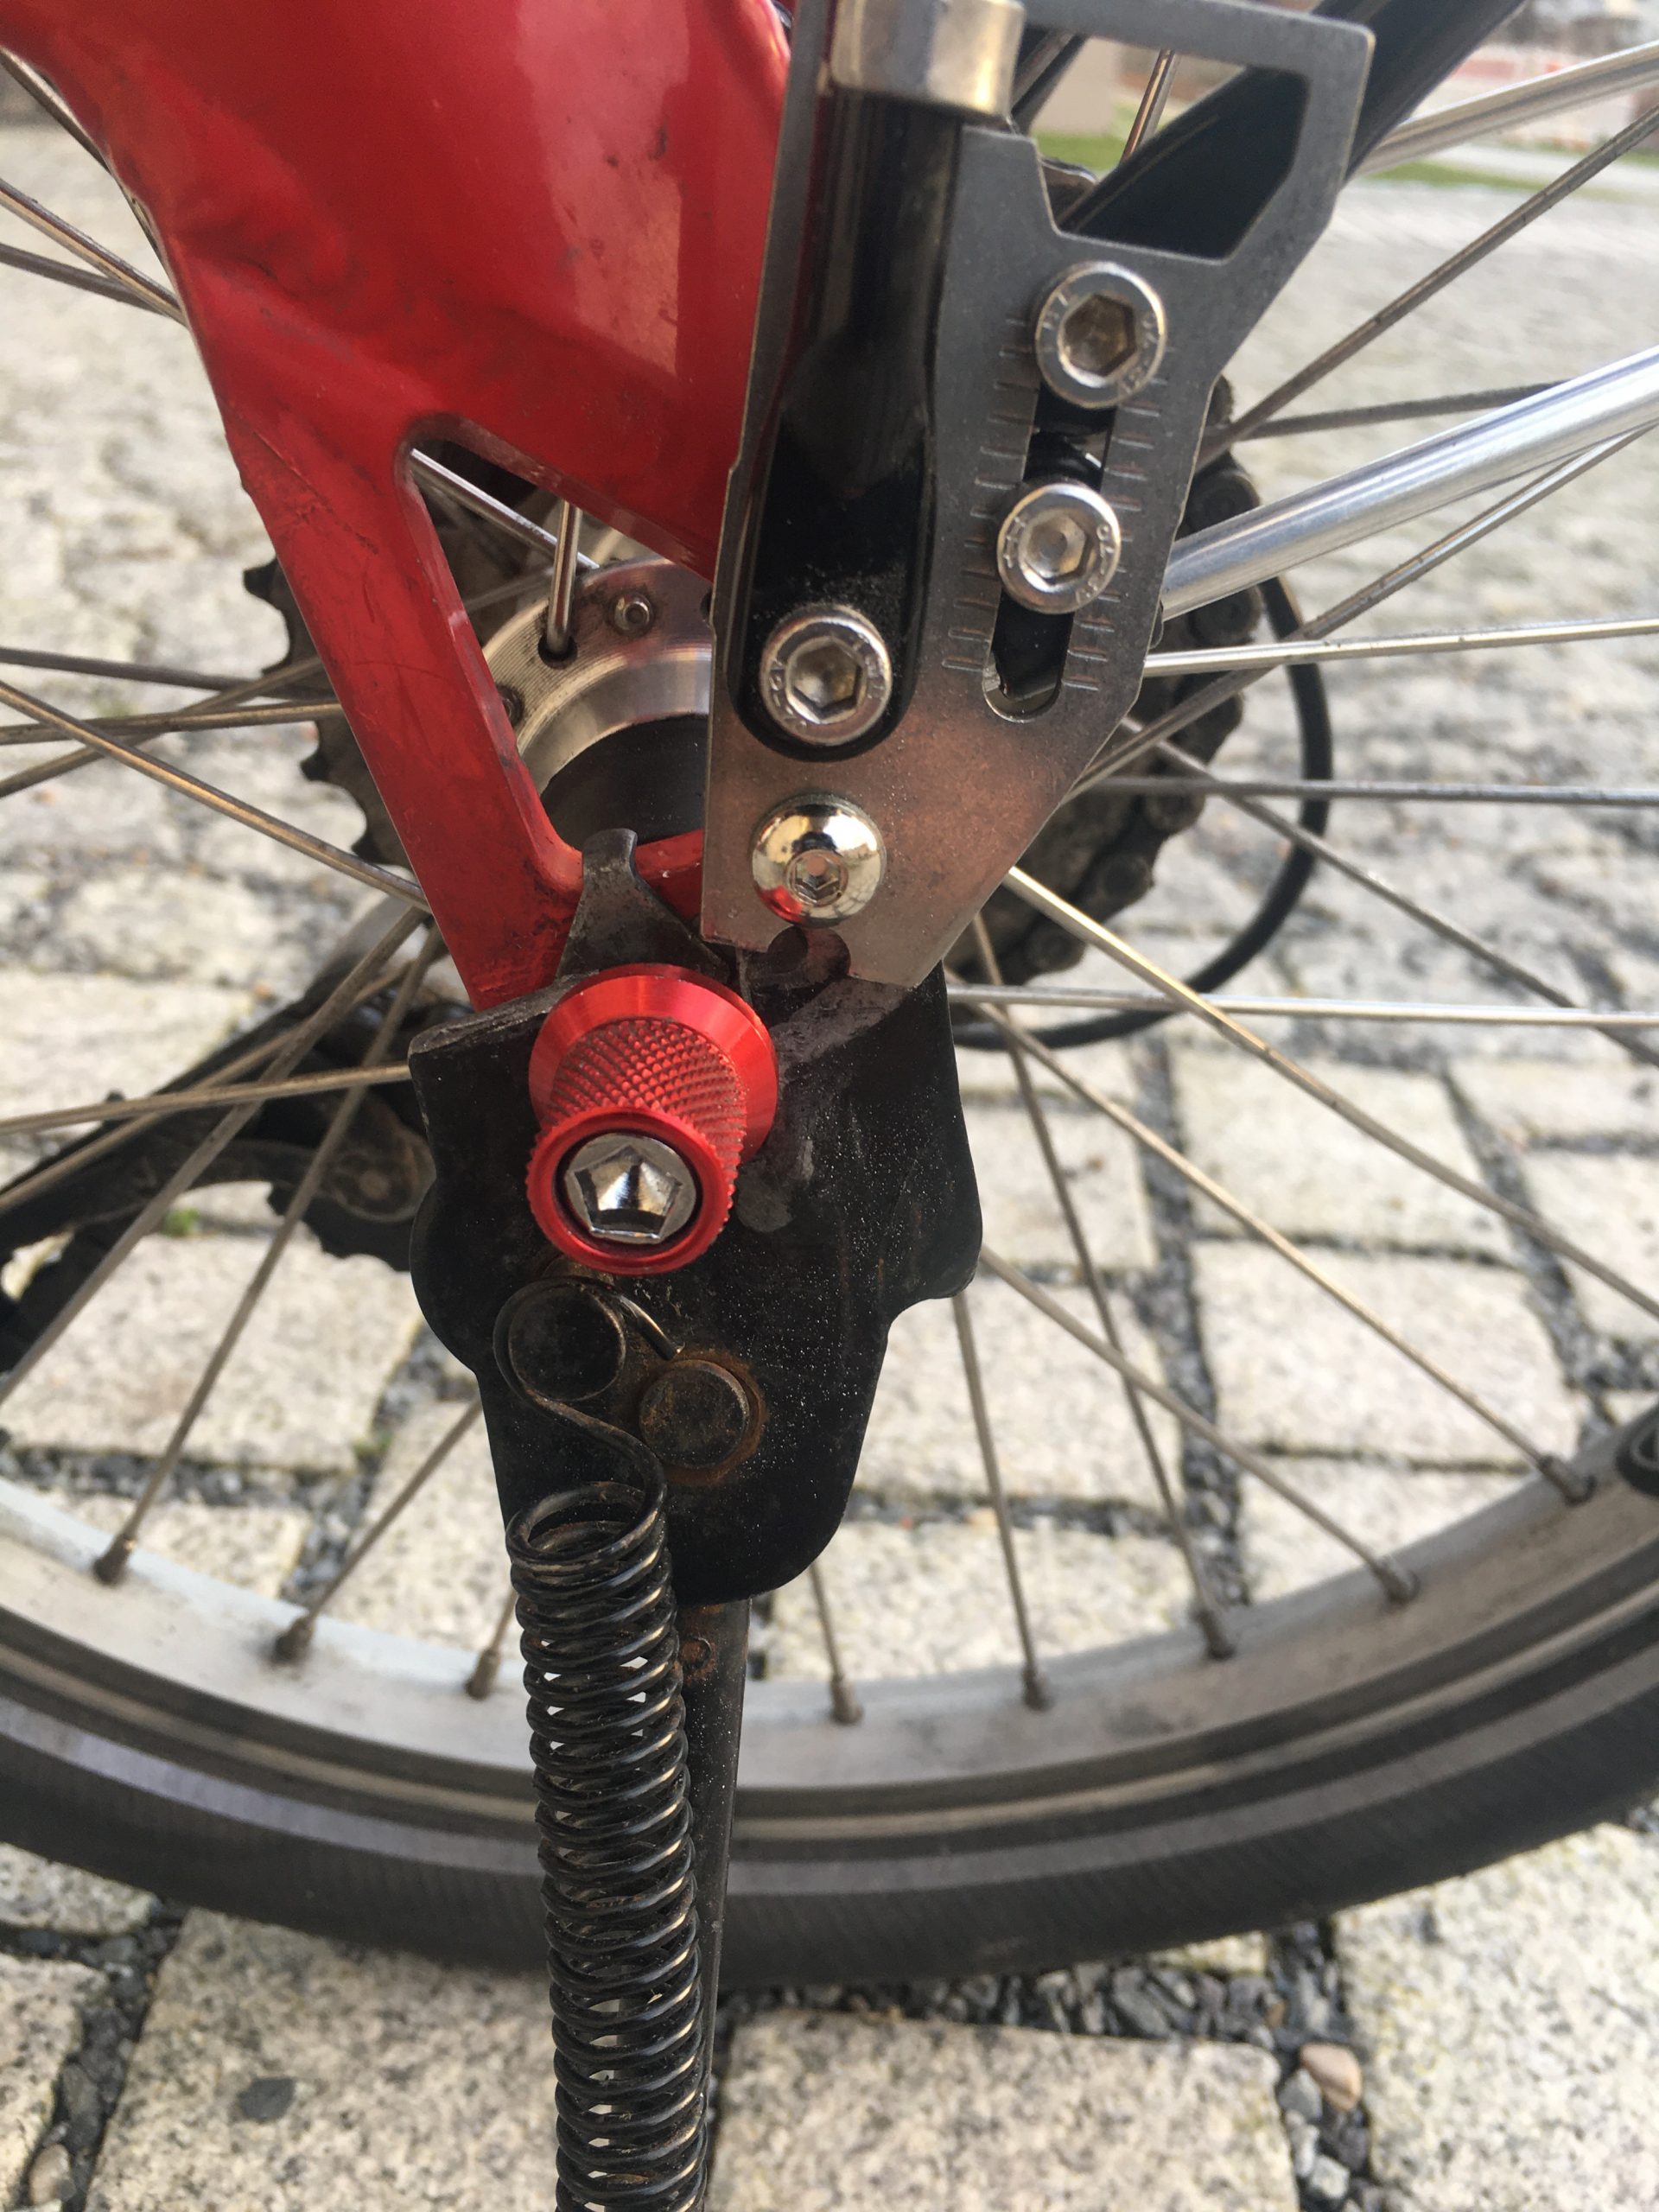
But the work on the Birdy is never done! I had wondered why the front brake was occasionally sticking, and it turns out that the spring system in one arm of the still original Avid V-Brakes was damaged, presumably simply through over use. And the brake arms hence need to be replaced. And as you can see here, these V-Brakes - with an arm length of approx 105 mm - are even a fraction too long. The cable touches the suspension spring, as you can see here:
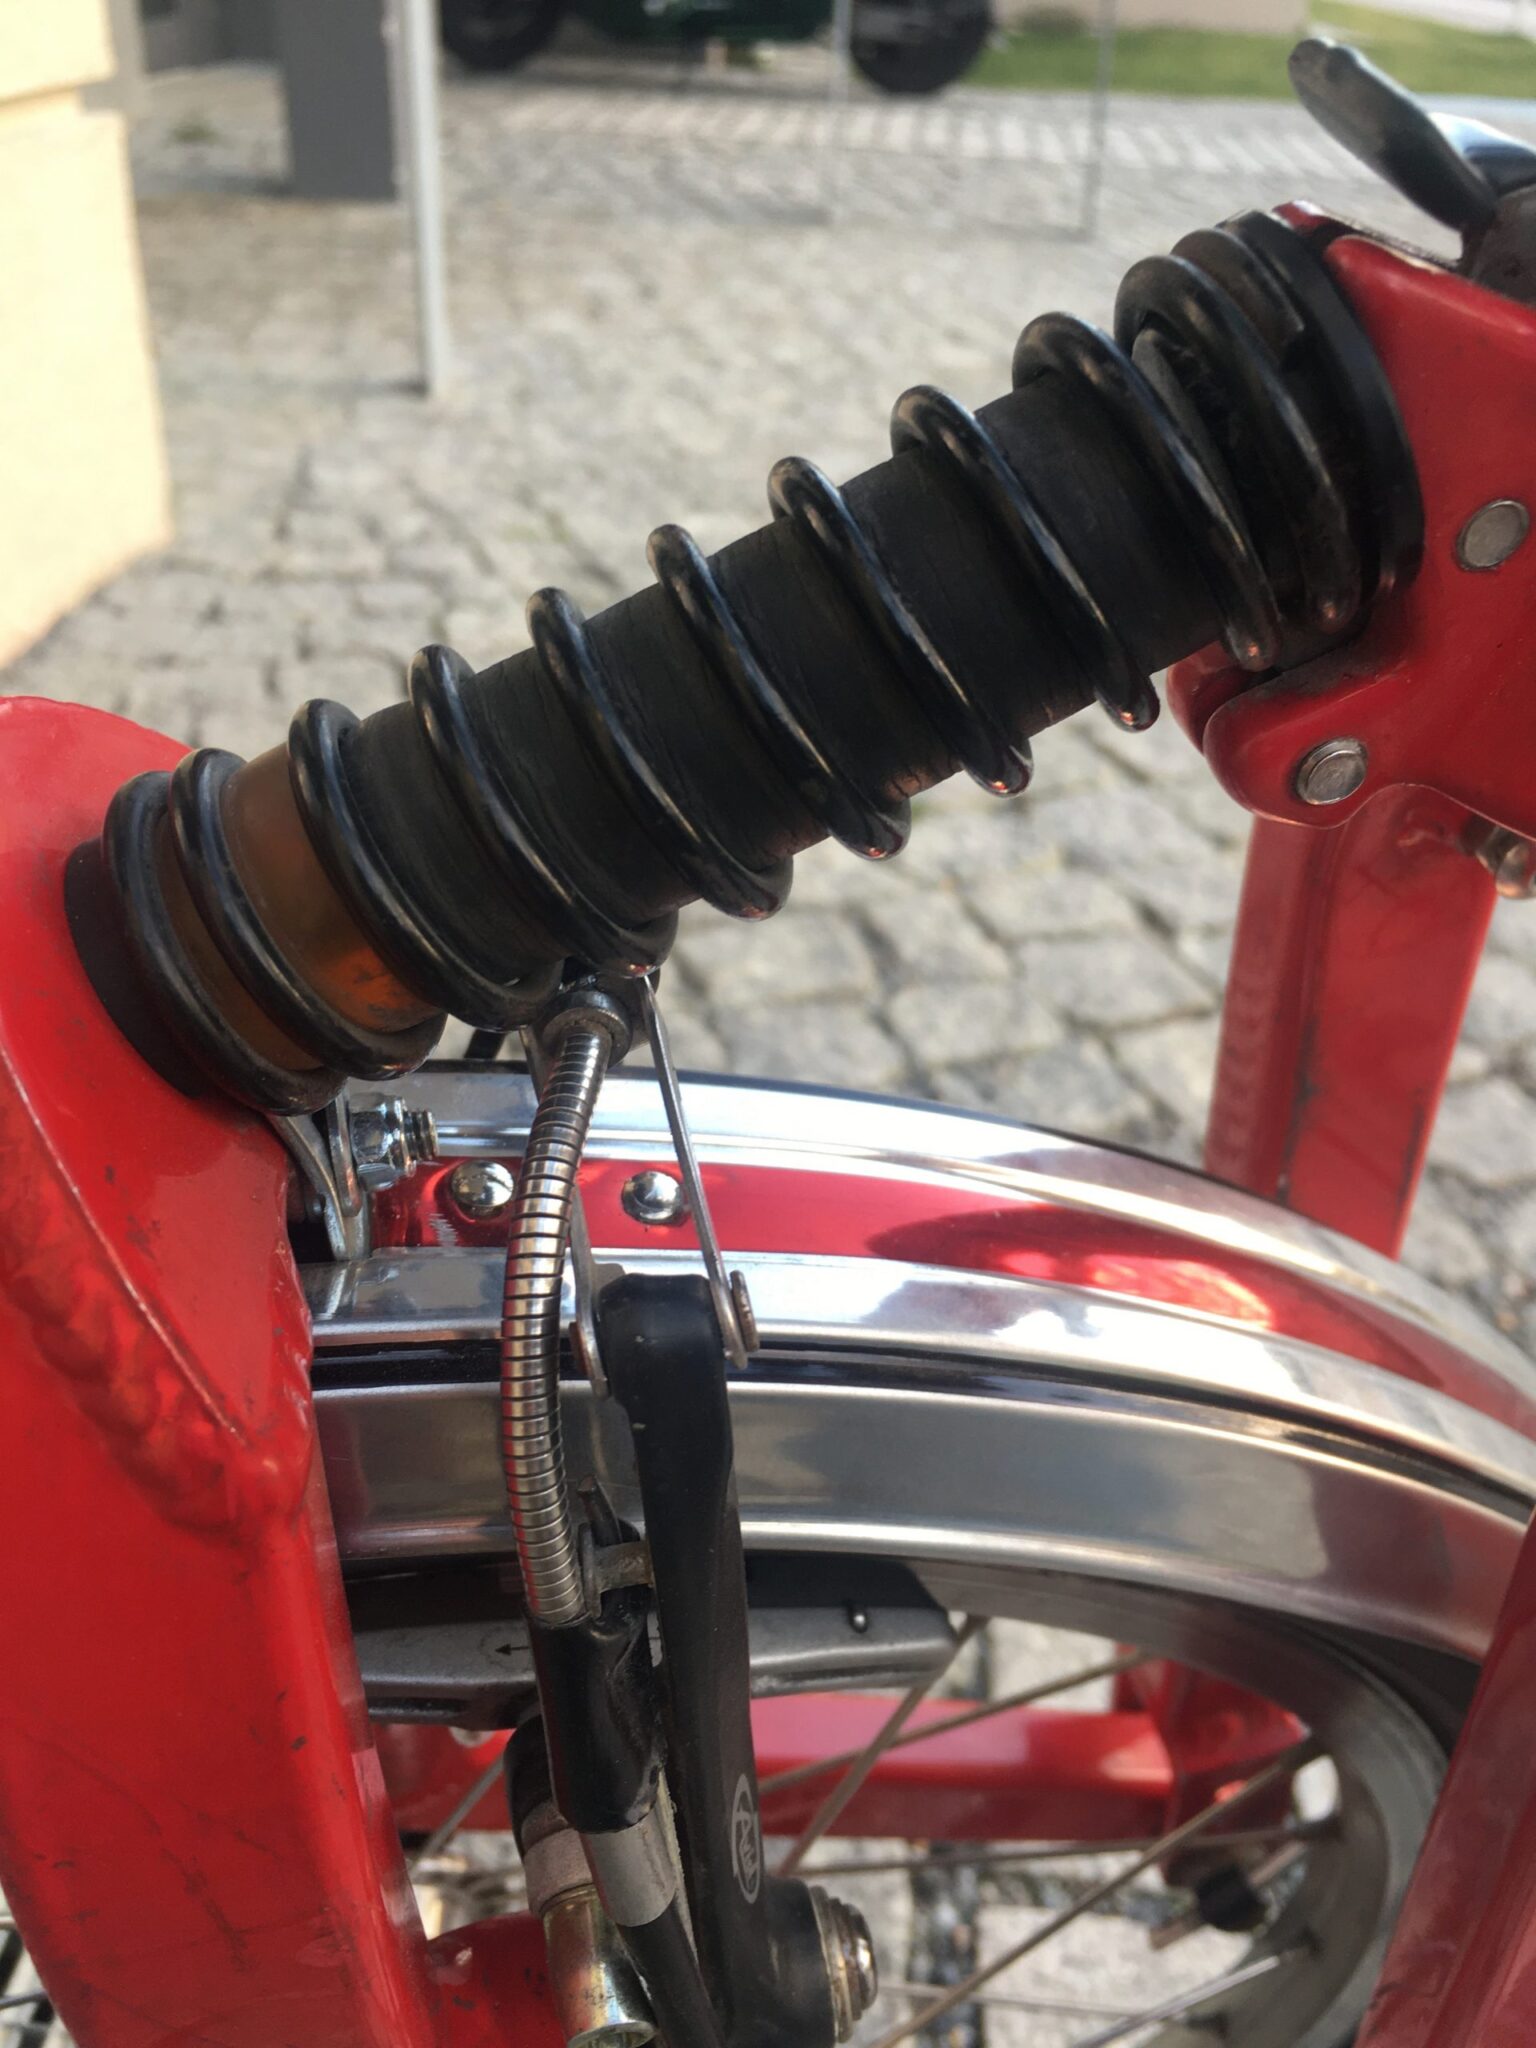
But the problem is Shimano's V-Brakes are all 107 mm length, and the standard from other firms is generally 110 mm. The only viable V-Brakes I can then find are Tektro M 530 (€16-€18 per pair on eBay) - these have now been mounted:
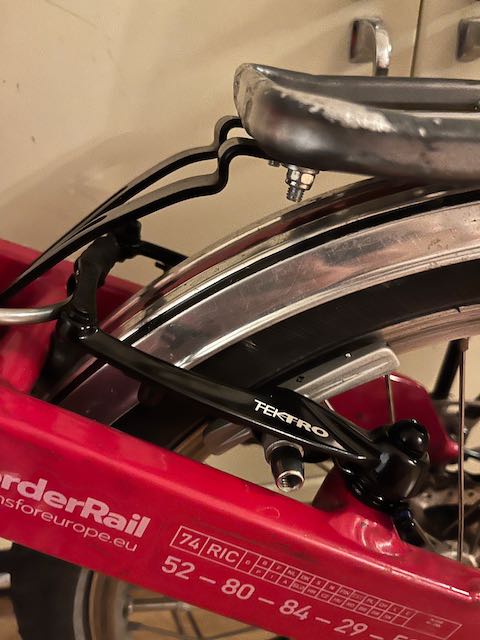
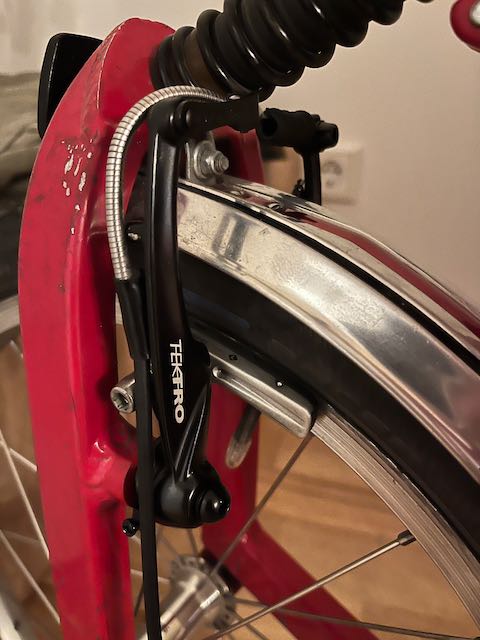
I am happy with the result - the Tektro M 530 brakes are short enough to fit on the Birdy perfectly. Strictly speaking I only needed to replace the front brake, but reasoned it would be better to replace both - I cannot have the other one failing in the middle of a field in Slovenia or something!
So for now the bike is good enough for adventures in 2023!
Eventually I will have the perfect setup on this bike! ? And one day I will tidy up this blog entry. But not today!